Wood You Lend a Hand?
Since my last update I've been able to accomplish a good bit of tasks, but it feels like I got more accomplished. Either I'm forgetting some things or the holiday time warp is messing with my head!
I'll spare you the gory details of up close photos, but I was able to successfully weld up the cracks in the tanks. Since they were on the outlet spout, I tightened a hose clamp around the spout while I did the repair to hold the cracks closed. I used the iron the melt in some stainless mesh on both sides of the spout and laid down a layer of HDPE from a plastic welding rod to fully encapuslate everything. Of course, this means the outer surface isn't perfect anymore - but dang close to it - so I'm going to either smooth it down some more or find somethinng to put between the rubber connector and the tank spout to make sure it 100% seals. I do NOT want any grey/black tank leaks.
I bought valve rebuild kits for the grey/black tank valves. I'm waiting on the new belly pan aluminum to arrive before I complete the installation with the tanks. Before I mess with them again, I want to be ready to put everything together and back in the Airstream in one shot. See, whoever had this thing for the last 20 years never emptied the tanks so there is still some "stuff" in there that is dry, flaky and generally looks like mulch. So... before I get to the point of reinstall, I want to try and clean out the black tank, hook everything up, test for leaks, and get it reattached as quickly as possible. Its just gross and needs a few flushes to be - uh - less gross!
Another item I checked off the list but didn't get a photo of is the new gaskets on the rear storage door and refrigerator access door.
Speaking ofthe refrigerator, I scored a deal on a small Hotpoint refrigerator from Lowes just before Christmas. $300 off the regular price, so I got it for $370-ish out the door with tax!
In my last post I mentioned that my 110v is all in. Well, that was wishful thinking. I had planned to protect all circuits with GFCI outlets or breakers. However, any time the split unit is running all the protected GFCI circuits but one will trip. It's not immediate, and I think its when the compressor is either just kicking on or when it's under a full load. All of the 110v lines, distribution box, and outlets are new. Everything is properly wired and grounded. I've toyed around with and without bonded grounds at the generator (just a tad far from the building for power right now), and with/without the bonded ground in the distribution panel with no changes. Since this is a giant metal box with electricity running through it, I'd really prefer to have GFCI operational. I have standard outlets swapped out while I continue on with other things and troubleshoot with Renogy support.
The day before yesterday I managed to finish the insulation in the center ceiling run and get that section installed. Sadly, I didn't know how the center section came out when I did the demo and mangled the J channel pretty bad getting it apart. I can't seem to find that channel anywhere so I just riveted the edges and I'll cover up the seams with some wood trim. It's not awful, but you can see the stress waves along the edges from where I removed it the wrong way. You can also see where I said "Screw it, I'm covering the seam with wood trim. I'm not fighting that wallpaper anymore!"
Along with the center section being complete, I also got all of the ceiling puck lights installed. They are click on-off, dimmable, and even have a dim blue mode for a night light. That makes two in the front dinette area, one directly over the door in the center, one over the kitchen sink area, one over the counter next to the fridge, one inn the bathroom, and two in the bedroom. They are quite bright and even on their lowest setting at night it is super bright inside. I'm going to get a few battery powered lights to strategically place around as well.
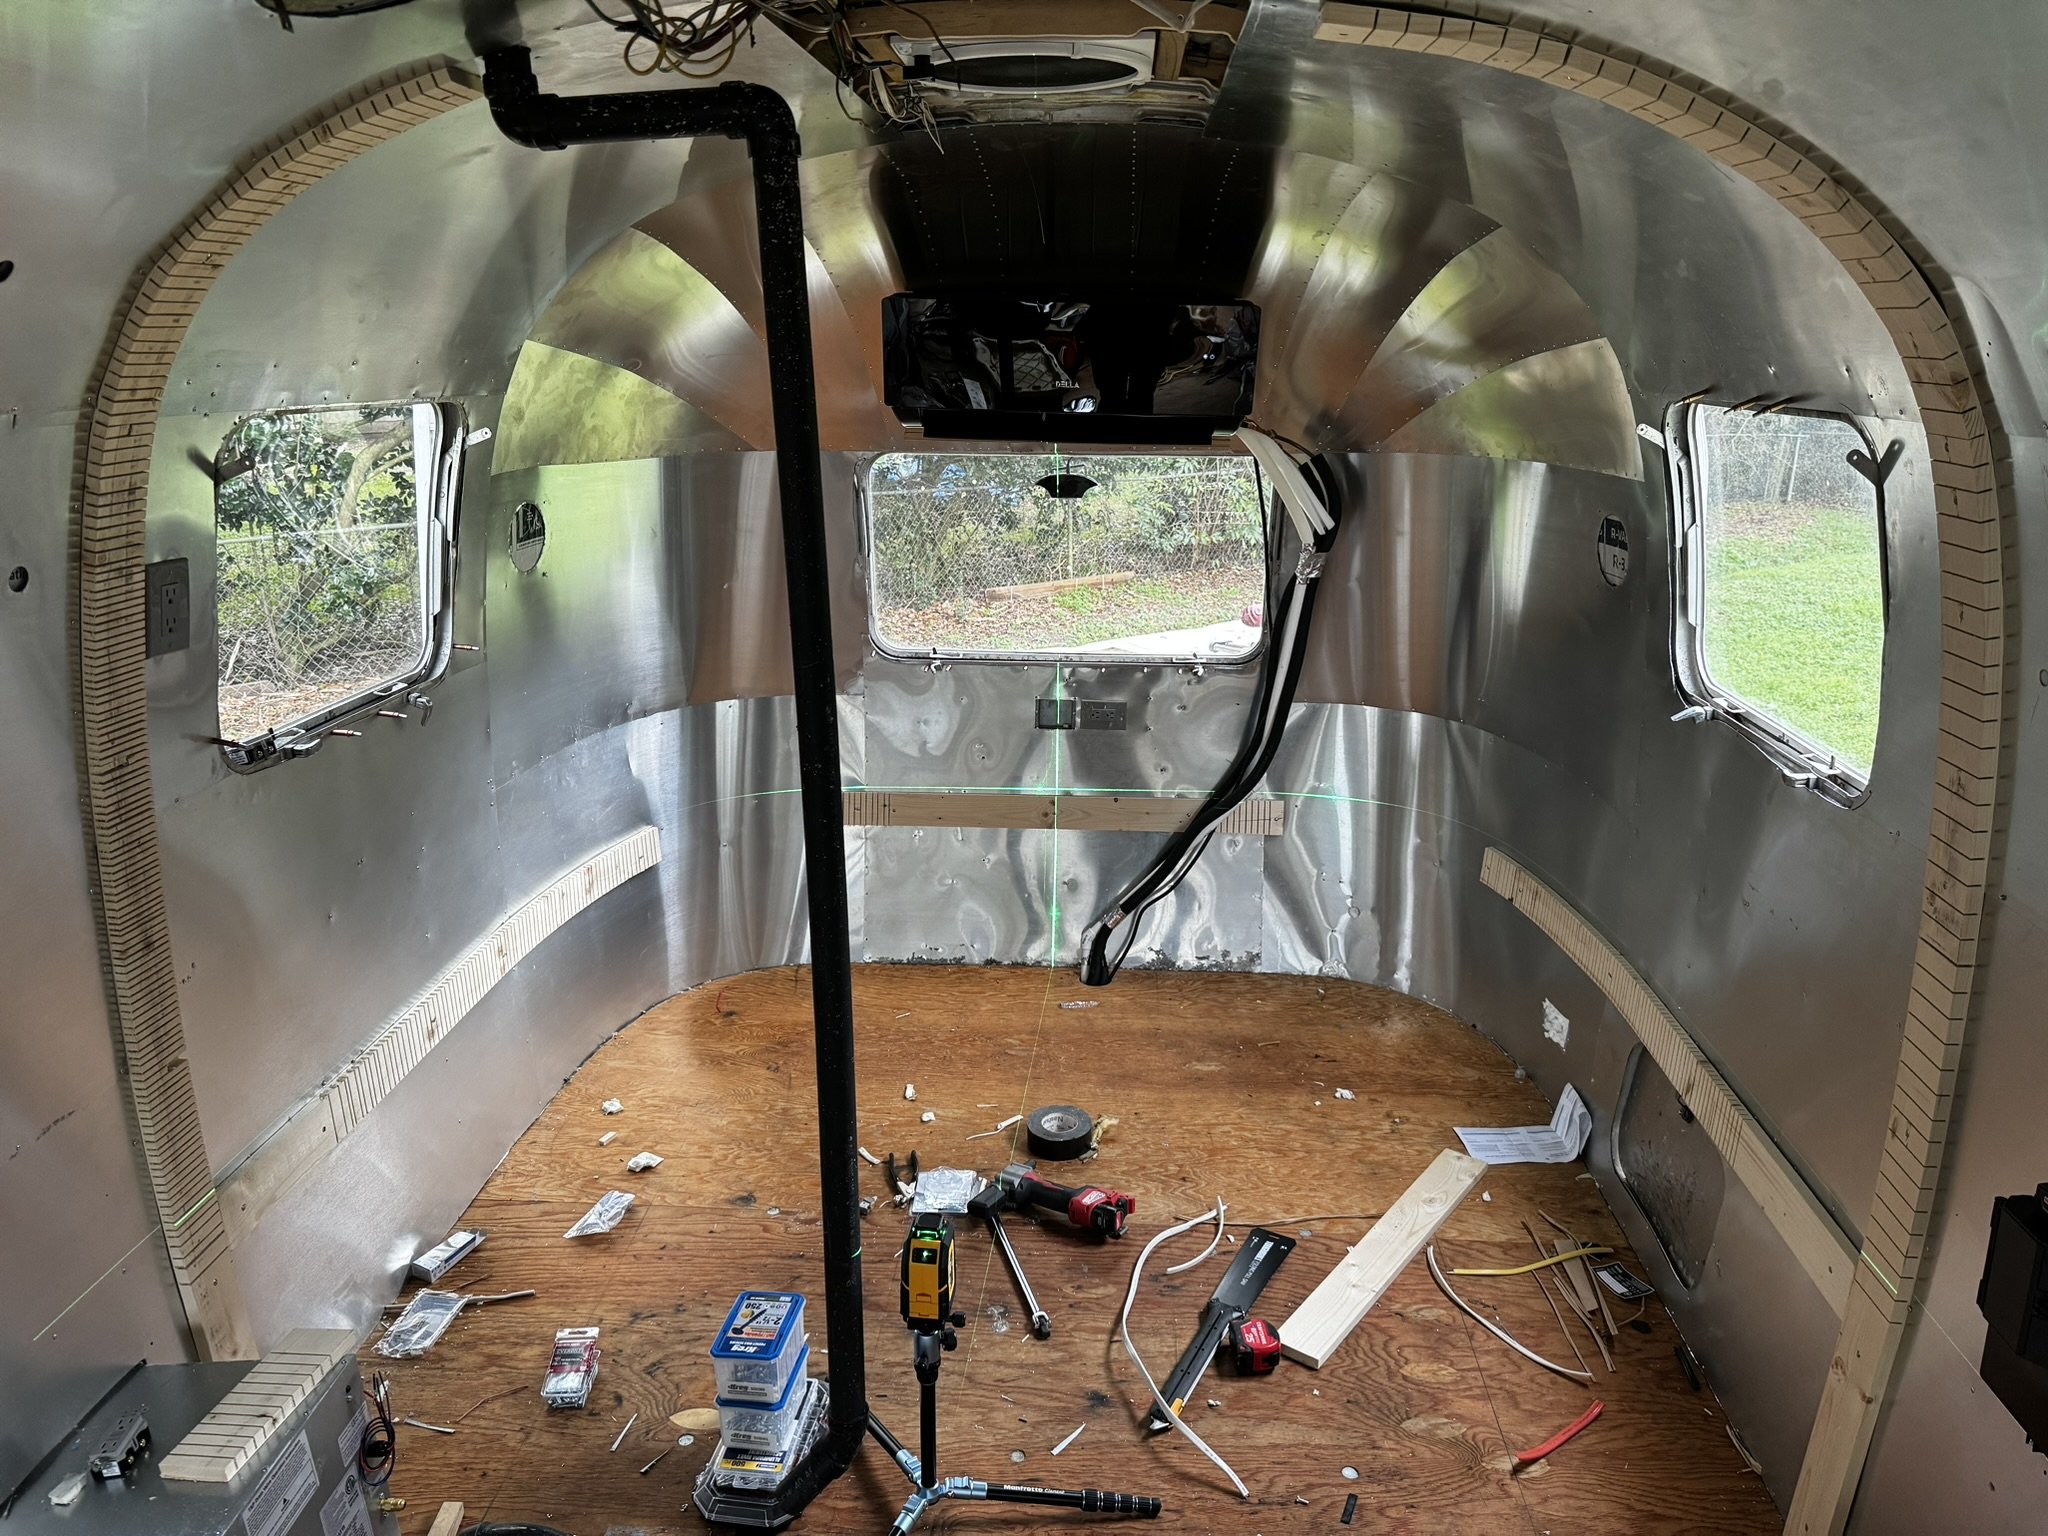
I also started laying out where the walls are going to be. There are two walls whose locations are dictated by the vent pipes - both bathroom walls. The original bathroom/bedroom wall was a thin sheet of woodgrain metal and the vent pipe was just tucked in the corner and hidden with a decorative cover. Since I won't be using any of the original bathroom equipment, I can rebuild this wall to be hollow and hide the vent pipe completely. It will also allow me to drop a CATV line to an outlet in the bedroom since I forgot to do so next to the power outlet in there for the TV.
You can also see the basic layout of the platform for the bed in this shot. I'm going to remove those slats along the walls and build it from the ground up instead of a laser level.
I also sanded all of the window trim and matched them up with where they go. The goal is to get them rescreened and reattached today. I was able to get the large window trim without a screen installed last night.


I've been temporarliy reassigned at work to a single customer working remotely, so I'll have more time to finish this thing instead of jumping a flight every week or so.
Now that the metal work is done, it's time to break out the Shopsmith and do some wood working!


