♫ I Would Tow 5000 Miles ♫
Status update after 5000 miles!
Yes, it's been 5000 miles since I set out on June 4th!
There are a couple of detours that aren't on the map, and I'm currently at Mystic Springs Cove Airstream park north of Pensacola, FL for the week. If it's not 5000 miles, it's reeeeal close!
On to your burning questions:
Q. How did the tile hold up in the shower?
A. Perfectly. No cracks, loose tiles, or weird spots. I think a lot of it had to do with the fact the shower sits right over the top of the axles, which minimizes the movement vs being at the far end of the trailer where things will bounce quite a bit.
Q. How does it tow with it being so heavy?
A. It's not heavy. It's still within the GVWR of the original axles. It pulls like a dream. The Hensley Cub hitch is a little on the light side for this trailer (600lb tongue, 6000lb trailer weight rating), so I just purchased and installed a Blue Ox Sway Pro 1000lb tongue rated hitch. I actually towed with two trucks. My truck is a 2020 F150 4x2 with the 5.0 V8 and 10 speed automatic. In the mountains it was fine. The V8 roared pulling it up the grades and the engine braking going down was fantastic. The other half of the time I was out I was pulling with my travel partner's 2020 F150 4x4 with the 3.5 Ecoboost and 10 speed automatic. In the mountains, the Ecoboost was a monster going up the grades and never broke a sweat. However, the engine braking going down the grades was really weak. I was on the brakes way more with the Ecoboost than the 5.0.
Q. What has broken or surprised you on the trip?
A. First thing I noticed is hangars do not want to stay hanging in the closet. I need to find a solution to stop them from jumping the rod during travel. It's only happened once, but the kitchen sink sump will sometimes become air locked and not pump out the water in the sump and overflow. I need to drill a hole through the floor and route a drain line outside in case that happens again. I tried an electronic sump switch to drain out more of the standing water when I first installed the sump, but it kept creating an air lock so I went back to the float switch it came with. White roof vents are like heaters in the summer! I should have bought smoked covers instead of white. I bought some insulating pillows for them and it's much more tolerable. The duct fan install is flawed. I chose to put the intake up high at the end of the closet. As we all know (well, I do now) the inside skin gets quite hot in direct sunlight. The duct fan is just pulling this hot air and sending it to the other end of the camper. I'm going to relocate the intake further down to be closer to the center of the living area.
Q. Has the mini split fallen off yet?
A. No! The mini split has been working great! It's currently 92* outside with the Airstream in direct sun, and the inside is 73*. It's also nearly silent. I stepped out to do laundry earlier and couldn't hear my AC, but could hear the AC on a Bambi (I think) clear across this park. Time will tell how the heater side will work, but I think it's going to cook me out of here if I let it. One thing about Mini Splits - they don't operate like a typical HVAC with ON or OFF cycles. They pump more or less depending on the thermostat, but never actually turn off. This is a problem when the mini split is too big for the space (like an Airstream), is even at it's lowest setting it will still get the bedroom down into the 60s when it's in the 90s outside. I bought a Sensibo smart thermostat that mimics the physical remote and set upper and lower temperature limits so it actually turns off and on like a regular AC. The temps are much more manageable this way.
My travels have taken me all the way to West Virginia, Atlanta, Memphis, Chicago, Wisconsin, and all the way back to Daytona. Currently in a "reboot" outside Pensacola. I'm headed to a Thousand Trails campground about an hour north of Birmingham on Saturday.
While I was in Memphis, I took advantage of moochdocking with Family to install some solar panels. I managed to fit 10 100W solar panels on the roof and got them tied into my inverter/charger. They have been working great. If it's really hot out, the solar is just shy of being able to keep up, but if it's pleasant in the low 80s or 70s, I can be completely off grid and have all the power I need.
Also, I took this screenshot while on the road. I still think it's silly that the sun is pumping nearly 900W of power into my batteries as I'm running down the road!
As we were going though Nashville, one of us didn't lock the door properly and it flung open at speed. I say one of us because she closed and locked it, and I verified it was locked. Apparently it was not. It sheared off most of the rivets on the inner skin of the door. You can see the bow in this pic vs the screen door bow. I was able to get it 90% of the way by hand. I need some clamping devices to get the last bit of kink out of it.
What's next? I took the plunge and joined Thousand Trails so I'll be using them primarily, but next weekend is Alabama, Then on to Natchez Trace in TN, then to Memphis for a few days, then it's off to Sedalia, MO for the International Rally! After that, all bets are off, but I'll be making my way west!
It’s Really Coming Together!
Wrapping up the final touches and she’s ready to hit the road!
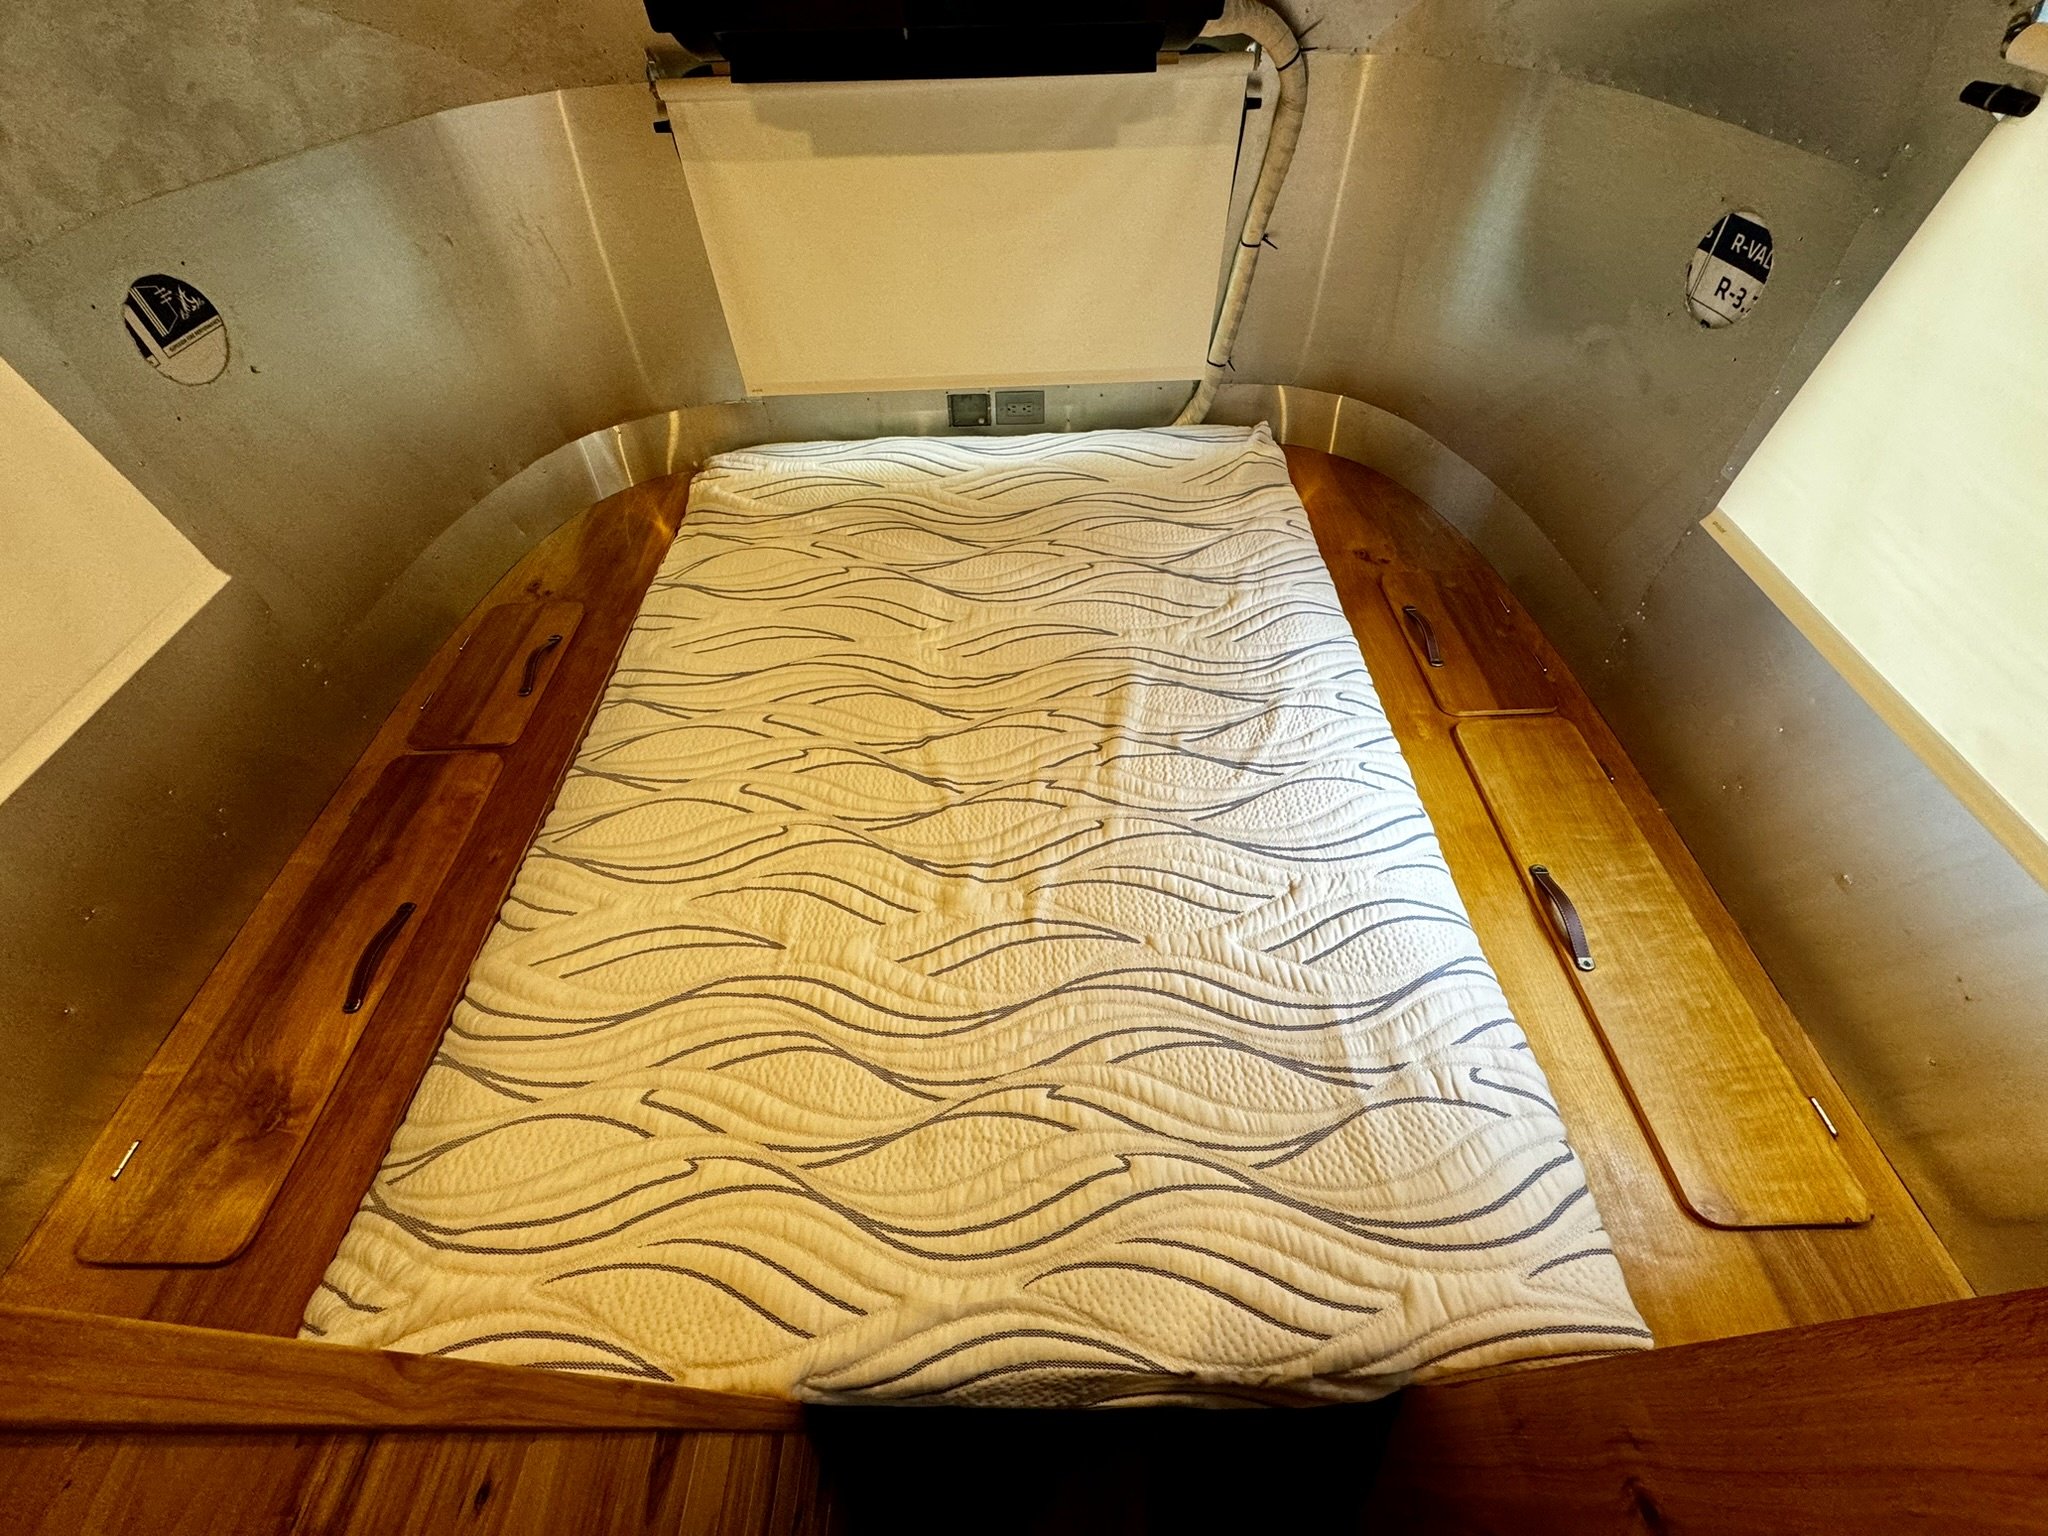
Man, things have progressed quickly! I finished the bed platform with storage bins on each side.
I installed some swing away curtain rods and just hung curtains for the closet until I come up with something better. It covers the closet contents and will swing out to provide privacy at each end of the hall.
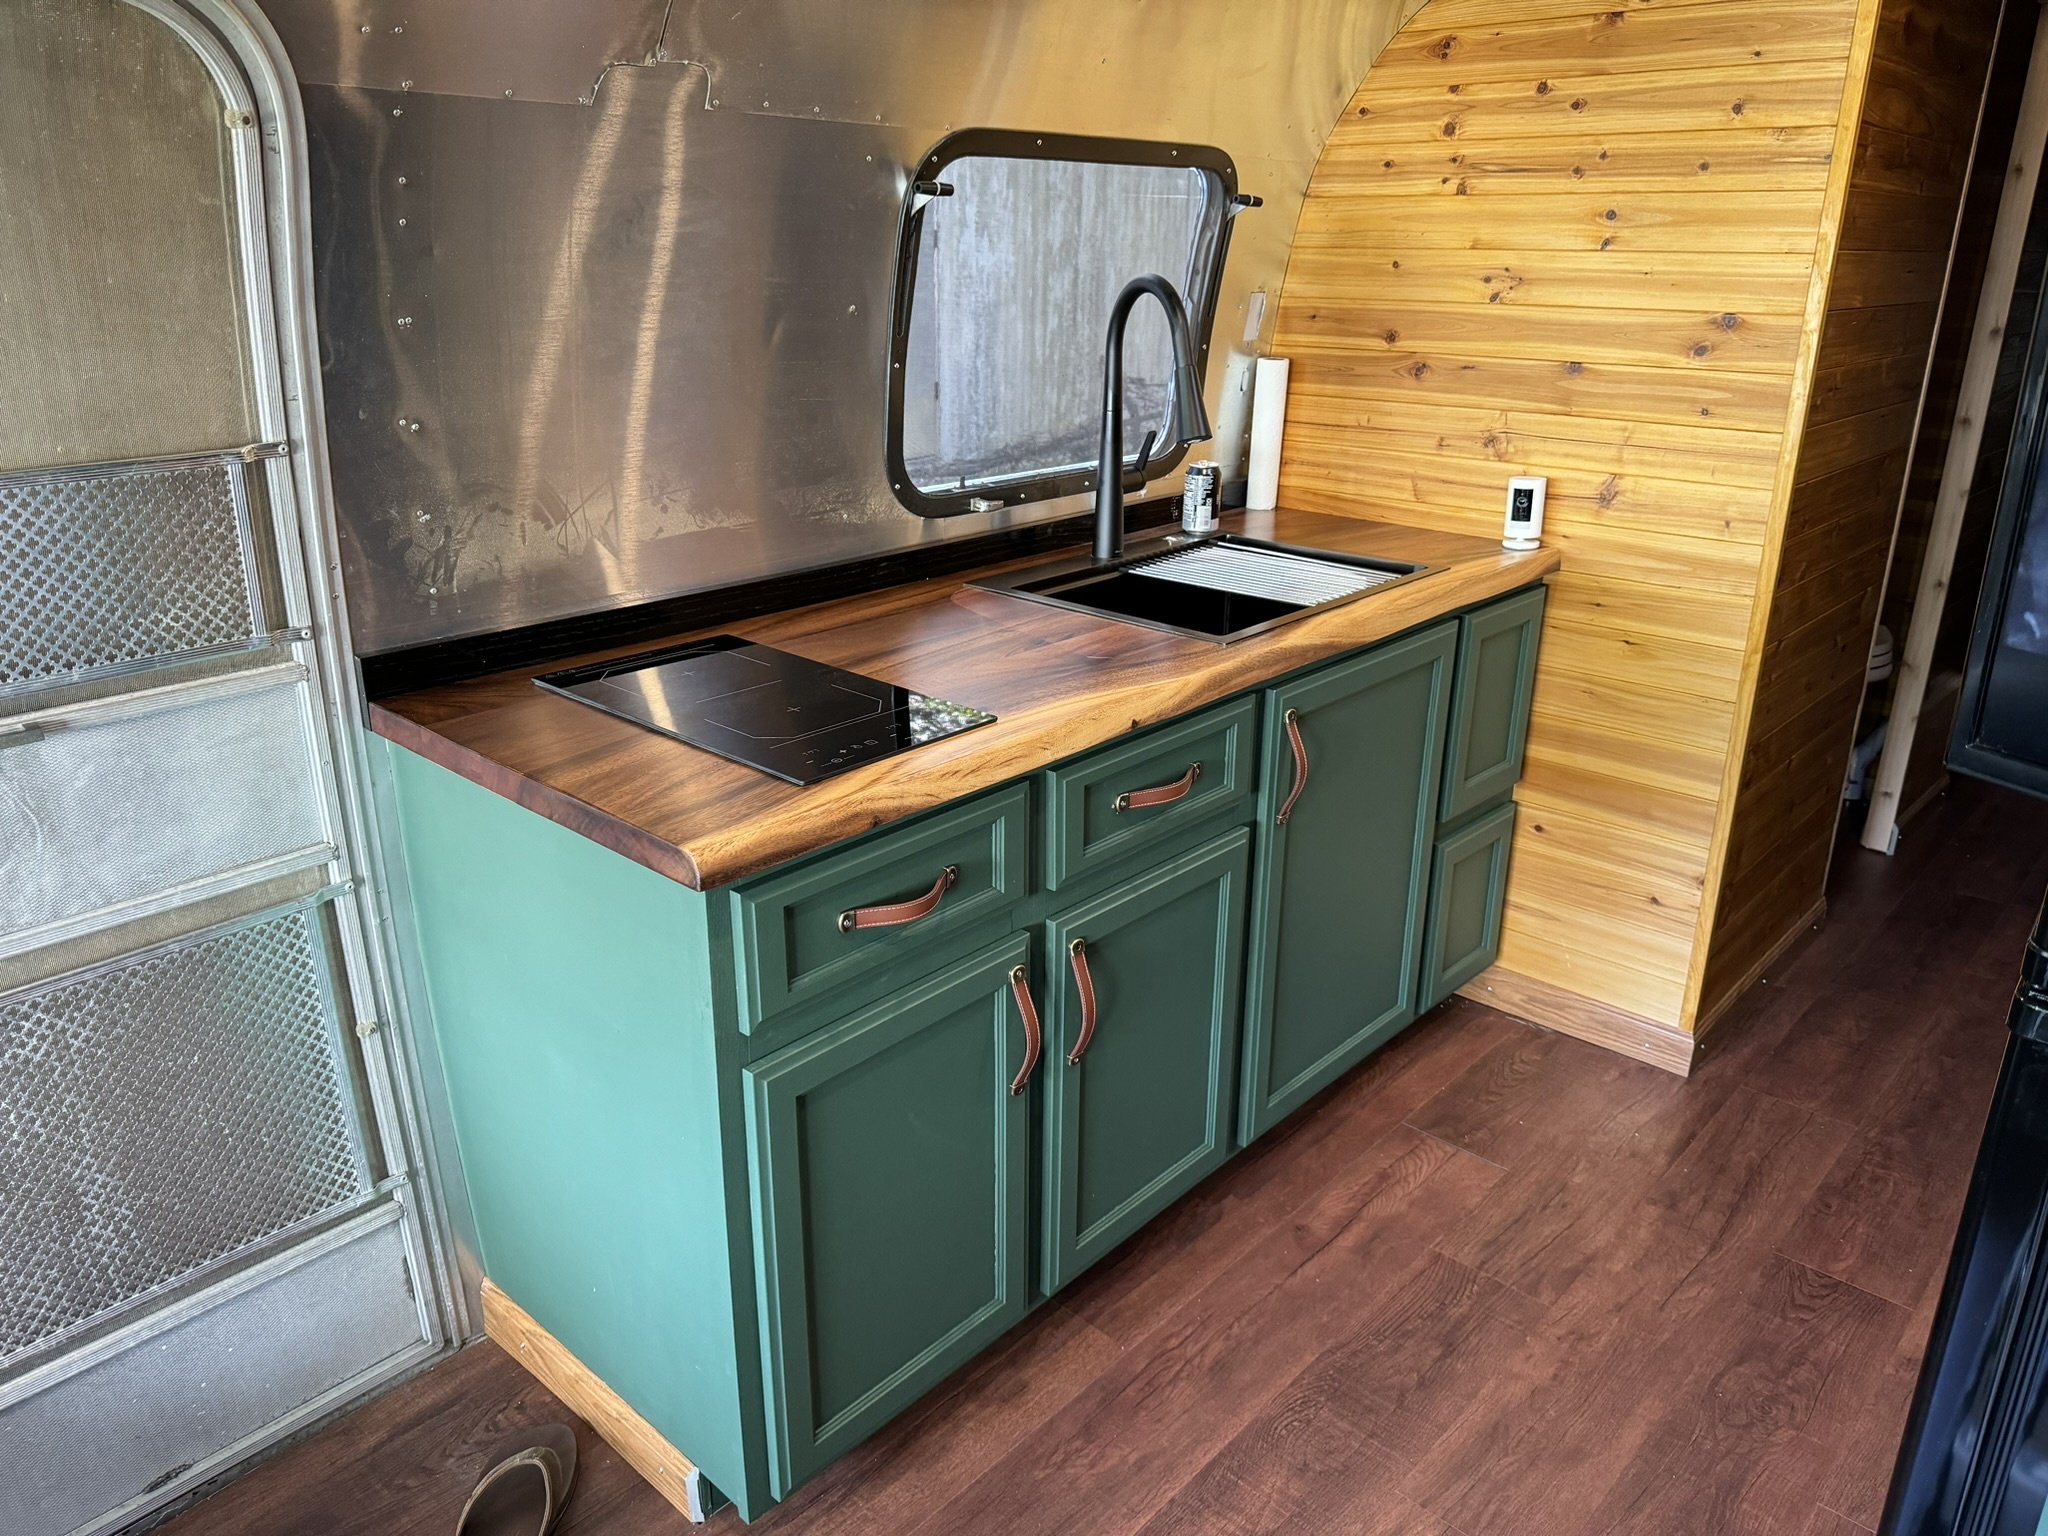
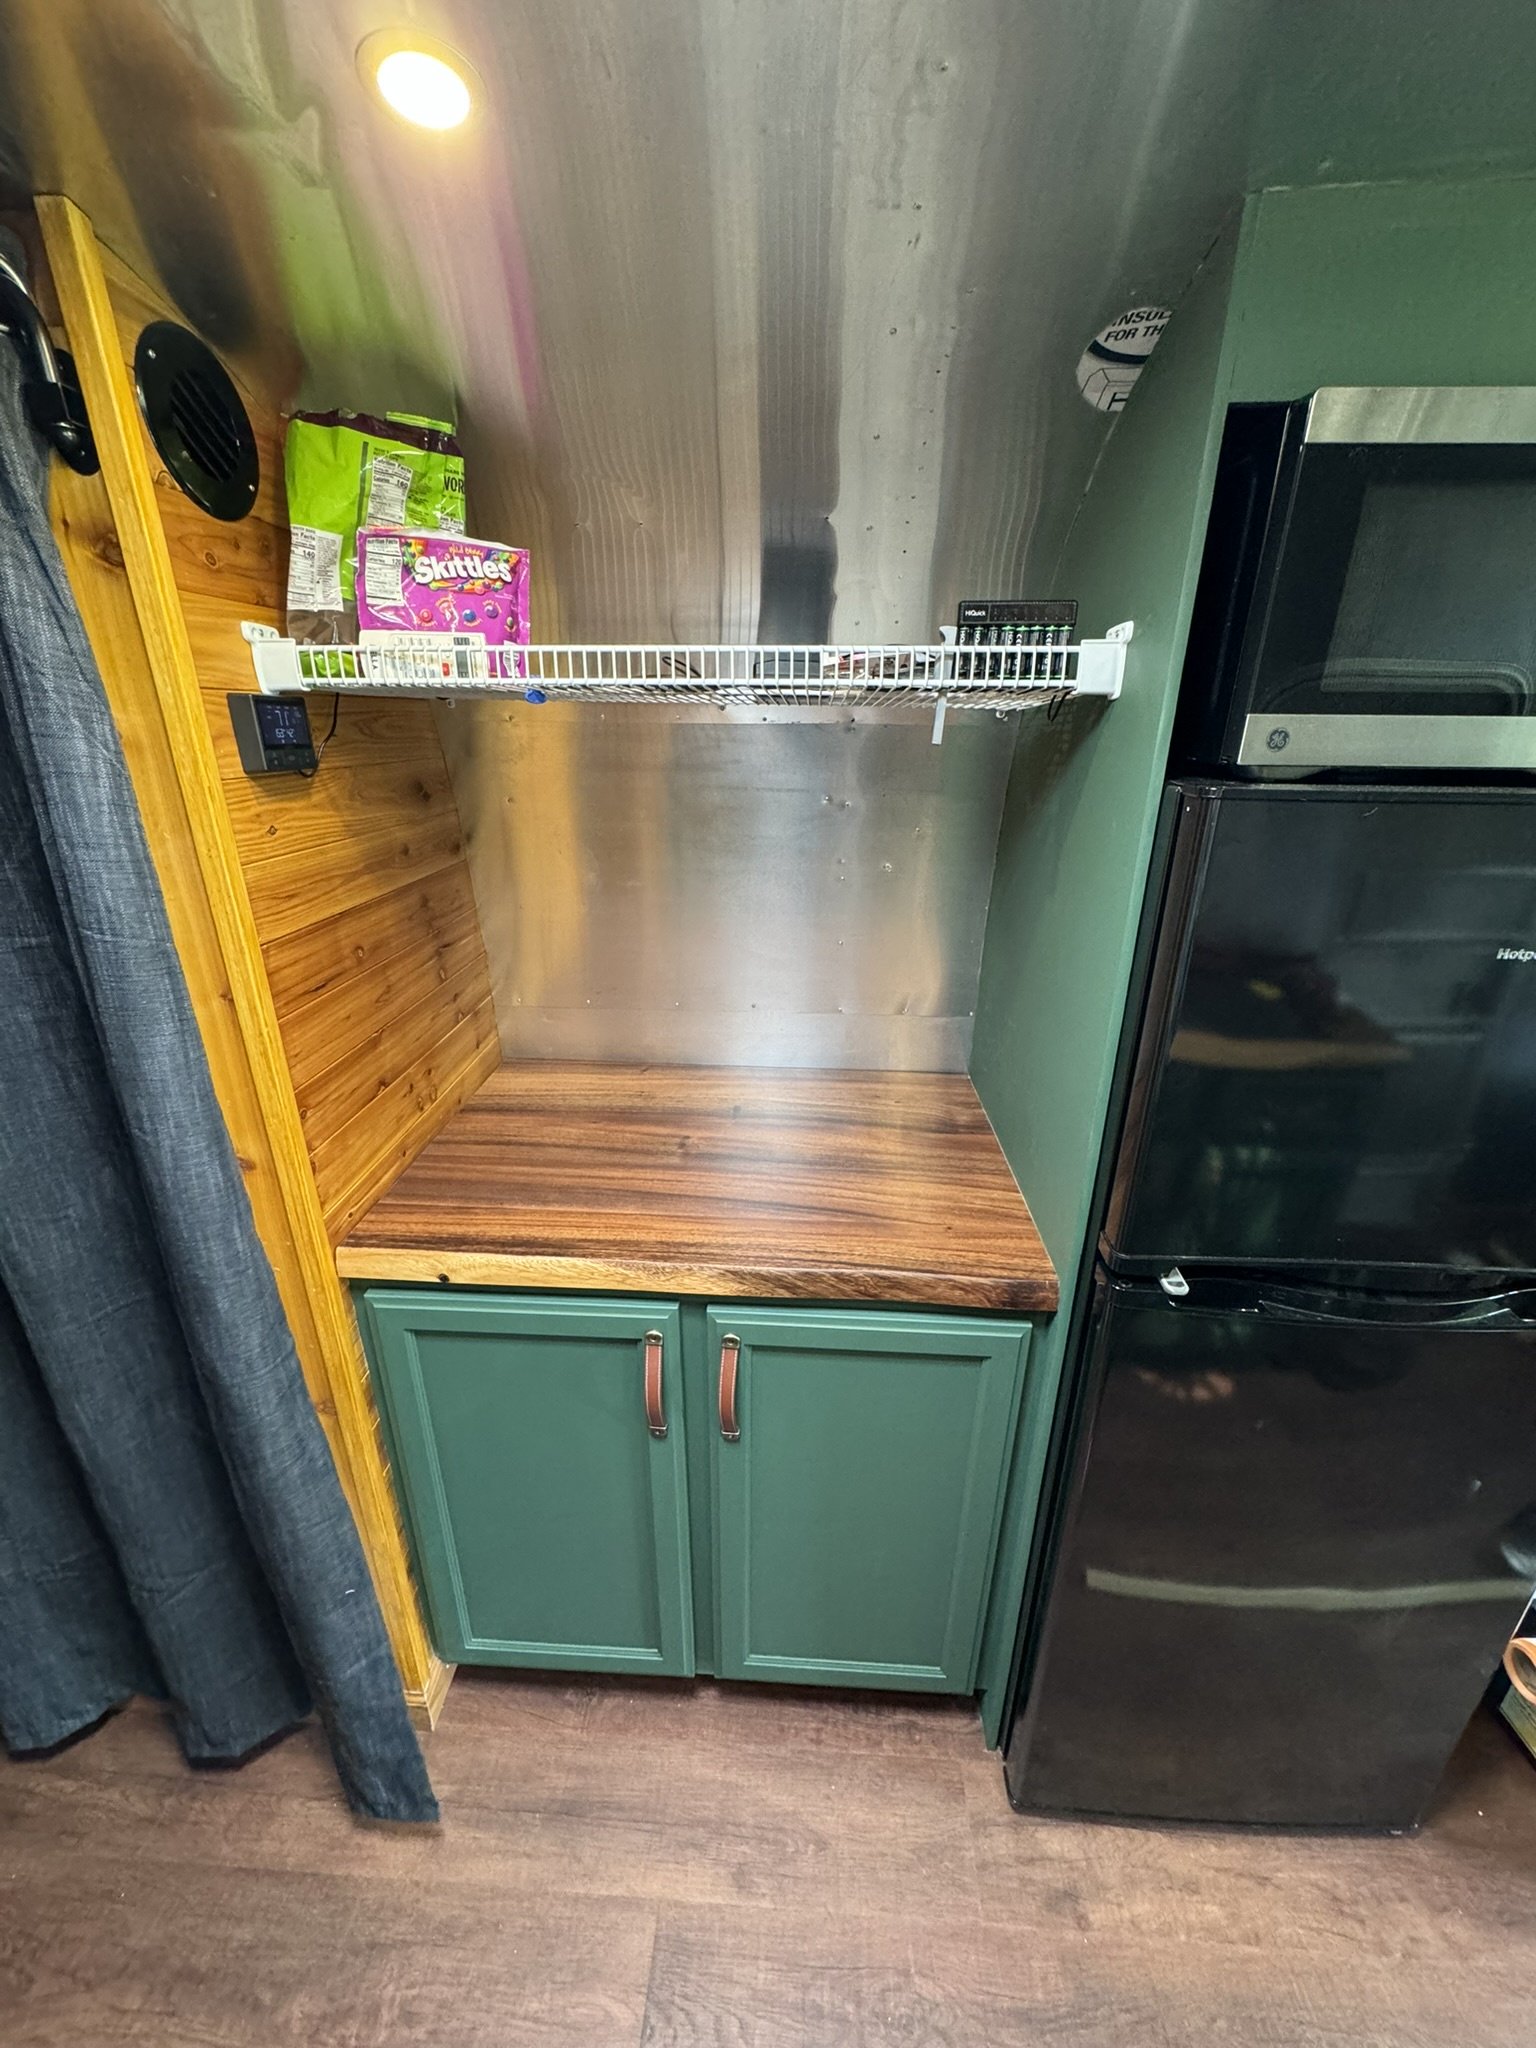
I was able to get the cabinets painted and handles installed. I'm not thrilled with the color. It's lighter in photos than it is in person, but I really wanted a darker green overall. (EDIT: 11/2024 - I actually love the color now!)
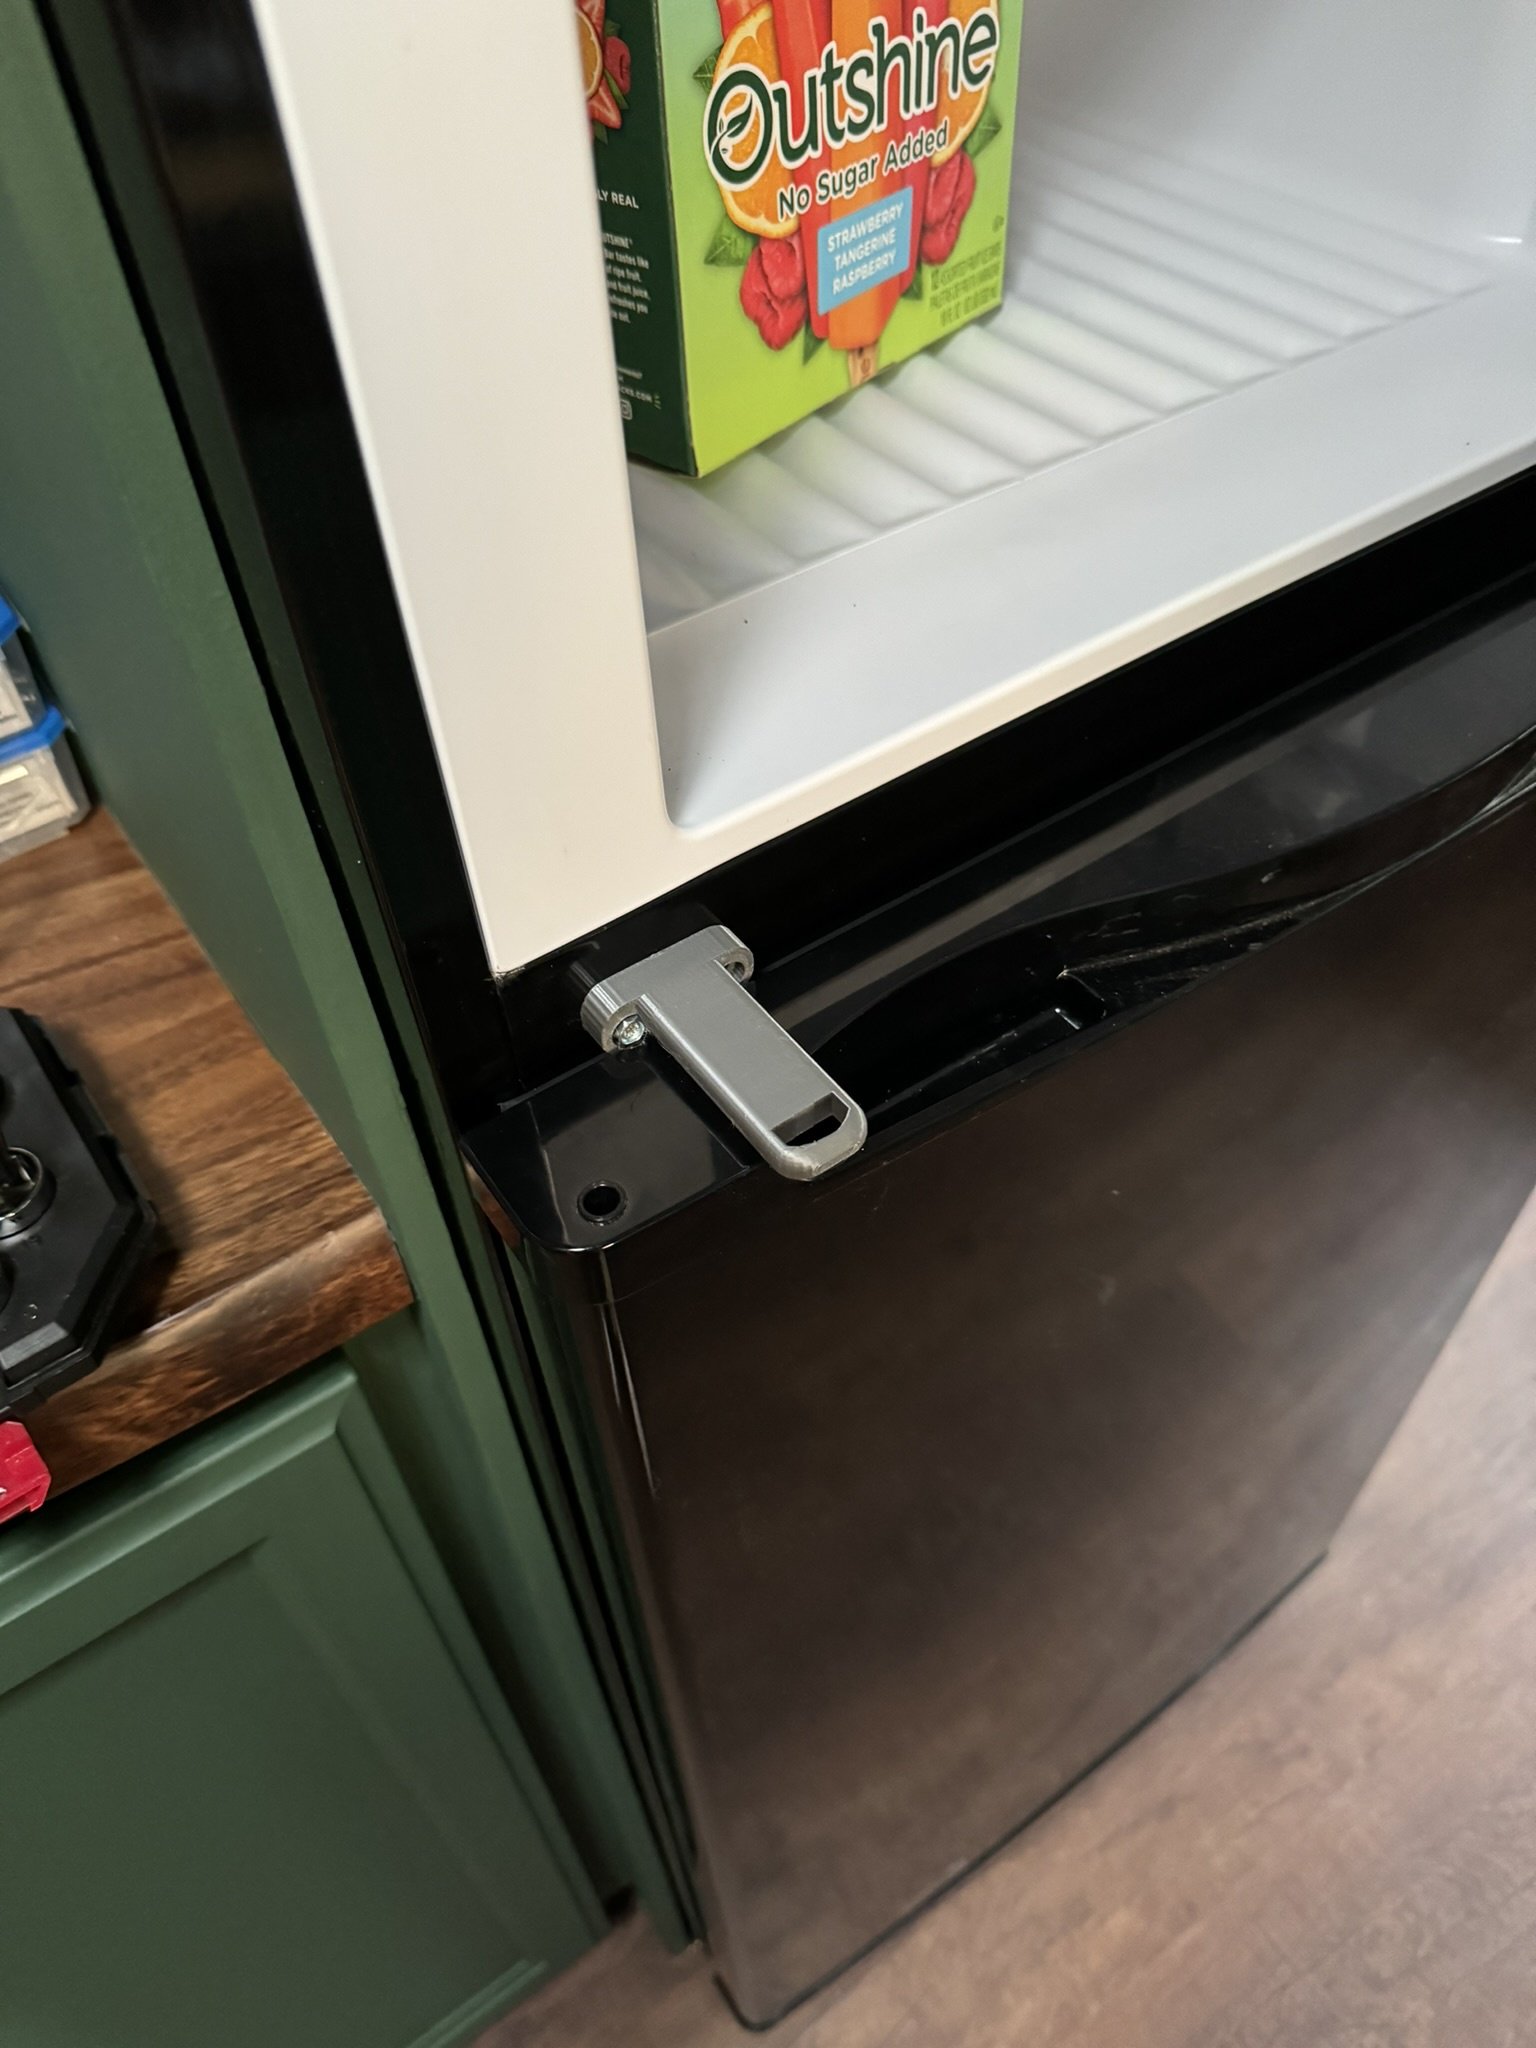
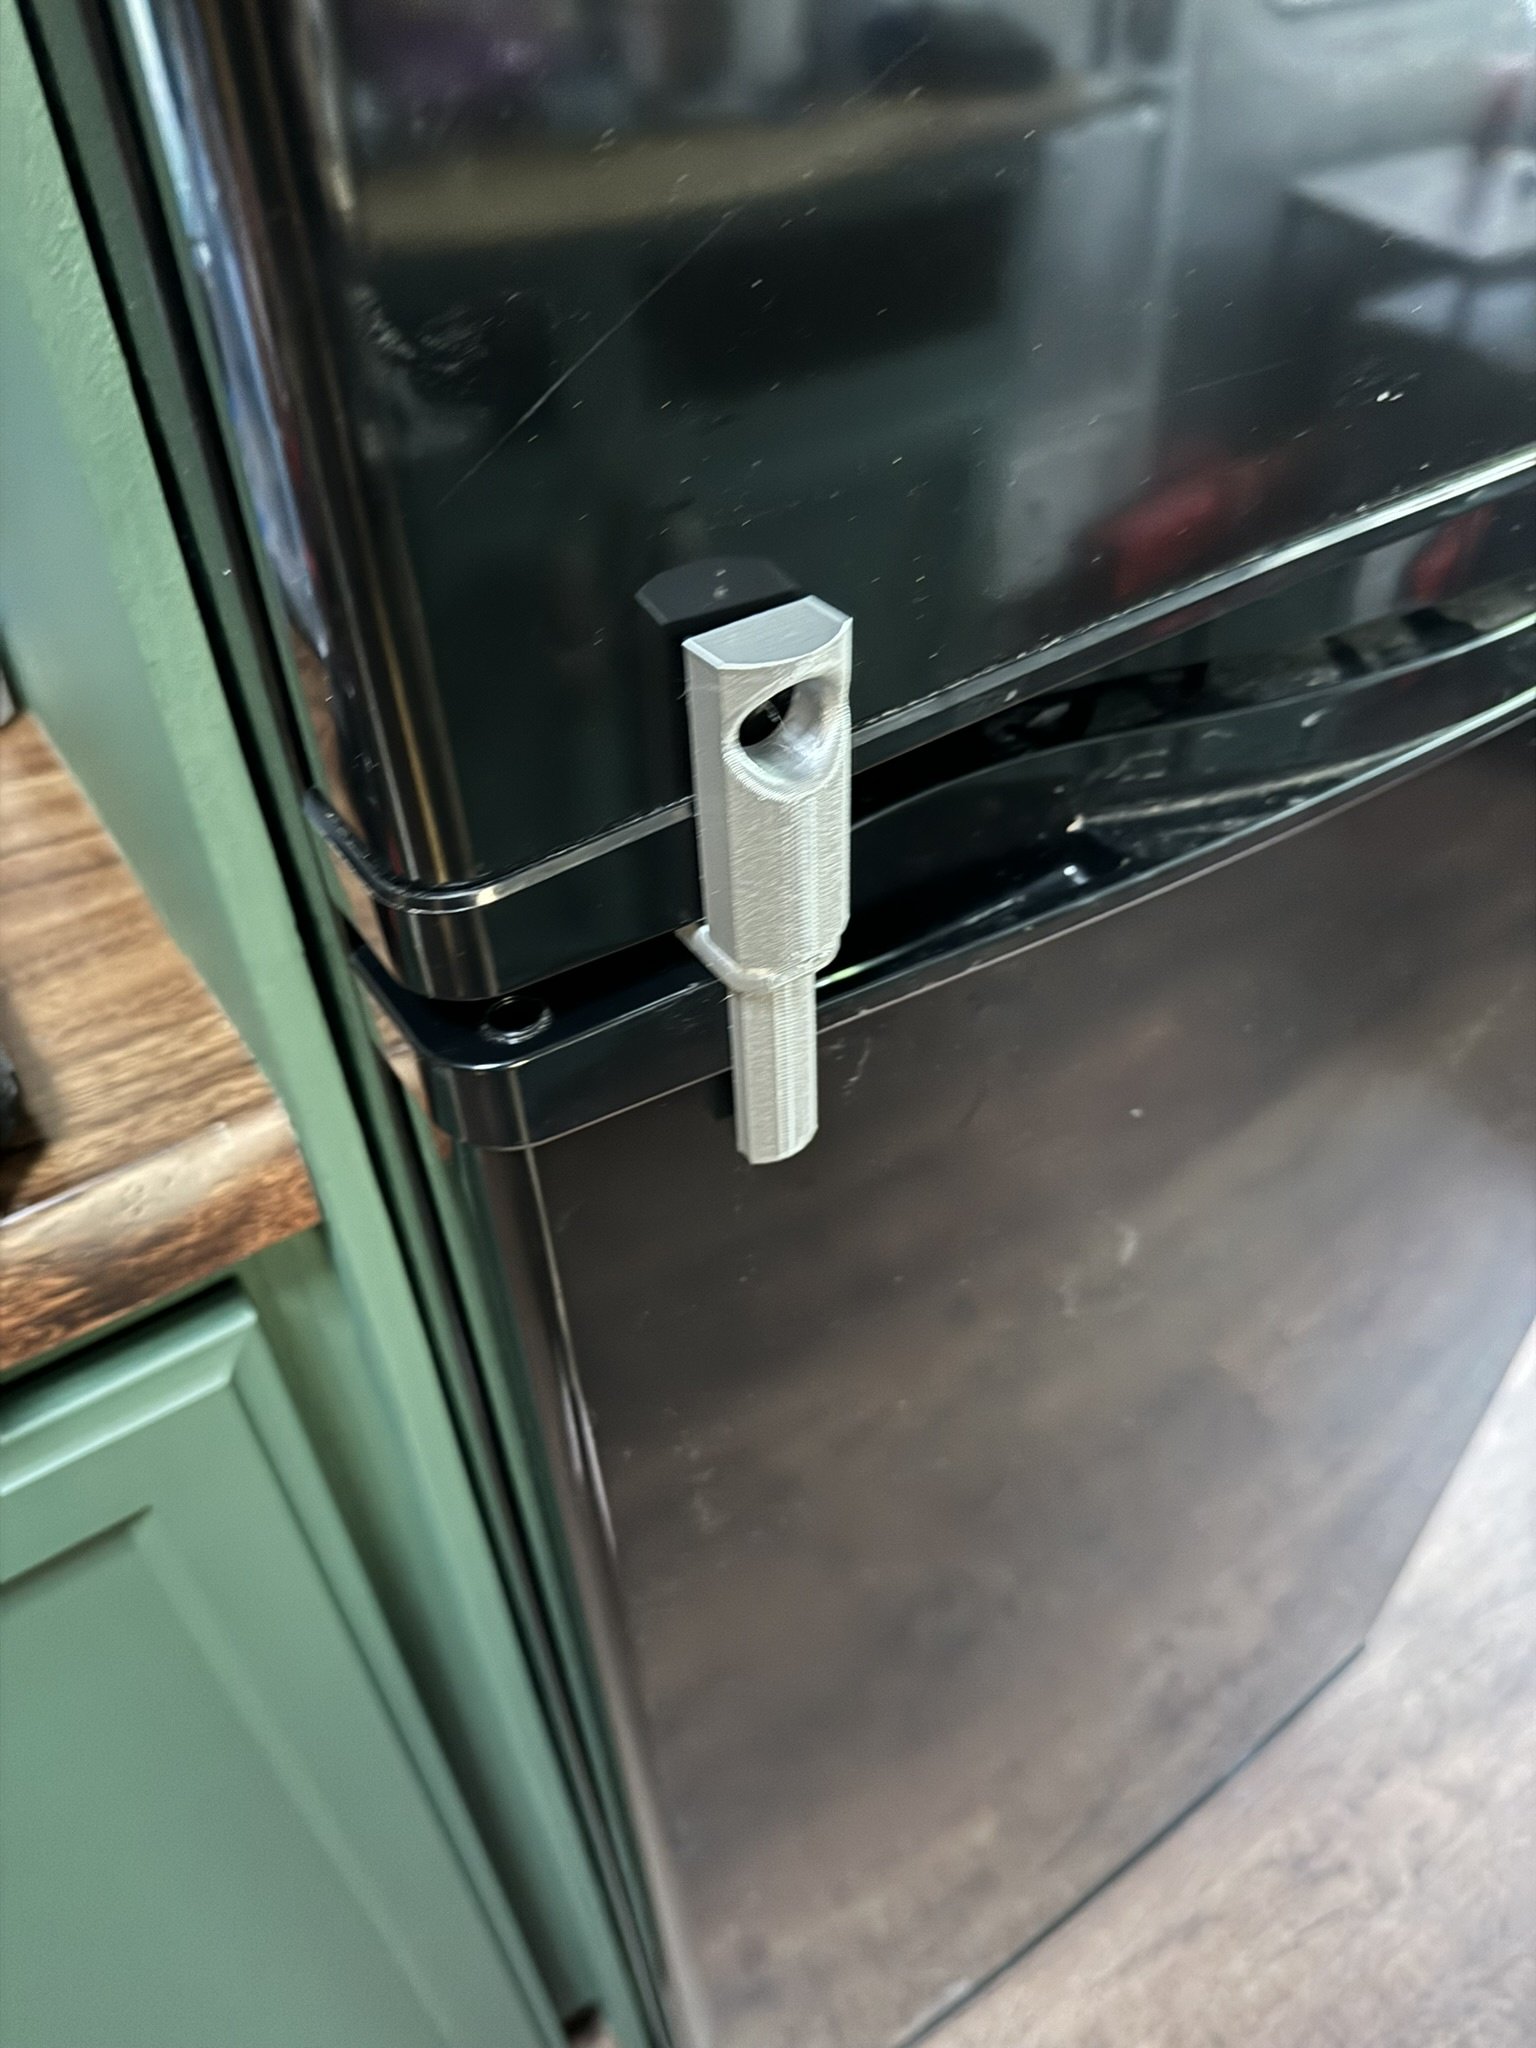
Since it's a residential fridge, I needed a way to secure the door during travel. I searched Thingiverse and found a latch made for an RV fridge that looked a whole lot like my Hotpoint. It fits and works like a champ!
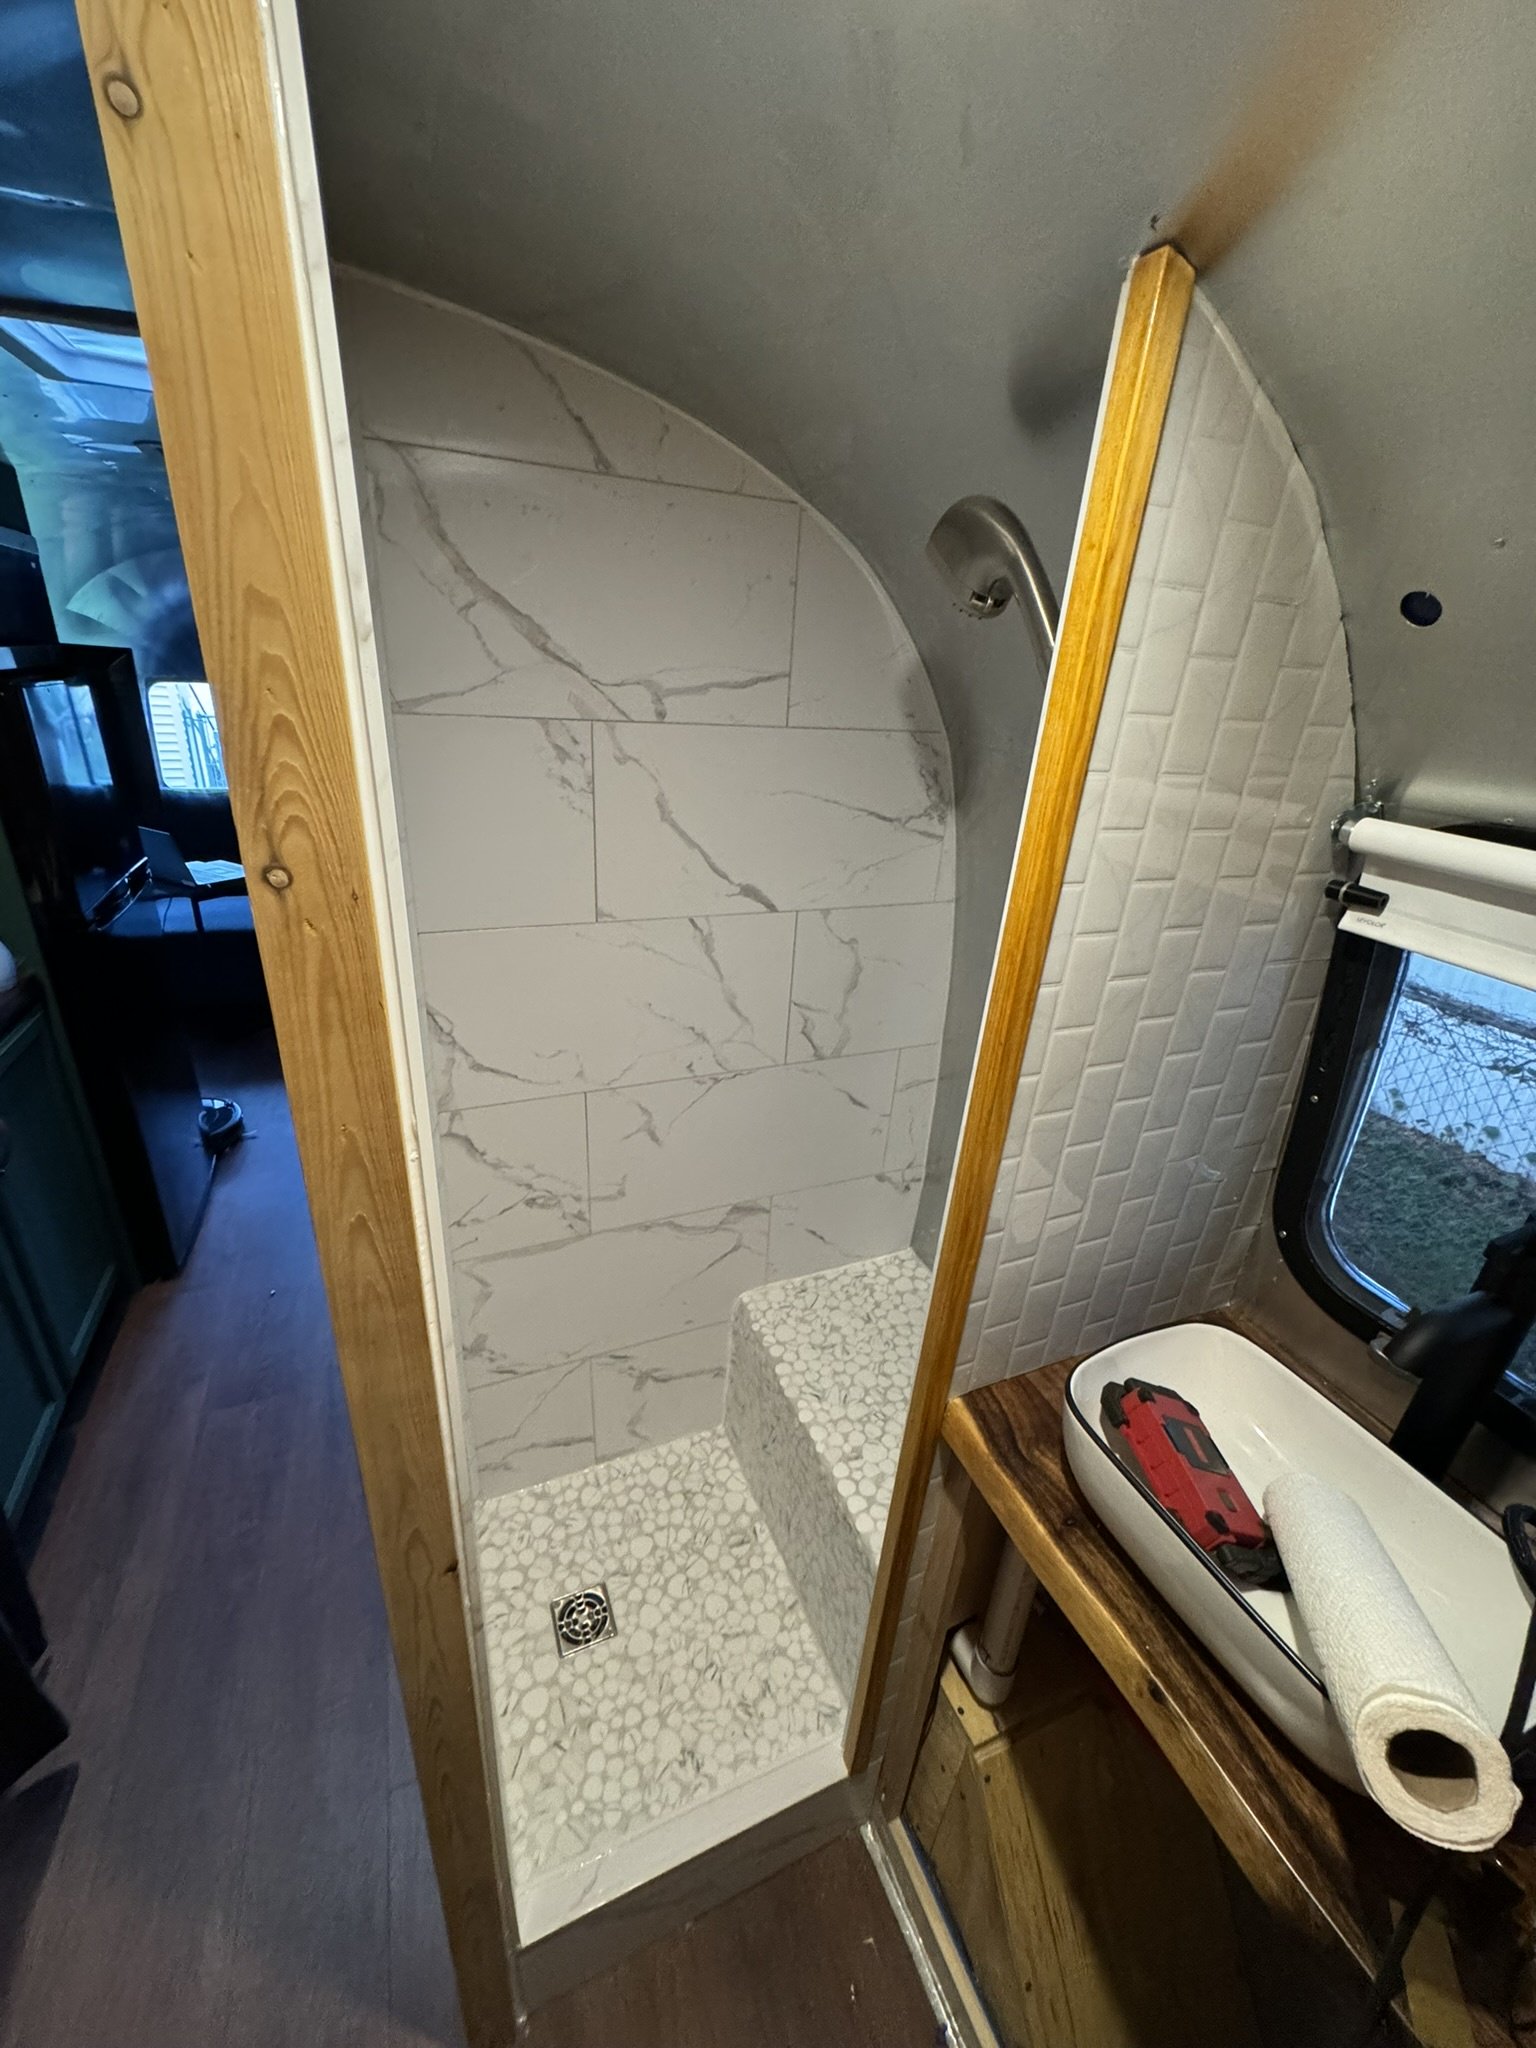
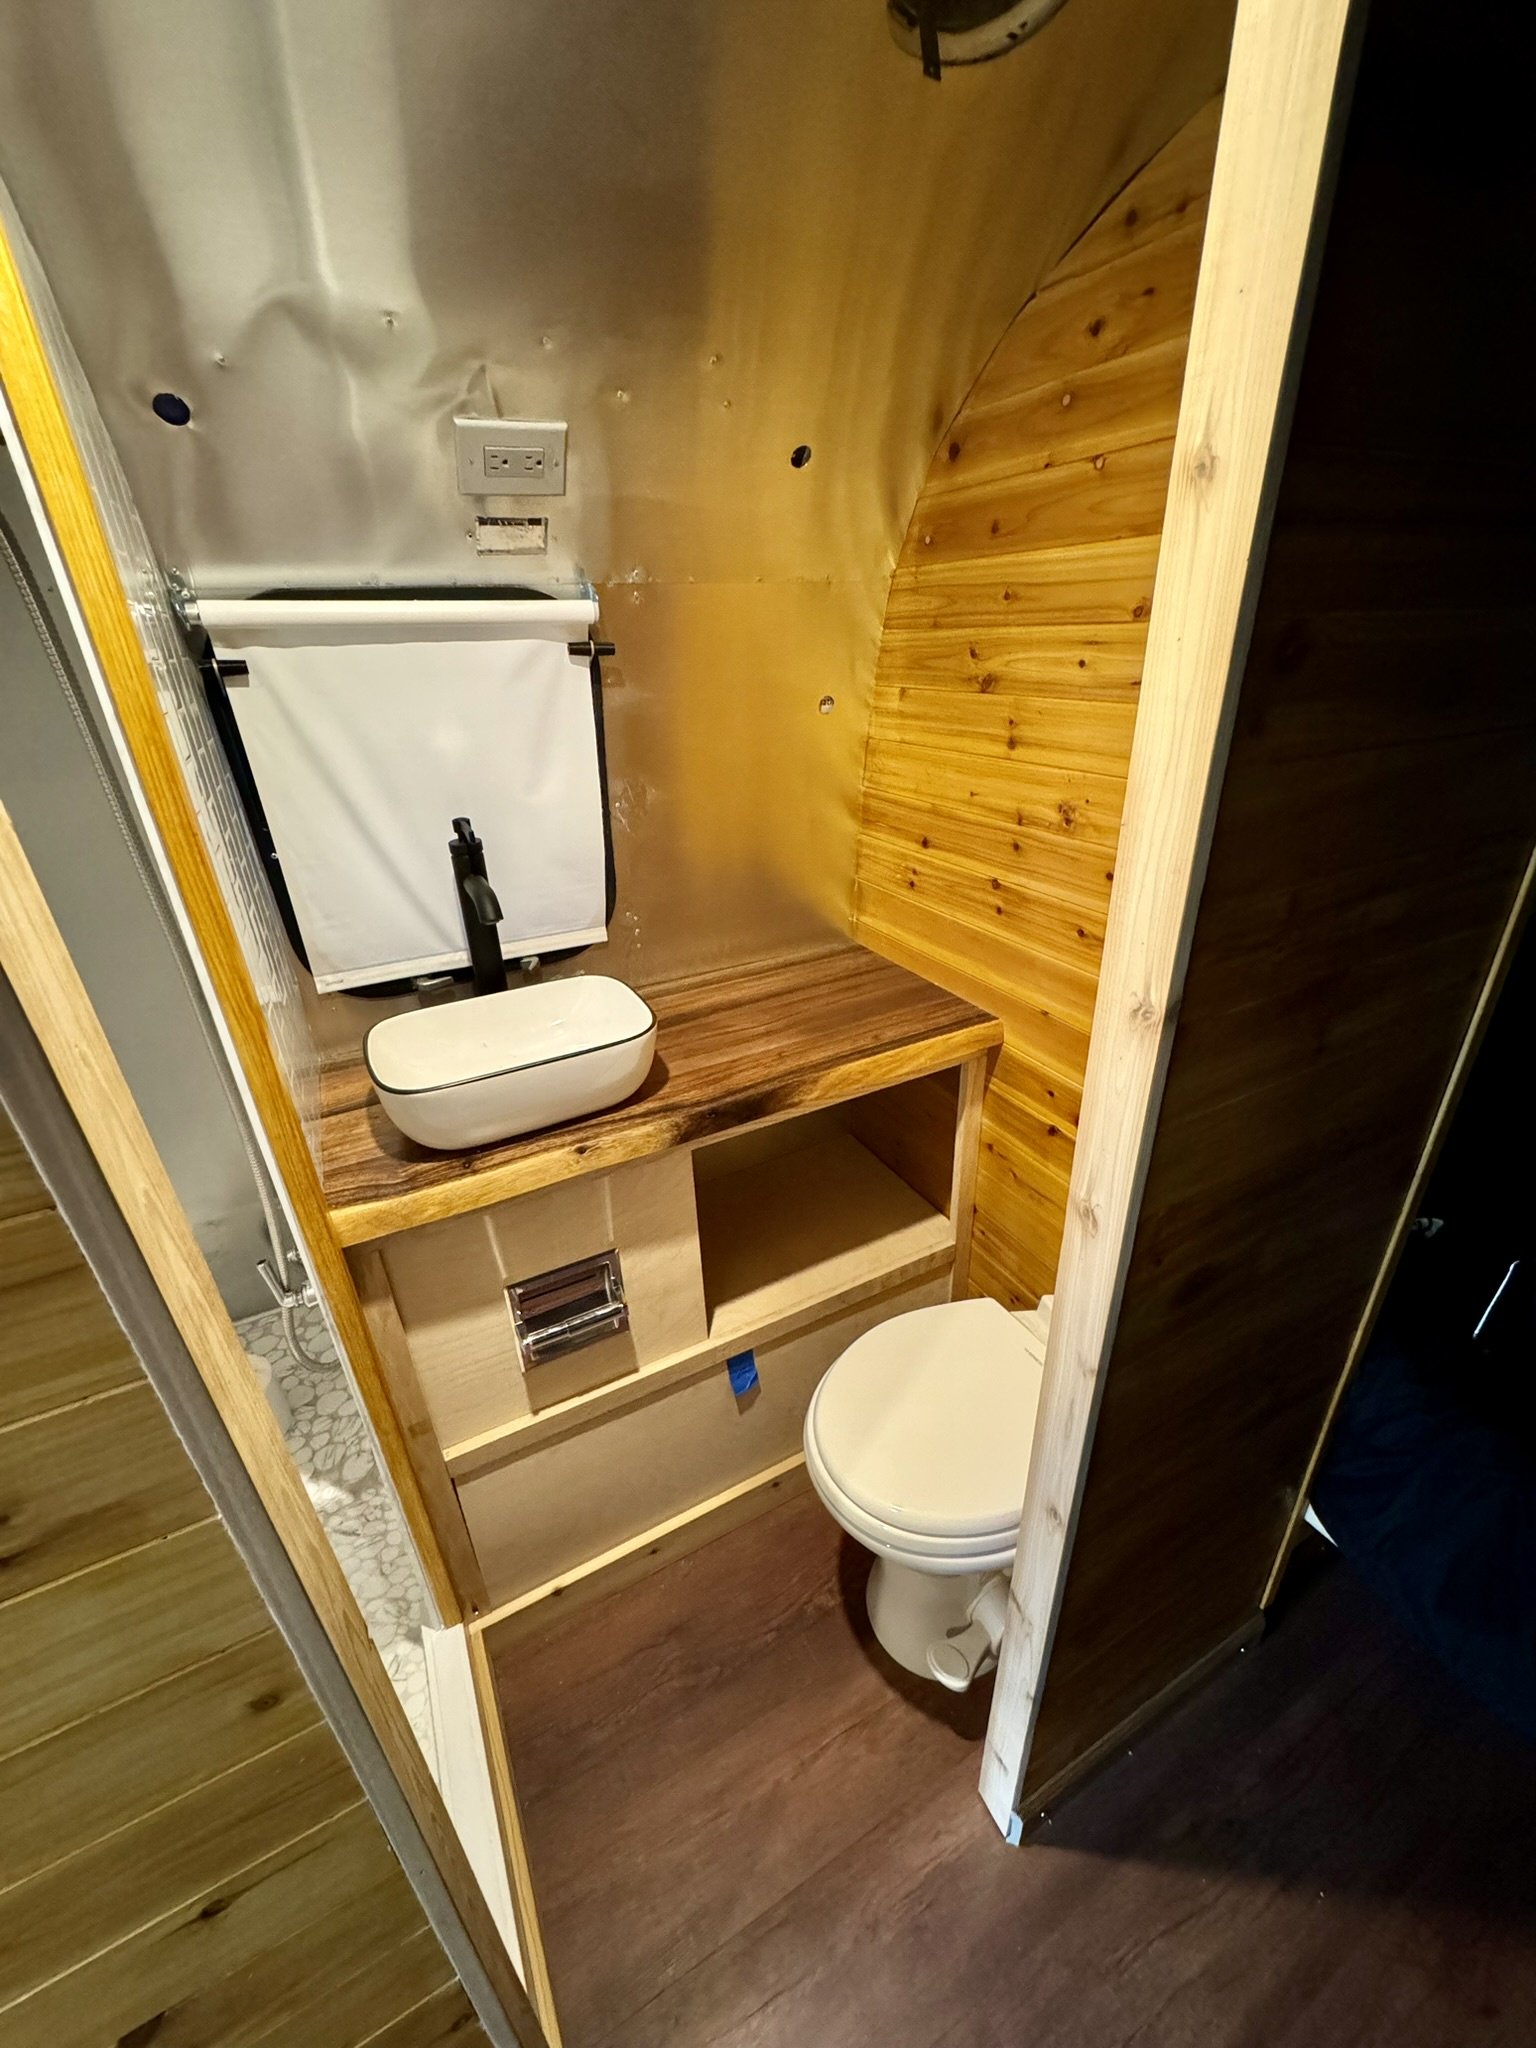
I got the shower all trimmed in, and finished up the bathroom cabinet. The opening on the right is a static shelf, with an open path to reach the plumbing fixtures being the TP roll. The whole panel the TP is mounted to will come out with three screws. Still need to paint the cabinet.
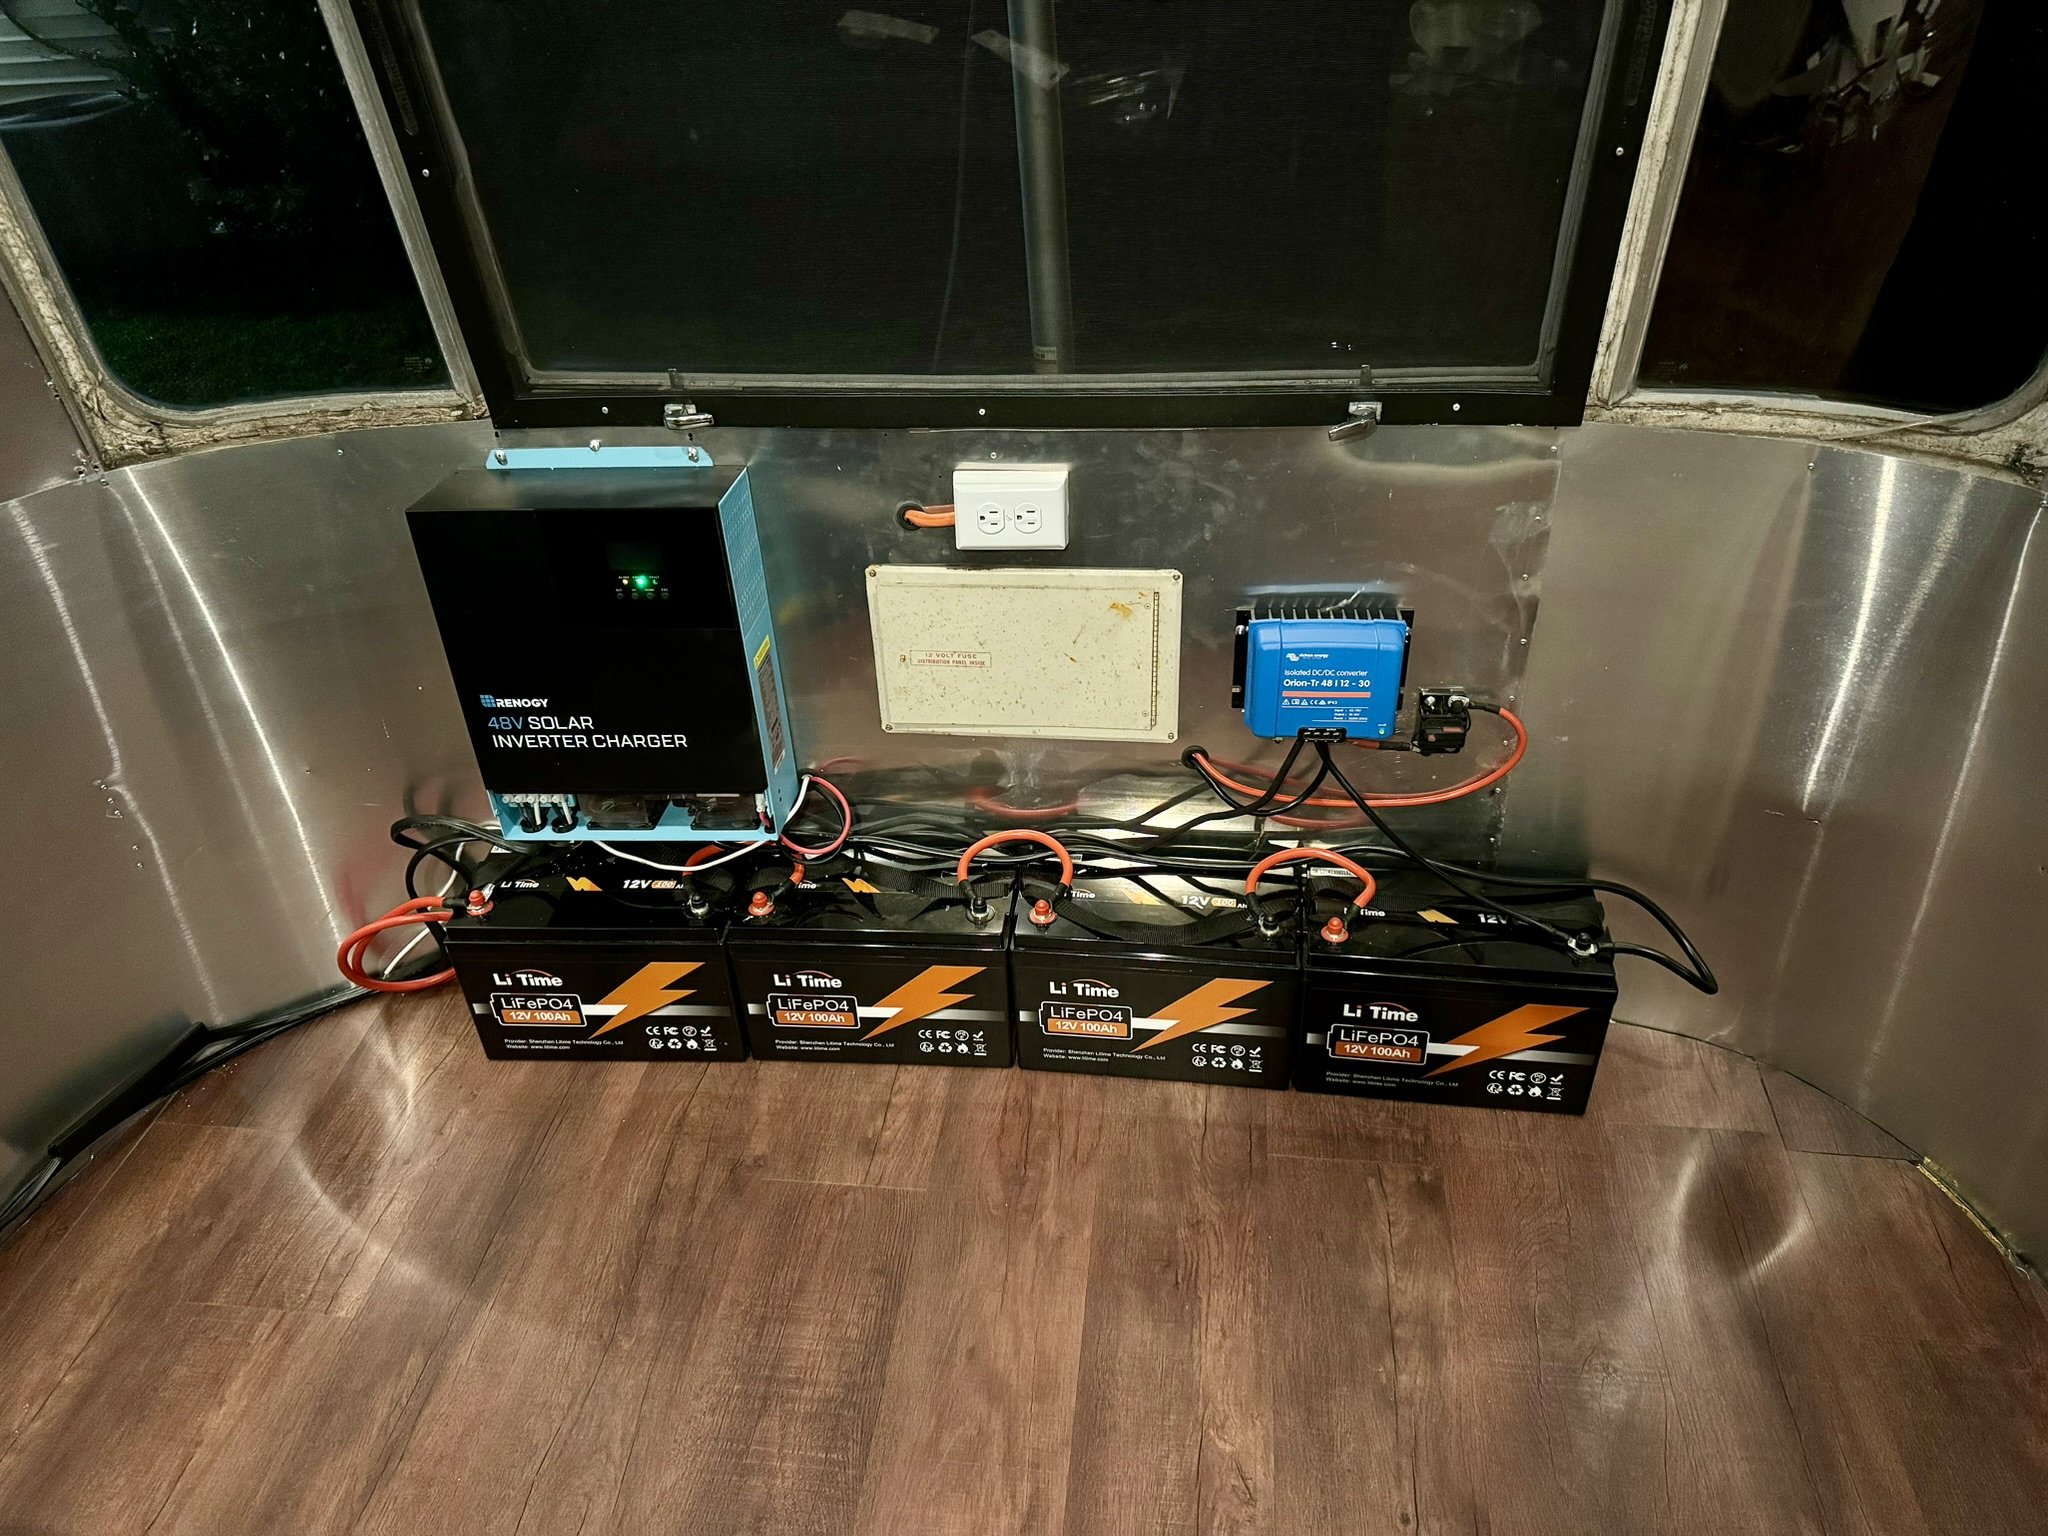
I finally created a new front panel, rearranged my batteries, and mounted my inverter/charger properly. I got the Bluetooth module for the inverter/charger so I can see real time stats. With the A/C idle, a small fan to circulate the air, Starlink, 32" TV, and Apple TV going I'm only drawing 180 watts.
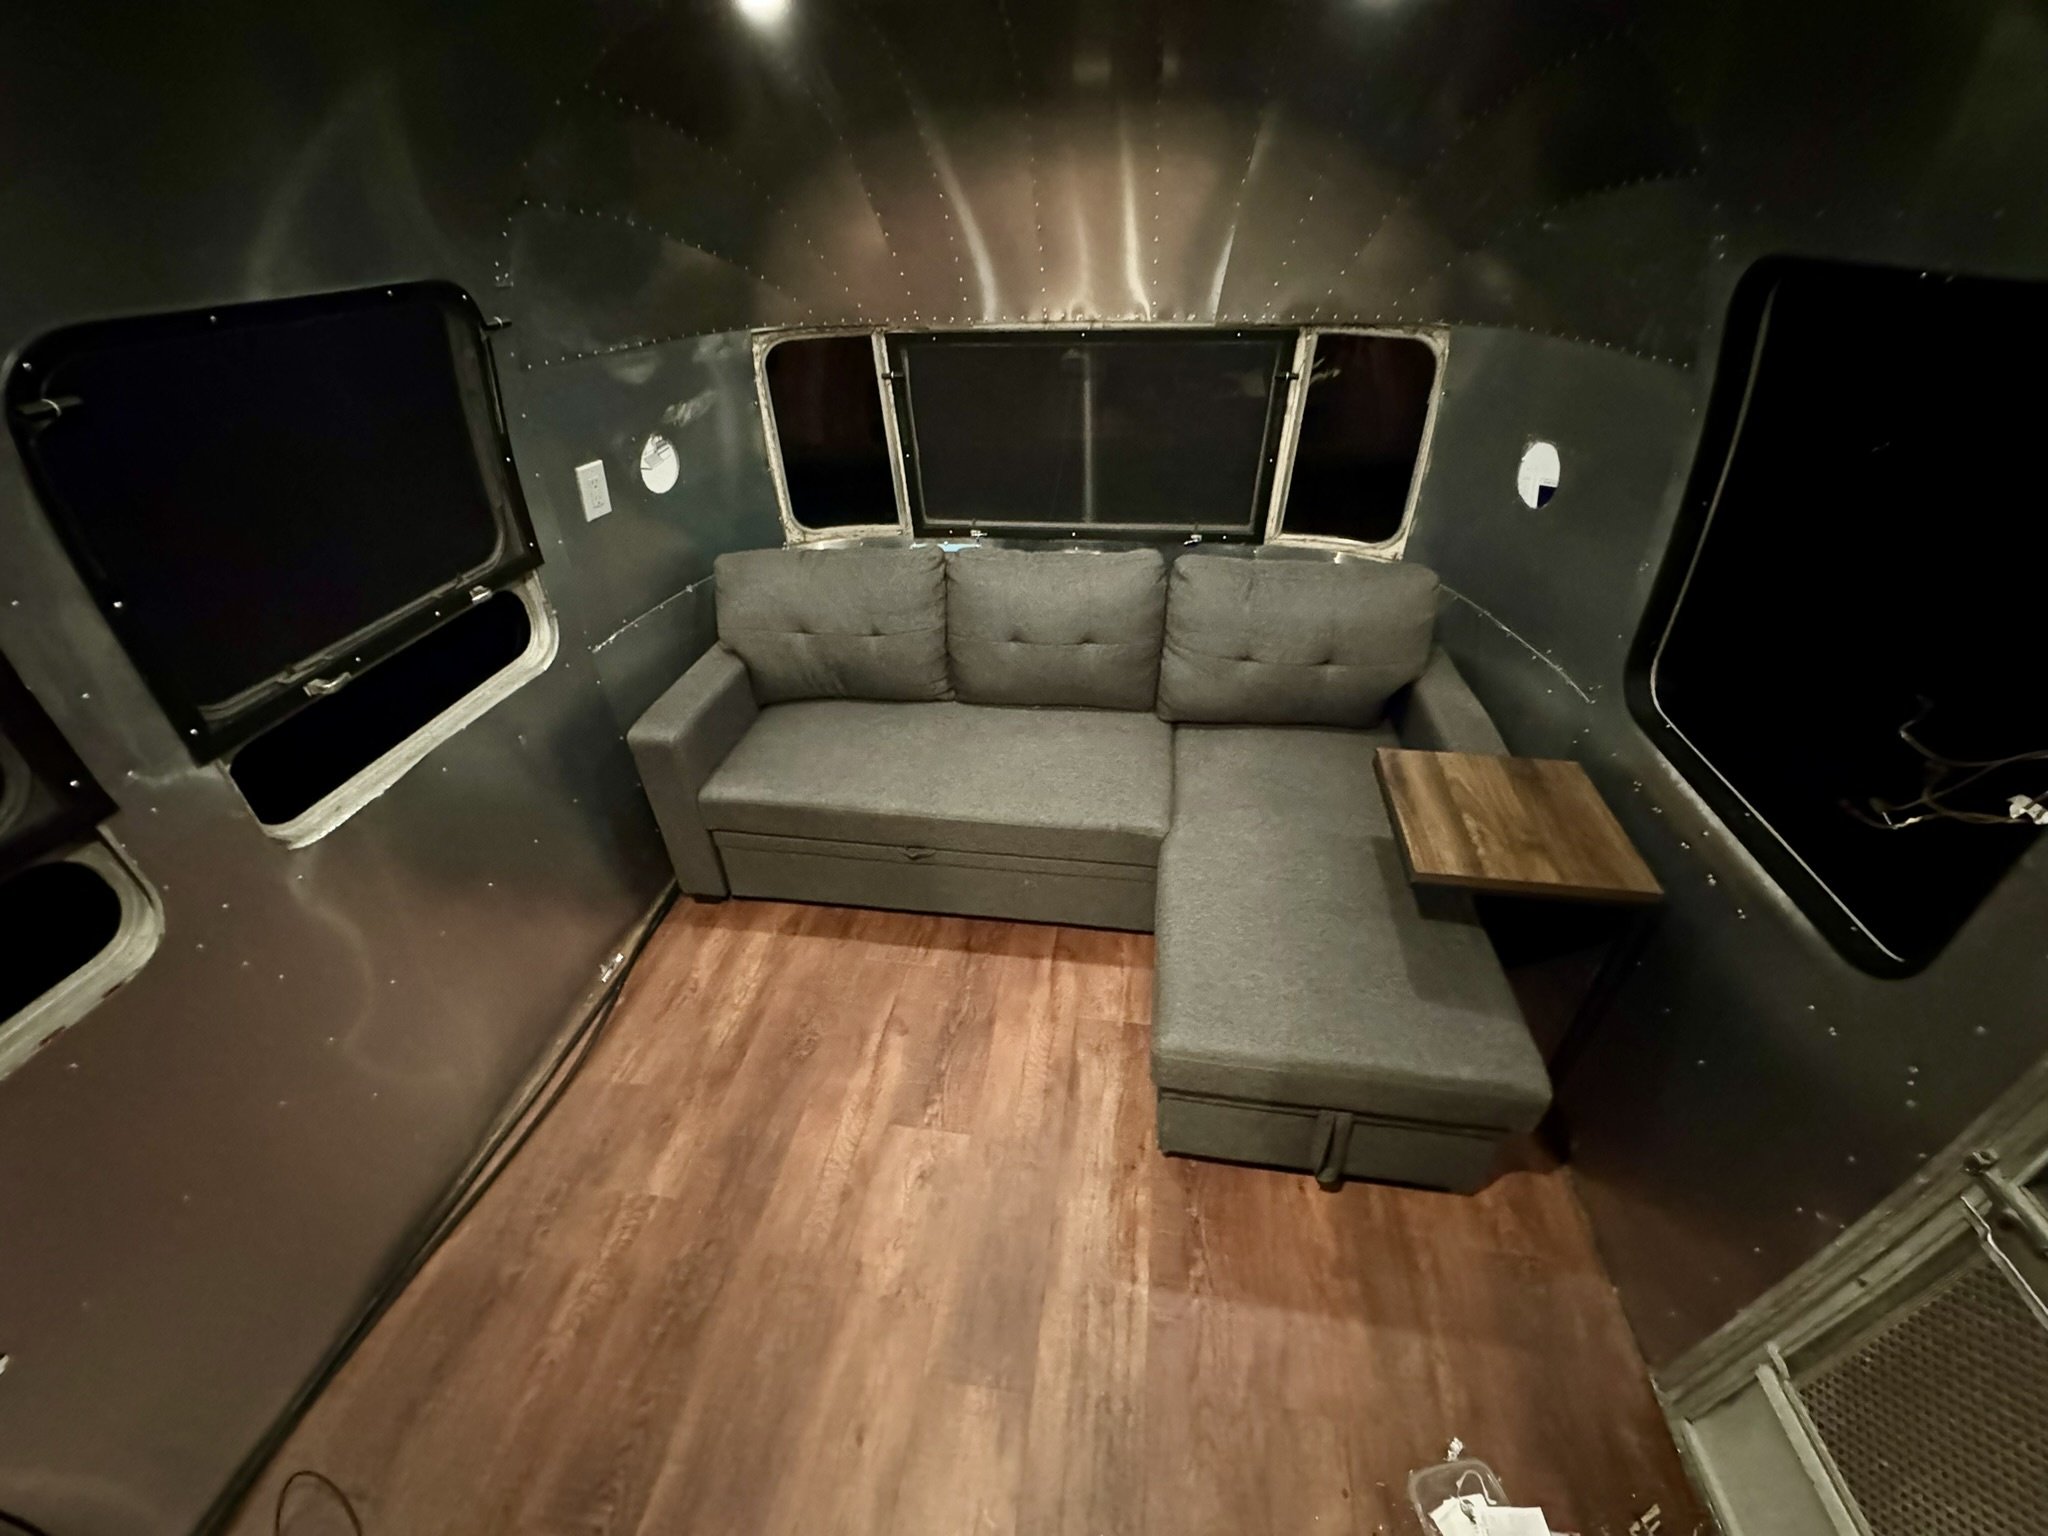
I found this great little couch on FB marketplace. I was afraid to commit to an expensive couch, then find out it wouldn't fit through the door so this was a test. I kinda like it though. It's completely modular, so each arm comes off, and the chaise and sofa pieces are separate as well. You can swap sides with the chaise. The chaise lifts up for storage underneath, and the sofa flips out to make a queen size bed. I wouldn't want to sleep on it every night, but for visitors or a night of lounging in front of the TV it's great!

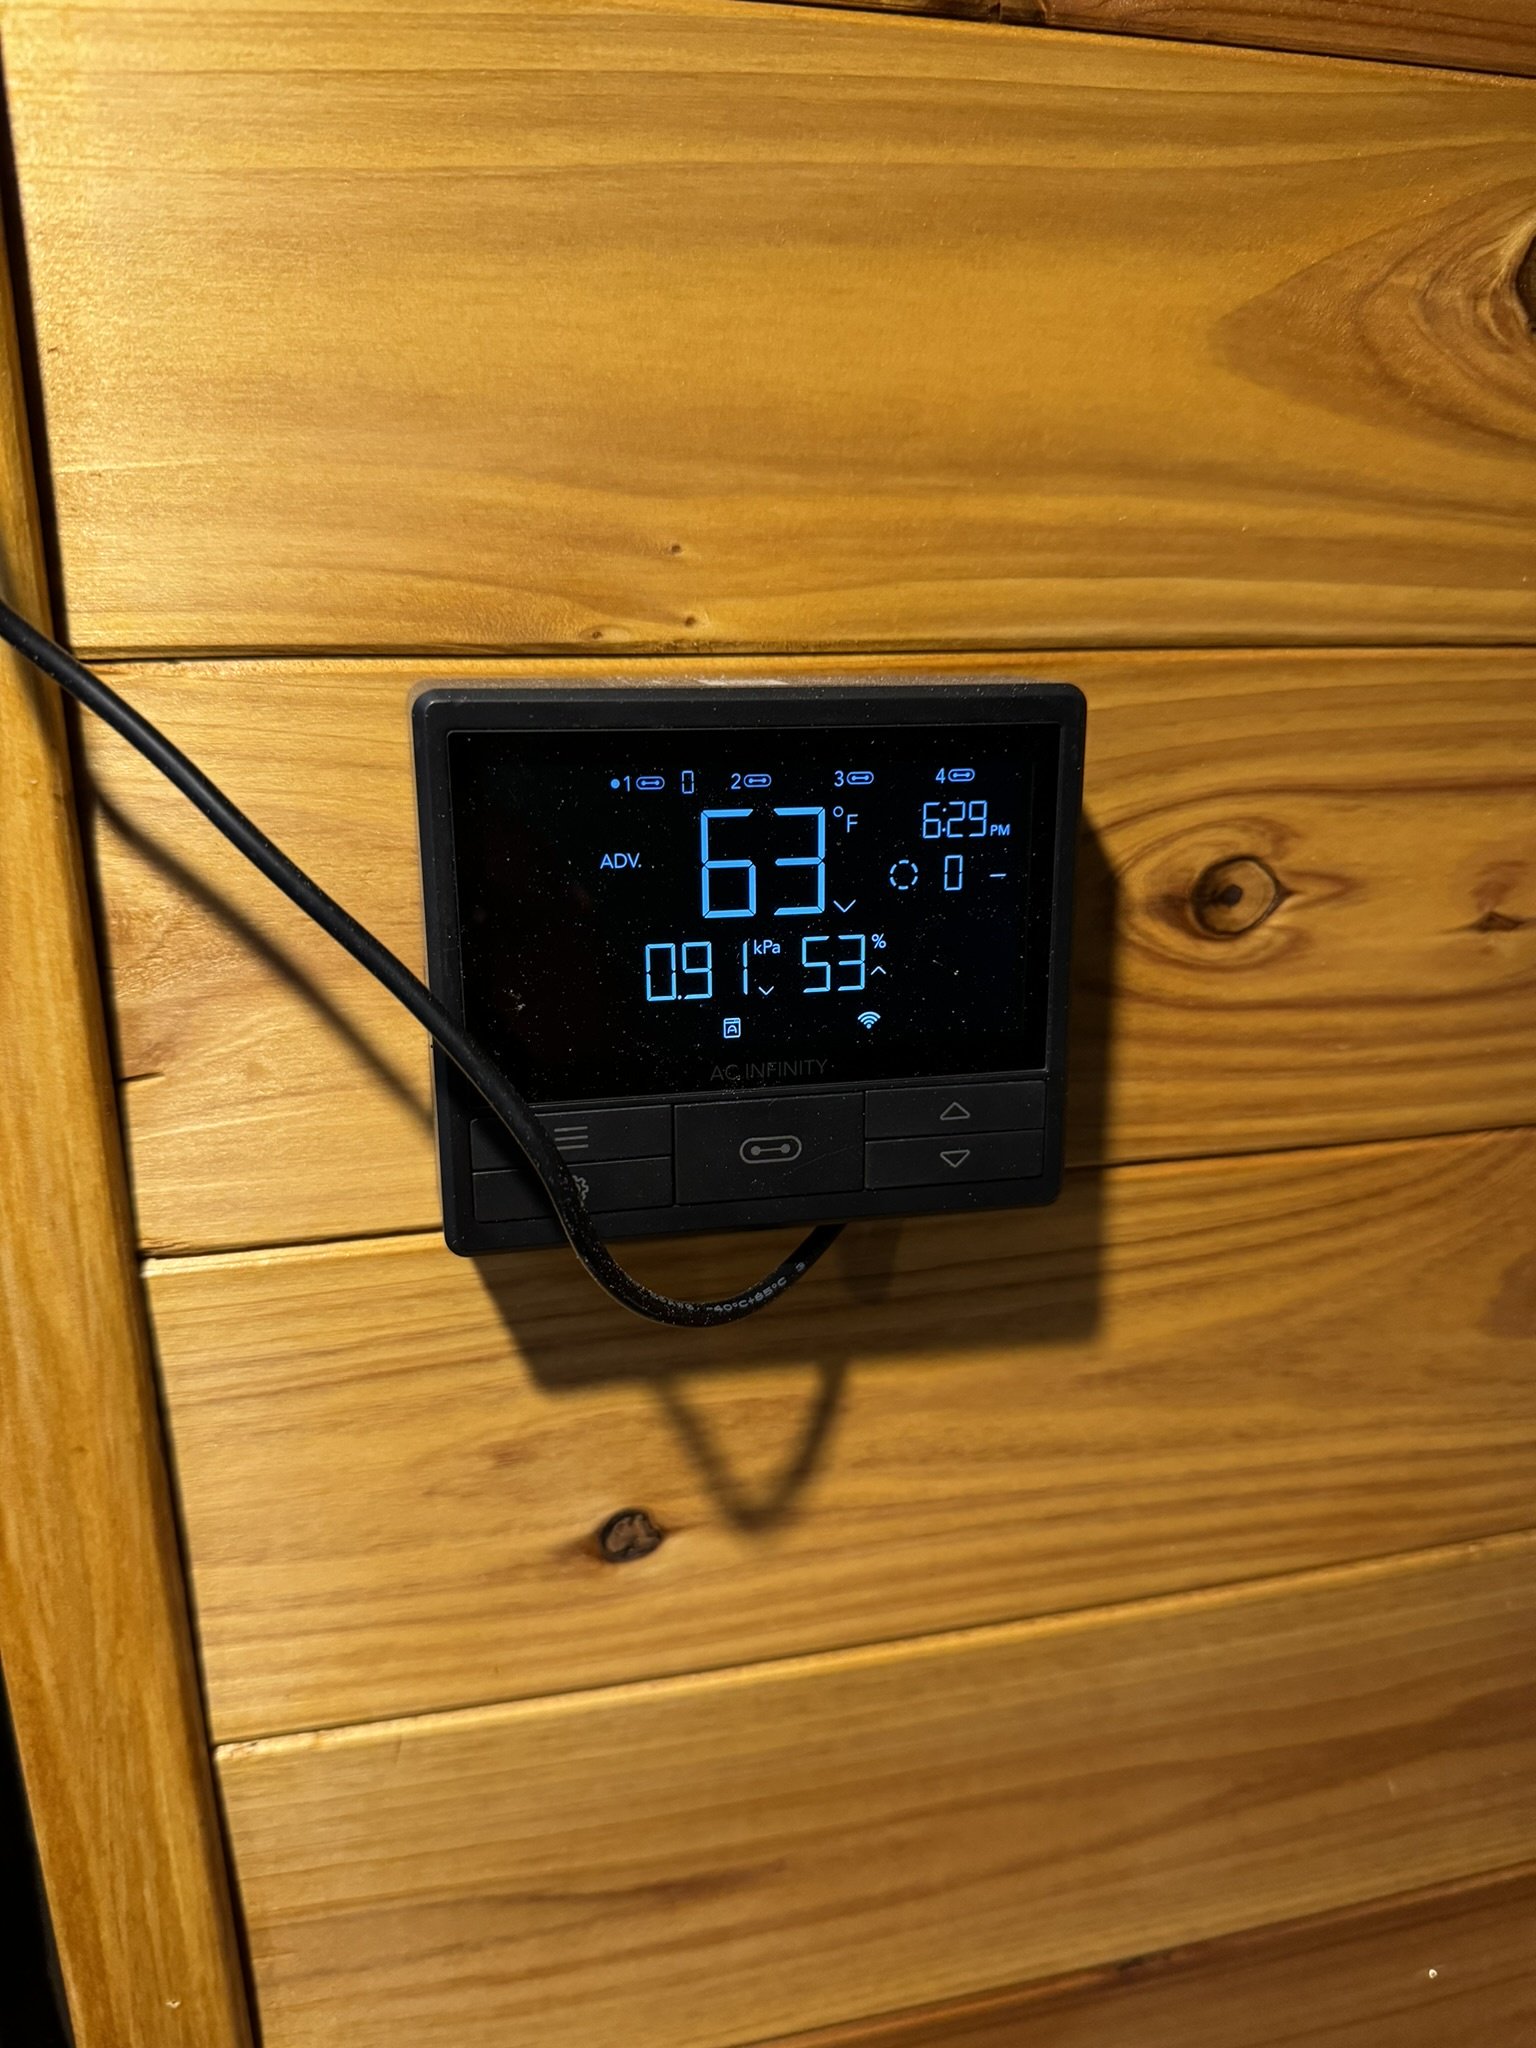
For those of you curious how well the mini split works in the airstream, the hallway does restrict the airflow, but the duct fan alleviates that. 63* inside on a humid Florida morning in May results in condensation like a Coke can!
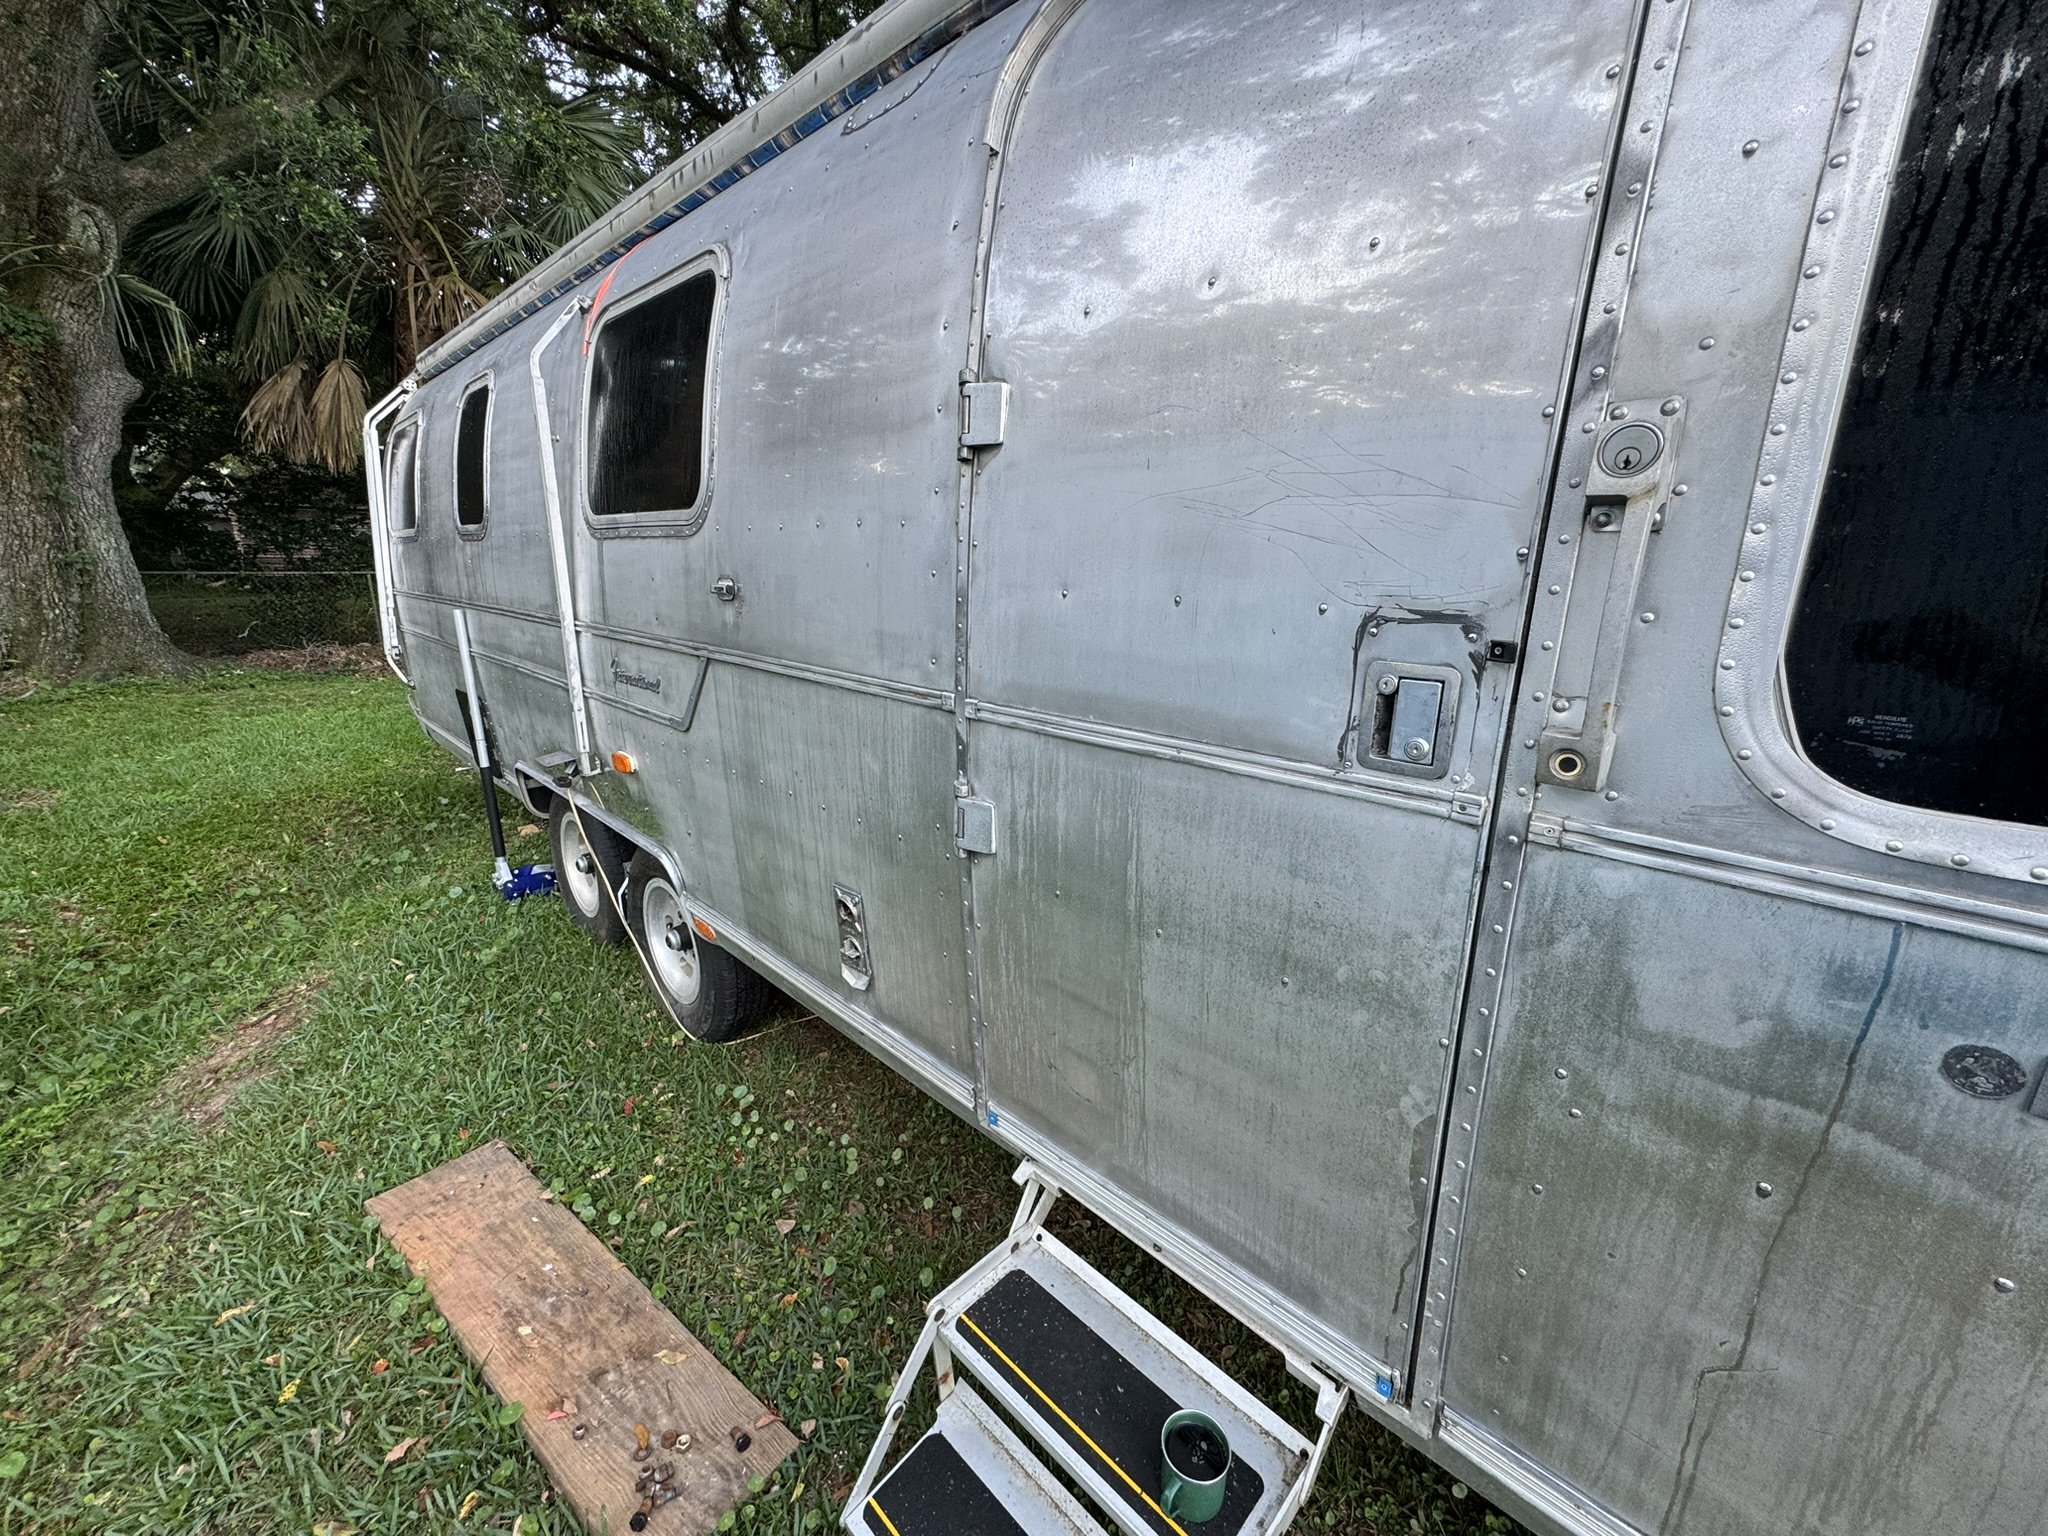
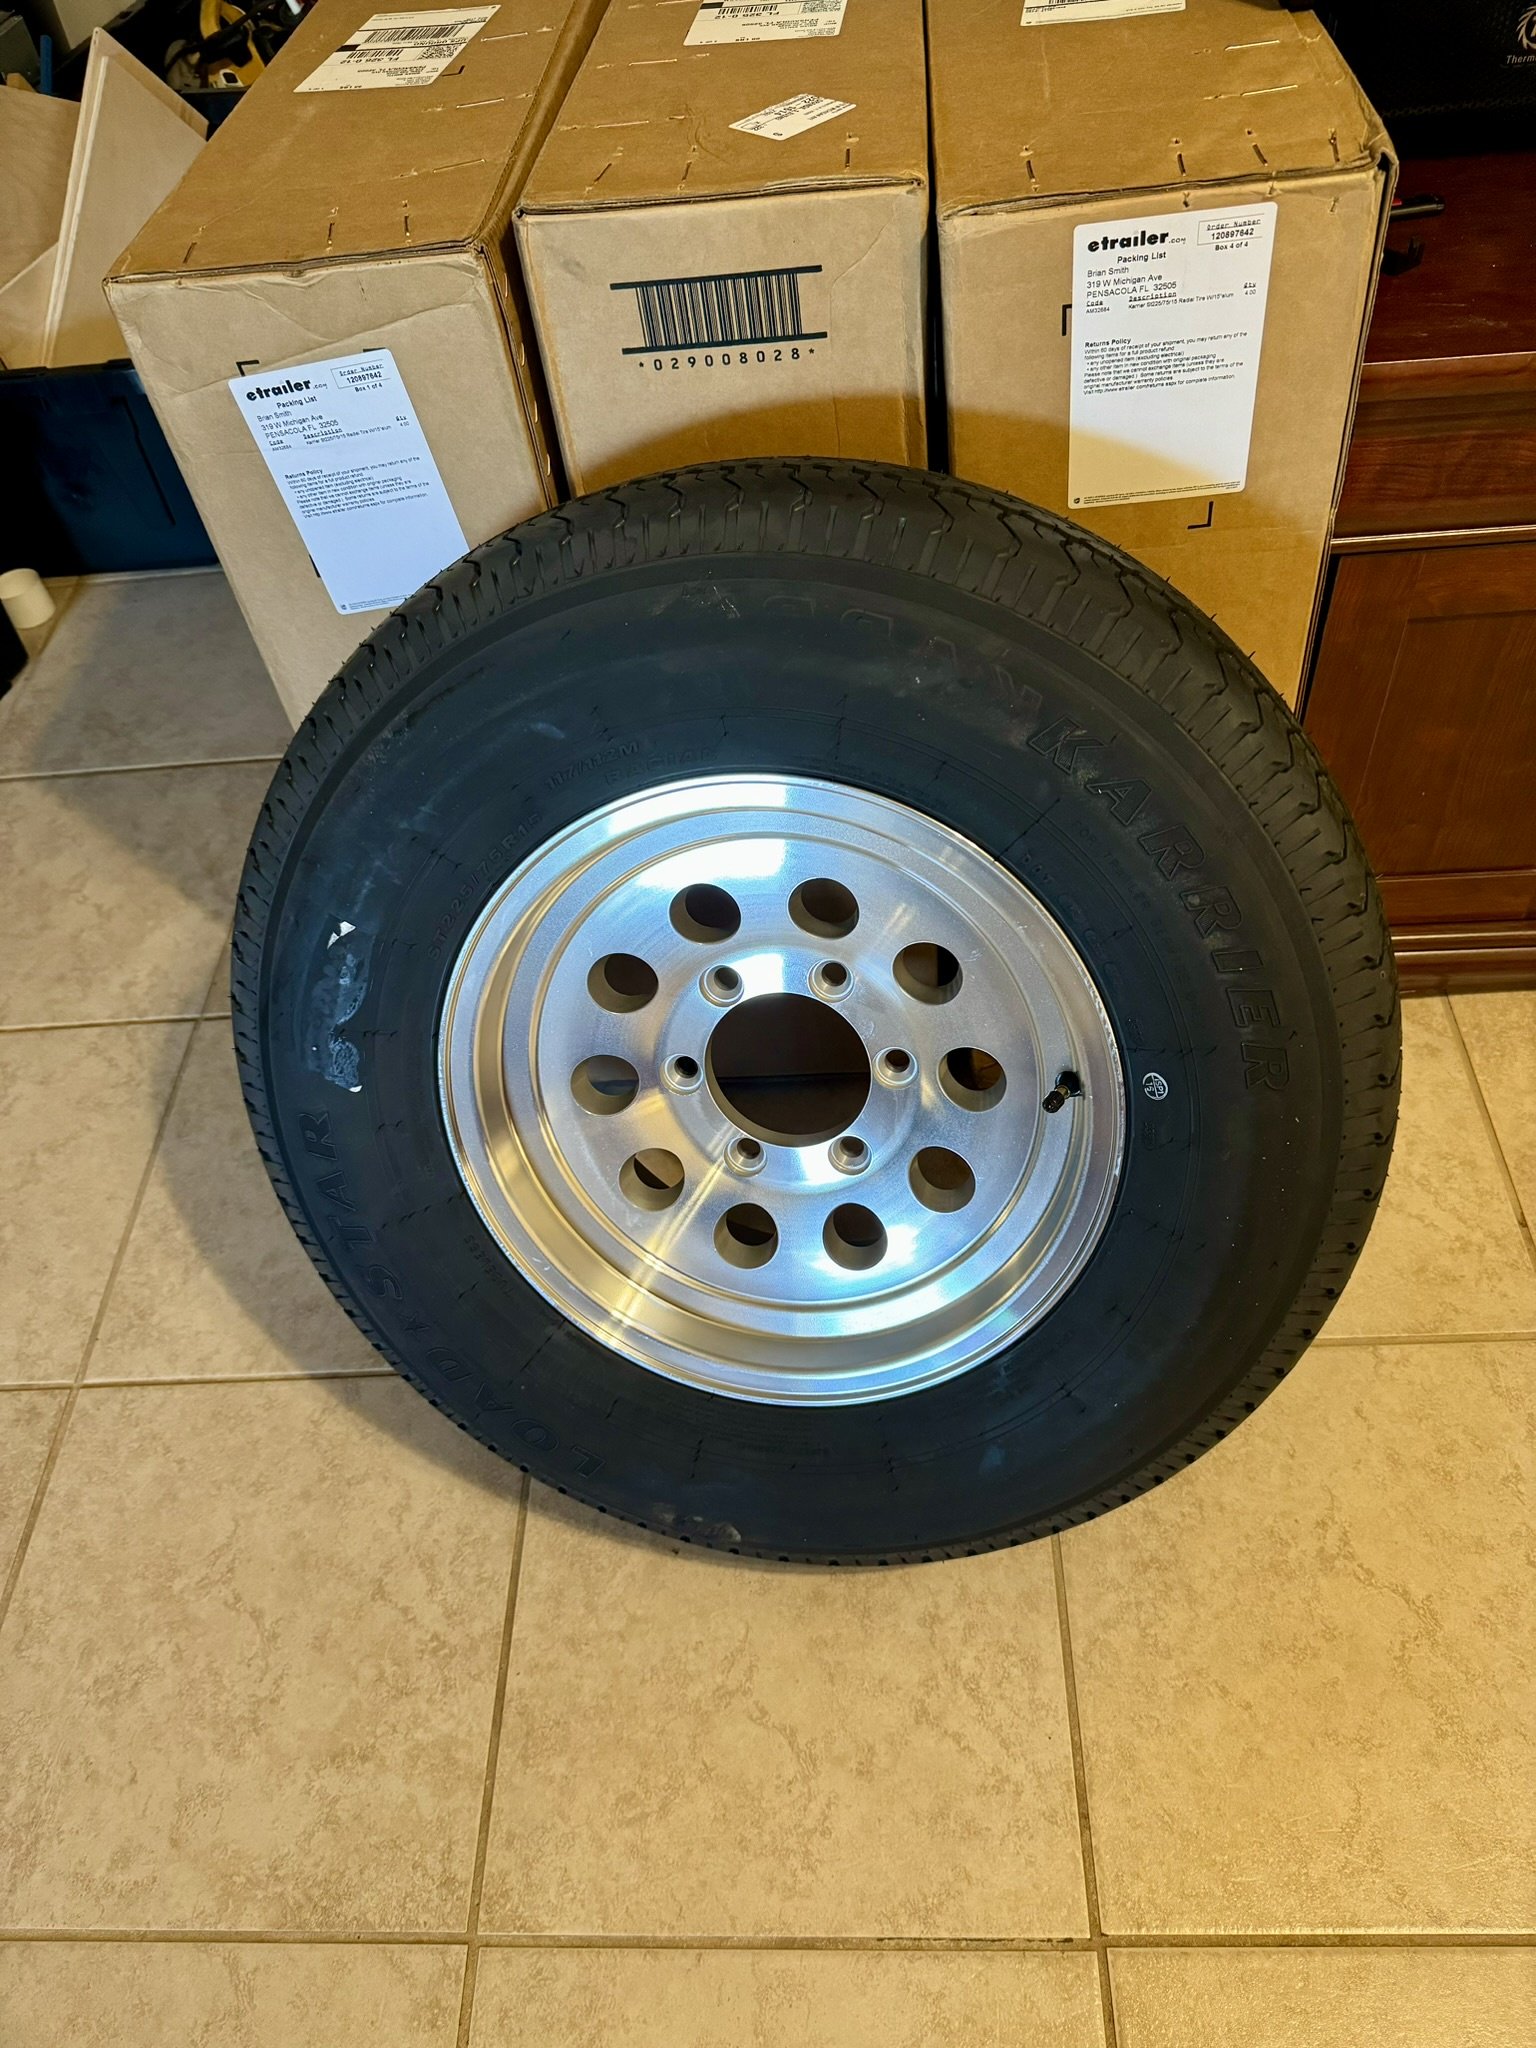
My new wheels arrived!
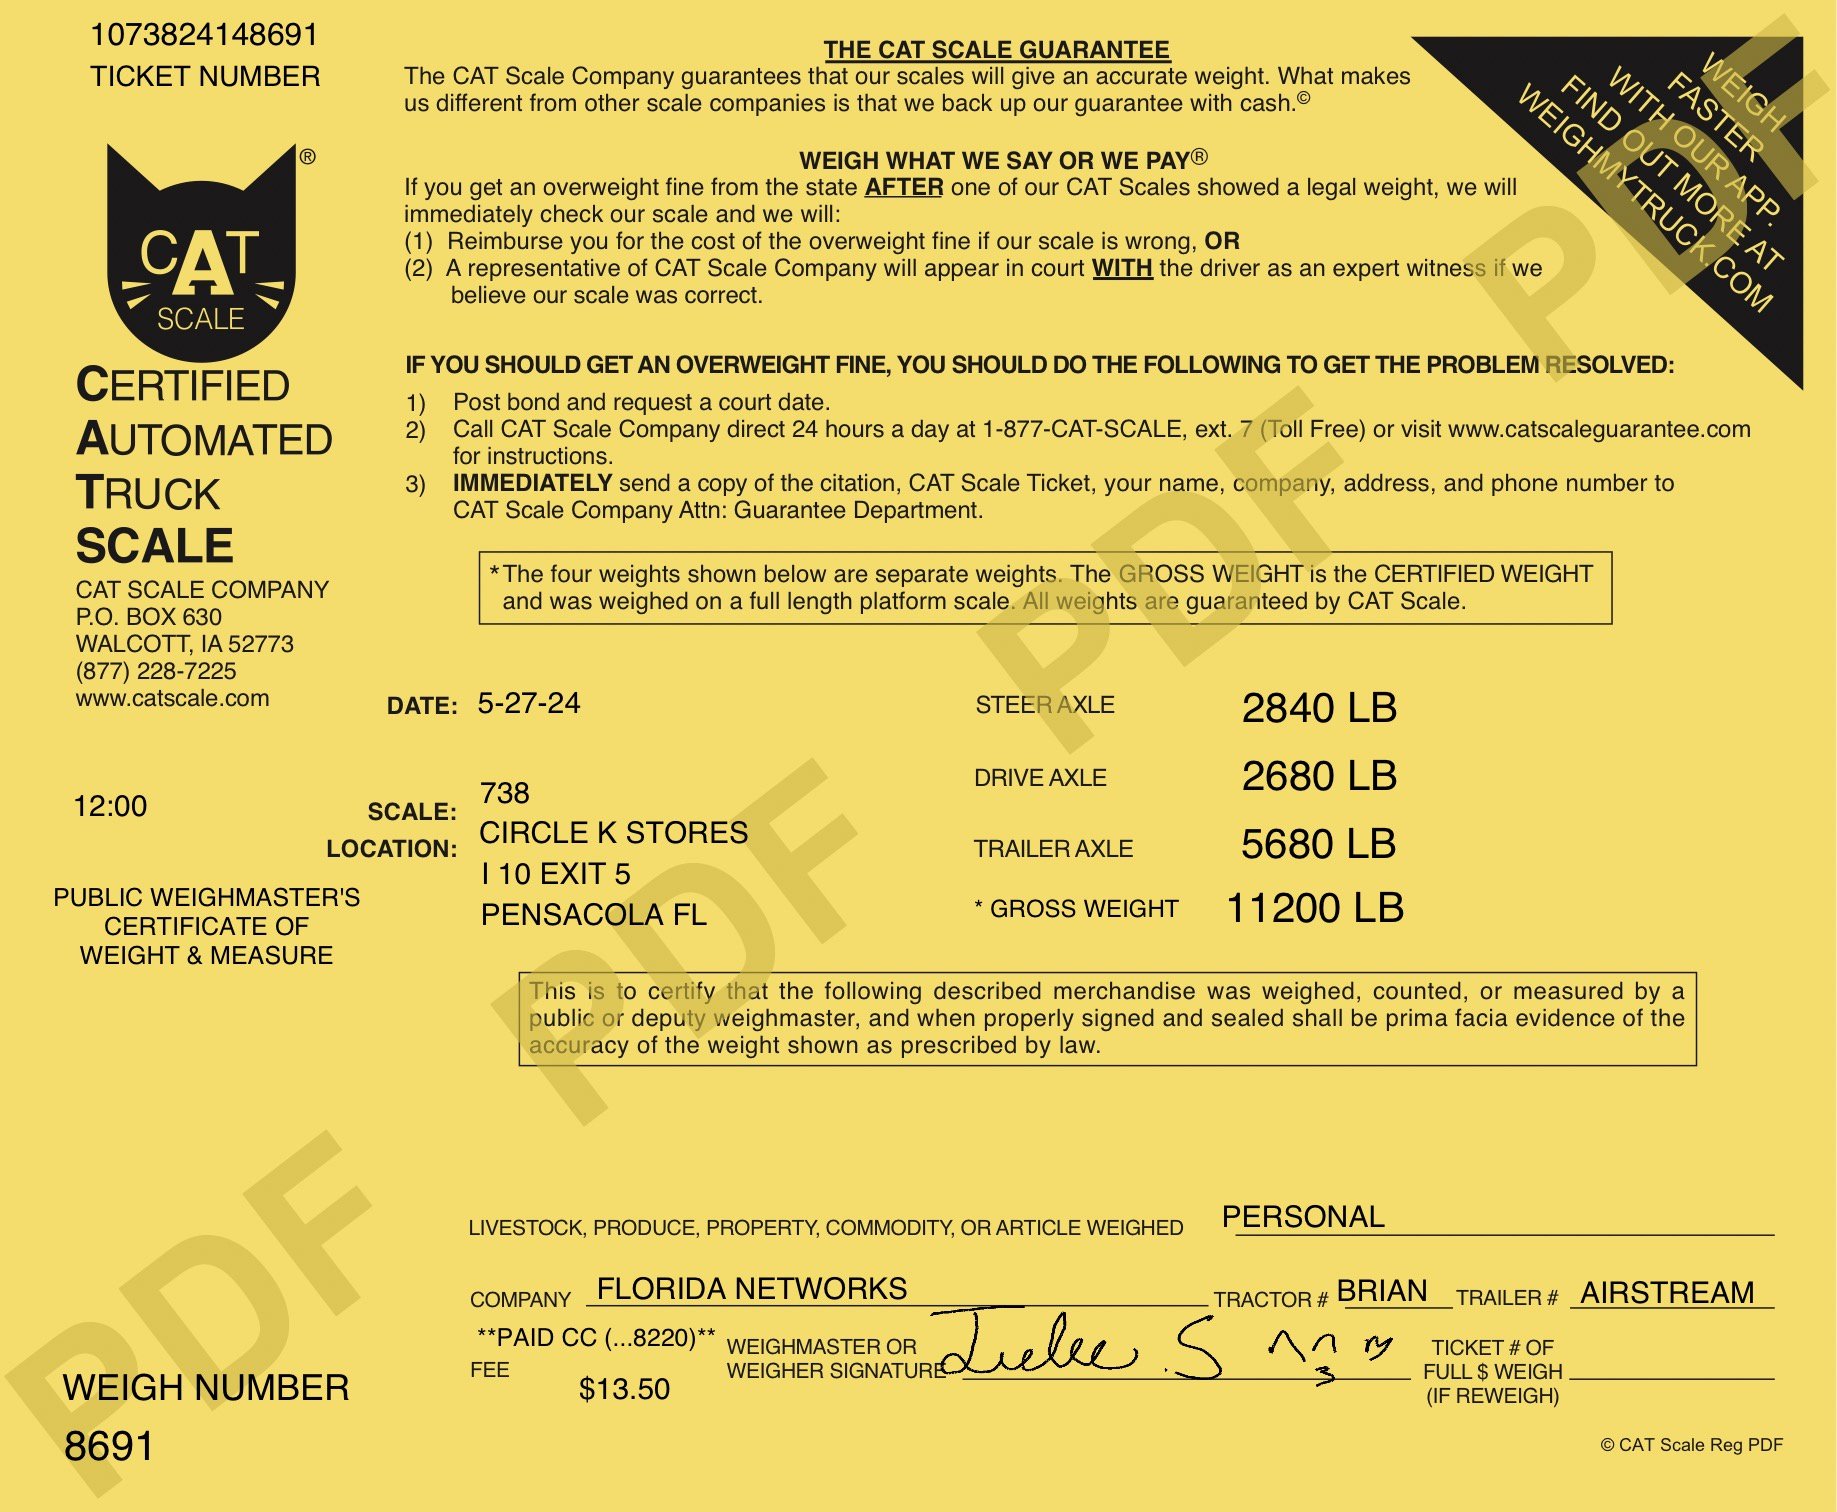
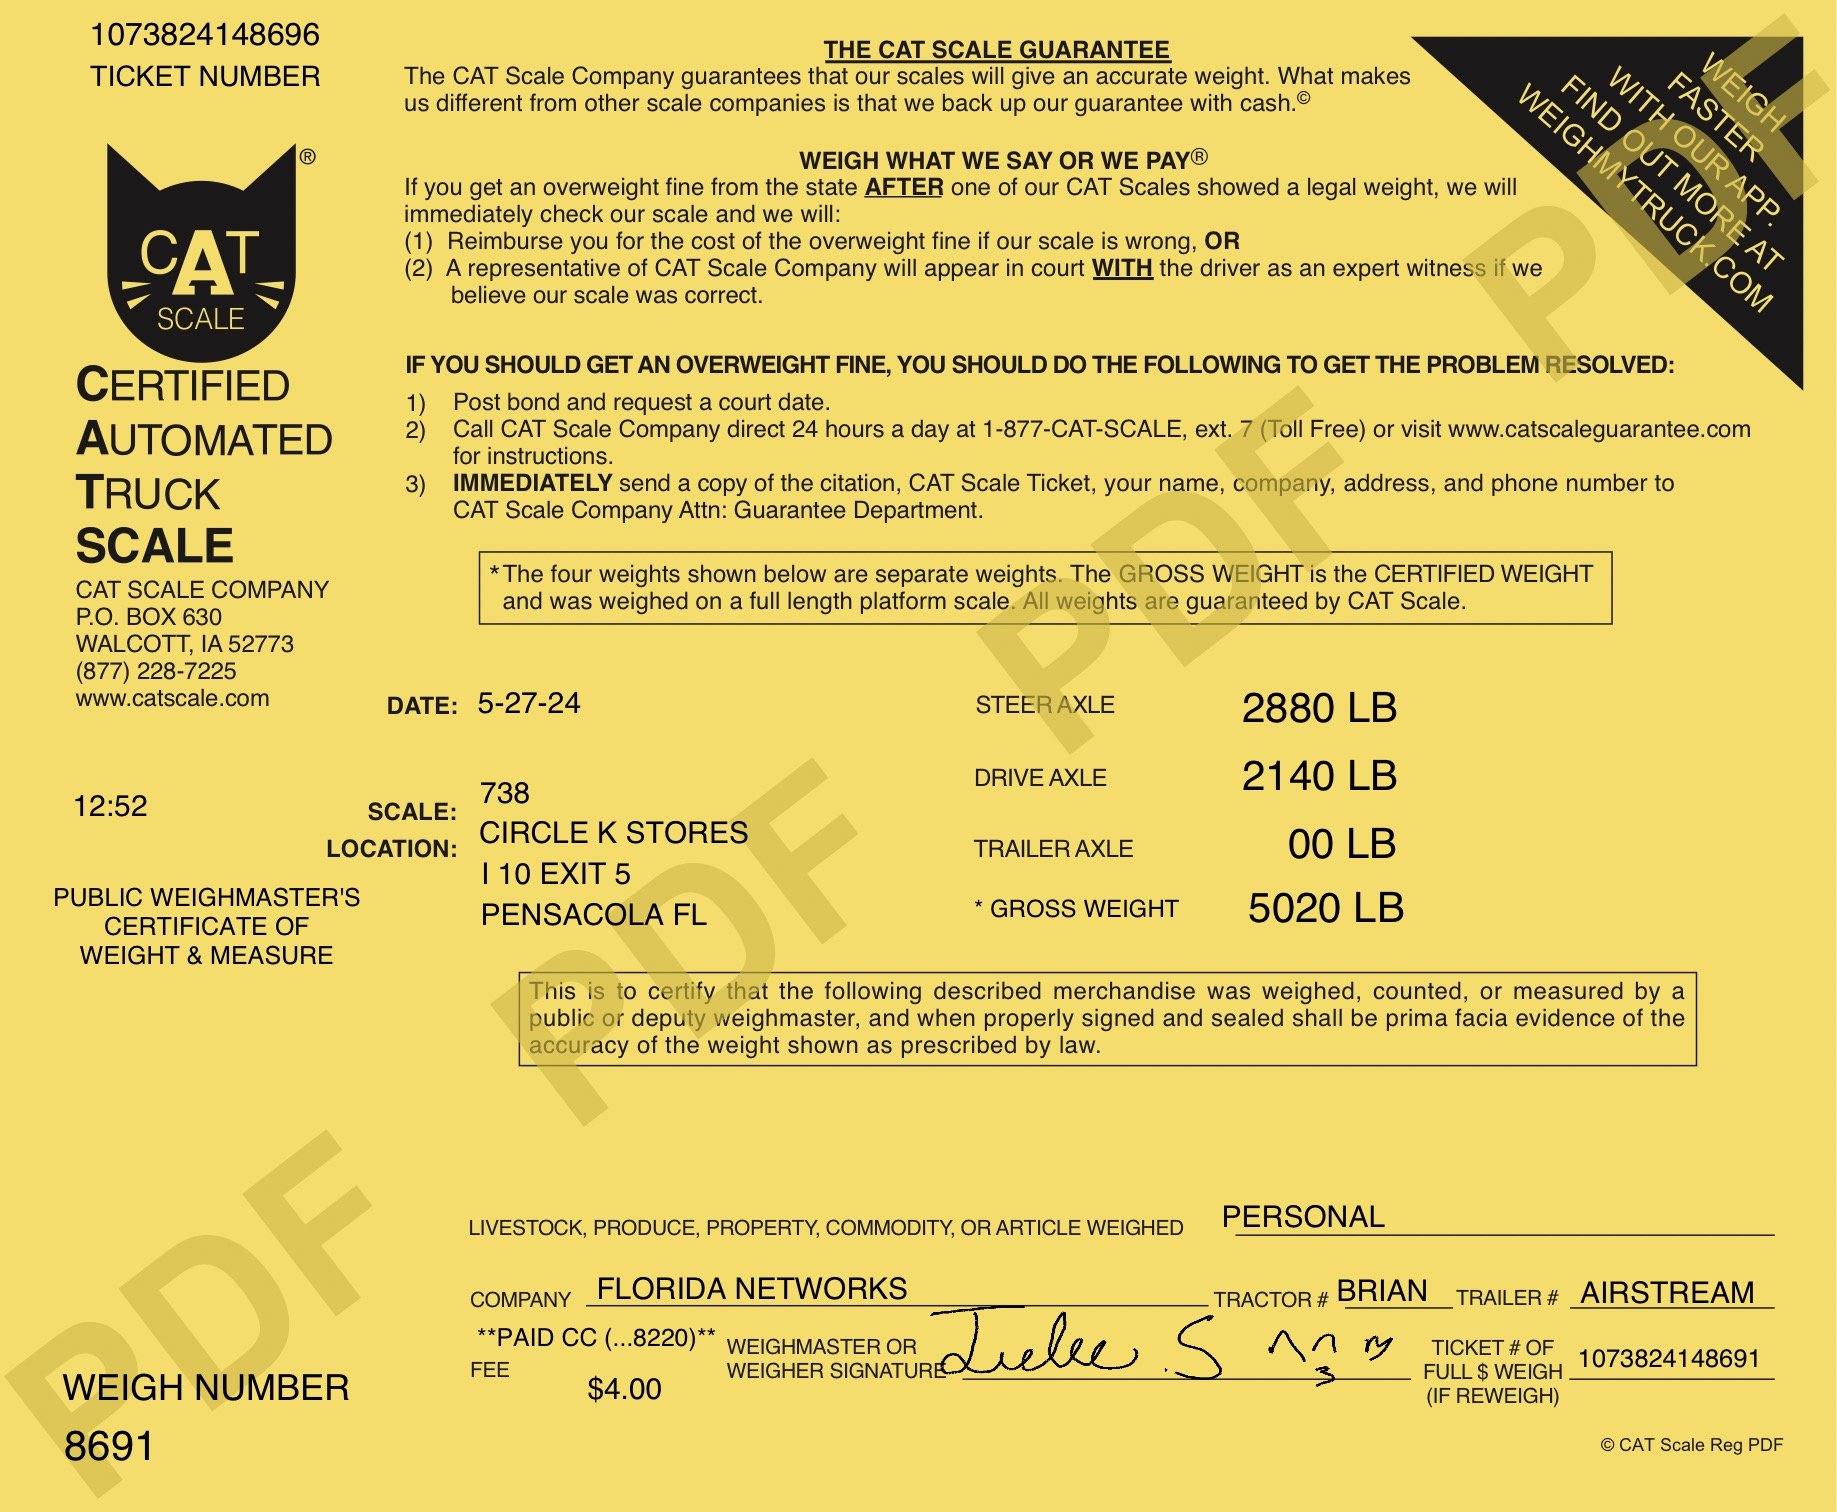
With all of that done, it was time to go weigh it and see how bad I screwed it all up. Truck, Airstream, and 50 gallons of bleach water in the fresh tank.
After subtracting the weight of the water (425 lbs) we come to a total of 5755 lbs dry weight. I thought it was going to be 6000 or slightly over. Owner's manual says it weighed 4850 dry when it was new. With the beefed up frame, 3/4" marine ply floor, 2x4 framing, actual tile floor in the shower, and everything else, I've added 900 lbs to the original dry weight. I think the new axles were heavier as well. Anyway, I opted for uprated axles. Original gross weight was 7100 lbs with the 3200 lb axles, and with the 3500 lb axles the new gross weight would be 7700 lbs. So really, I only lost 300 lbs of capacity. Still, I have 1945 lbs of cargo and water capacity. I can live with that!
Would I do this again? Not no, but HELL NO! The only things I haven't replaced on this thing are 70% of the frame, the skins and ribs, and the windows. It's brand new. All of it.
(11,200 weight is truck + trailer, 5020 weight is just the truck)
I Forgot to Post an Update, So Here You Go.
I waited way too long to post, so here’s a firehose of project updates!
Holy smokes I'm long overdue for an update!
Recovery from surgery sucked. I was down for six weeks of not being able to do any heavy lifting and everything I needed to do to the Airstream was heavy lifting!
I last left off with the shower floor being tiled and only a couple of walls up. Now that the bathroom was fully framed in, it was time to frame in the closet so I would know where it ended, and the "nook" counter began.
And with a snap of the fingers, all of the walls were covered in tongue and groove cedar. As a reminder, this tongue and groove is only 1/4" thick and it's really light!
For a little bit of extra cedar, I used aromatic shiplap cedar inside the closet. This stuff smells great.
I struggled trying to find the best finish to use for the cedar, but settled on Amber Shellac. I think it has just the right tone I was looking for.
I then began framing in the cabinets.


A little bit of CAD for the fridge wall (Cardboard Aided Design)


I decided to take a break from framing and install the shower wall tile. These wall tiles are very light weight and made specifically for walls. It's about as light as the cheapest LVP you can find (no backing, etc). Ignore the gaps where it meets the aluminum shell. The way they fit together necessitated wiggle room. Still haven't figured out how to make that look good yet.
With the shower finished and the sinks not far from going in, it was time to tackle the plumbing. The flow is: Freshwater tank to water pump, water pump to accumulator, accumulator to one way valve, one way valve to water filter. From the City Water connection (built in one way valve), it goes directly to the water filter, then to the bathroom and split off to the toilet, water heater, faucets, then under the shower seat into the kitchen sink. There is a manual valve on the hot water exit from the water heater that is plumbed right back into the fresh water fill tube. This allows me to be on fresh water and spin up hot water without wasting it since the water heater requires flow to work. It also doubles as a way to fill the fresh water tank while connected to City Water.
I didn't plan on it, but my microwave fits perfectly on top of the fridge. I also wired in the tank sensor control panel and the power button for my inverter.
GLAMOUR SHOT! The counter tops are in! These things are gorgeous.


One huge problem I ran into is the really snazzy sink I bought is too deep for the Airstream drain. The drain pipe rests on the bottom surface of the sink and any water passed through the sink keeps the basket area submerged all the time. I had to revert to my boat knowledge and bought a sump pump made for boat showers and such. The sump sits on the floor, the sink is plumbed directly to it, the float switch senses the water level rising in the sump, then kicks on a bilge pump to pump it up and out. The drain line isn't connected in this pic. It works great. The only modification I'm doing is adding a Water Witch level sensor that will run the pump for several seconds after there is no more water in the sump. Out of the box it leaves too much water in there for my tastes.
A rare photo of me installing the flooring. I’m usually behind the camera. I had a friend come visit for a couple of weeks and she helped me with the flooring. Way more help than I realized!


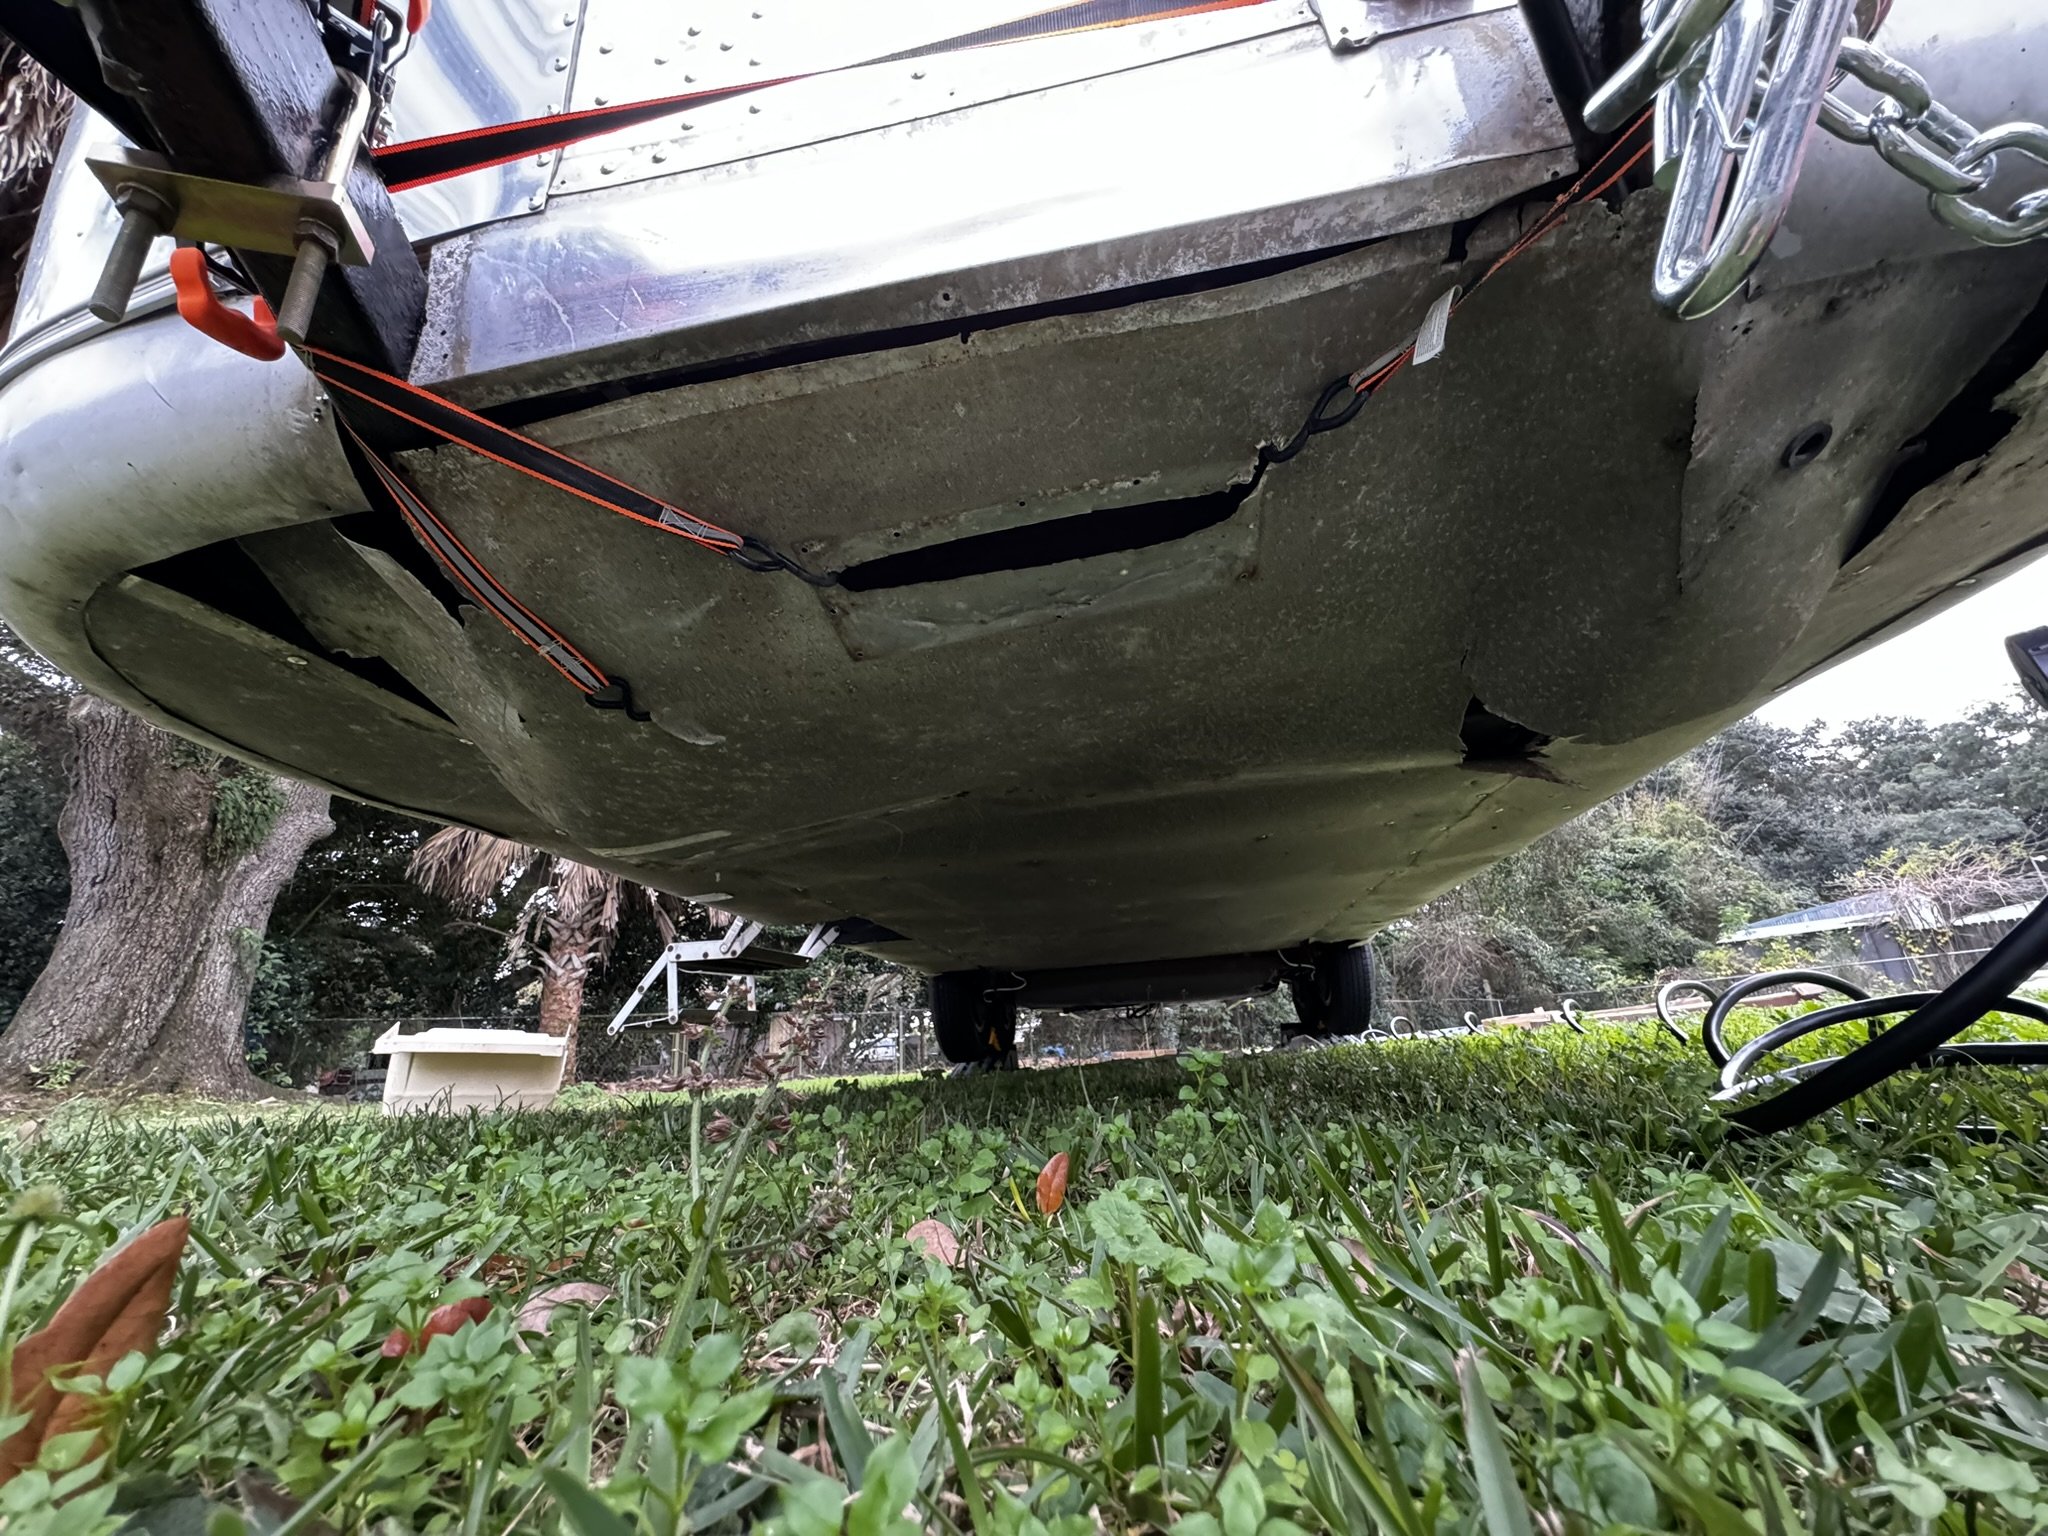
Remember the harrowing story about bringing this thing to Pensacola and the front fell off? Well, this is what fell off. A couple of pieces of the 2" polystyrene went with it and a couple of the screws holding the insulation in place. I even ran over my own screw and got a flat!
I cut some replacement polystyrene, replaced the front 48" of belly pan, and installed new stabilizers all around.
Now this one was interesting. I expected there might be an airflow problem with the mini split way in the back. There was. It wasn't completely awful, but a small fan really made a big difference on the air distribution. I found the perfect solution: AC Infinity Duct Fan https://acinfinity.com/inline-fan-systems/ I cut a hole for a vent grille in the bedroom, placed the fan right there, then through duct tubing in the closet (just hanging in the photo), and then to a grille in the kitchen nook area. The fan has a smart controller that will ramp up and down the fan speed and run the fan when it's below 68* or above 75* (I set those limits). It moves a significant amount of air pretty quietly and the entire Airstream is the same temperature now. The grilles will be painted black.
MY AXLES ARRIVED! I went with 32* down angle uprated axles. To give you an idea of how much lift to expect, the axle on the left is the new one supporting the entire load and the right axle is the old one hanging at full droop. The new axle still sits lower! New wheels and tires soon.


Today's project was the bed platform. I'm going with a North-South Queen. It's going to take up every inch from the back wall to the bathroom/closet walls. The large center section is hinged to lift the mattress for storage underneath. The left side will mirror the right side with the structure beside the mattress. It will be about 2" shorter than the mattress is tall, and will have doors on top and can be used as storage. The entire section on the closet side (imagine the hallway closet face extending all the way to the rear) is sealed off for outside storage. I think it's roughly 2' deep and 5' wide and 15" tall when seen from the side access door.
Next steps are to complete the bed platform, take care of a bunch of little things like corner trim, baseboards, sink securement, cabinet paint, etc and she'll be ready to hit the road. I'm still up in the air about the living area. Part of me wants a comfy reclining couch, while part of me wants a convertible couch for guests. Then, some other part of me wants a pair of recliners! I'll decide on that soon enough.
Goal is to be on the road by June 1st!
Moving Slow After Surgery…
As I’m recovering from hernia surgery, I buy a motorcycle. Because that’s smart, right?
Apologies for the delayed update. I went in for hernia surgery a couple of weeks ago and that wasn't fun! Thankfully I'm recovered a LOT so far. I honestly cannot recall the last time I felt this good and energized in my life as I do today! I had the hernia for a good ten years and finally did something about it. If feeling this good was a result of the surgery, then heck yeah it was worth it!
Since my last update, I got the shower walled in with the Schluter Systems foam boards and shower pan. Since this stuff is essentially Styrofoam, I'm hoping it absorbs any shocks from the road and keeps the tile happy.


After flying home from DC, I had one day to rest before surgery. All I remember is laying down on the OR table and chuckling with the nurse that the last time I was laying down looking up at those OR lights was 45 years ago. Probably in a different wing. I was 4 and had my appendix removed.
Oh, I forgot to mention, but I have the refrigerator and a new toilet on standby ready for their turn to go in.


I also bought a new (to me) toy. Kawasaki Versys-x 300. I wanted an on/off road capable motorcycle that was small and light enough to ride in the bed of my truck without having the tailgate down or intrude too bad on the payload capacity of my truck. She fits with the tailgate up and only weighs only 385lbs. Also, even though it's a small bike, it's a blast to ride!
My niece's boyfriend really stepped up to the plate and offered to polish the airstream for me while I was recovering! Had to order a couple of more wheels and bars so he can finish. Those should arrive tomorrow.
Doctor said no lifting anything over 25lbs for a month or so after surgery. We're two weeks in and I'm champing at the bit to get out there and work. There aren't a whole lot of lightweight things to do at the moment. I do have some new window seals to install. Maybe I'll do that.
Oh, I'm waiting to hear back from Colin Hyde to place the order for my axles. We had been sorting out the details before my surgery, then everything was put on hold. Hopefully I can get those ordered this week.
Laying Pipe…
Plumbing the holding tanks and the bathroom.
Since the last update I've managed to get all of the tanks fixed up and reinstalled! The dump valves and plumbing were all created from scratch to mimic the original, but one of the dump valves is slightly off from the original. Both valves need handle extensions, so I'll take care of the trim piece when I get the handle extensions. I also installed tank heaters on all three tanks - just in case. The good news is all three tanks passed the leak test, and the level sensors work just fine with the aftermarket display I bought!
I don't have any photos, but I plumbed the PEX from the street side fill and pump area under the floor to the curb side where all the water works are. I came up under the shower and went aft toward the water heater. Figure I'll go water heater->bathroom sink->shower->kitchen sink->washer/dryer. Yes, I am putting a washer/dryer combo in.
Speaking of the shower, the original shower pan is made of MDPE and is in pretty bad shape. Small 1/8" holes in the inside corners, smears of silicone in areas hiding damage, 8" long crack in the middle of the floor, etc. If it was fiberglass, I would have filled the holes, fixed the cracks, and laid a layer of gelcoat on - but MDPE? No dice. No way to fix it without welding it up. Combine that with the fact I removed the heating duct that goes from the front door area along the wall to the rear bedroom, there would be a 2-3" gap between the shower pan seat and the wall I'd have to fill.
After searching high and low how others have built RV/Van systems from scratch, I decided to go with the shower pan and wall system from Schluter called KERDI. They have polystyrene walls and pre-sloped shower pan with a waterproof felt-ish coating on it. Once the shower pan and walls are in place and seam sealed, it completely protects the structure from water or vapor damage. You can lay tile directly on top of it without doing a bed of mortar, barrier, mortar, then tile. I know tile is a no-no in RVs due to weight and mortar cracking, but I'm out of workable options. The KERDI is super lightweight, and I'll only be using actual tiles on the floor, up the wheel well, and the sitting area of the shower itself. For the walls I found some large click together LVT that is extremely light at Lowes.


The shower drain has been a PITA to sort out. Not being a plumber, I thought a proper P trap was required for all drains - in code or out of code. The problem is, all of the off the shelf p-traps connect directly to a drain going through the wall. I needed the P-trap to be lower than the drain by a significant amount. I went to the hardware store three times today trying to make something work. The orange place kept trying to cobble something together that would pass code. If I said "what about taking this and...", he would shoot it down and say you can't do that. The blue place saw my dilemma grabbed a few parts and said, "Will this work?" By gosh, it sure will!
It's not in the photo, but the KERDI drain has pretty good depth to it. I think it's around 7" from the tile bed to the end of the drain. This was compounded by the fact I have a few adapters to make all of this work.
So, from the KERDI drain - which is a 2" PVC pipe size, I have: 2" to 1.5" bushing -> 1" of 1.5" pipe -> 1.5" trap adapter -> 90* trap adapter ->1.5" J-Pipe short side... long side of the J pipe-> 1.5" flexible trap pipe -> 1.5" trap adaptor -> original AS 1.5" ABS pipe. WHEW!
For those of you recoiling in horror at the sight of 2x4s, they are actually used sparingly! I'm only using them where vents are in the walls and needing a cavity, the shower floor support, or wall corners/doorways that someone may lean into heavily. Everywhere else is getting 2x2 or 1x* boards.
While I was at the blue hardware store getting plywood to start building out the base for the bed platform, an associate asked if I needed any help and inquired about what I was building. Once I told him, he said, will sheathing grade ply work? Of course, it would, and he escorted me into the back where I was greeted by a cart loaded with plywood. Slightly thicker than 1/2", which is 19/32" I think. Most of the sheets were 5' long, with a few shorter cuts in there. There are six more layers hidden under the stack in the photo. They gave it to me for FREE. To them it was trash. There were a couple of pieces with terrible layers in there that aren't good for much, but the rest are perfectly usable. Lesson learned - when you need random small amounts of lumber, ask if they have any they are going to throw out!
Once I had my materials for the bed platform, I needed to find out where the bathroom and closet walls ended so I could re-create them. This was easier than I thought, as the bathroom vent goes inside this wall. Once I got the two walls framed up I glued and pinned tongue and groove 1/4" thick cedar to the studs. Man, every single board had to be custom scribed, cut, and sanded to fit! I didn't mind it too much. It smelled wonderful as the wall went up. I was initially concerned with the weight of the cedar, but this stuff is lighter than 1/4" plywood of the same dimensions! As long as it keeps it's shape after bouncing down the road, that's all I care about.


During an especially rainy day I decided to ask Google's AI Image generator to help me out visualizing some interior design and colors. Here are the top three that I liked. I'm leaning heavily toward the first one...


Can’t Find a Part? 3D Print It!
3D printing parts that are hard to find…
Not much completed this week other than going through a box of Sudafed and tissues. It's been a miserable week!
I did manage to design and 3D print some handles for the window lifts. The originals crumbled in my hands as I took them apart. I measured the base to be as close to the width of the arm itself. I think they are a little longer than the originals - these are 30mm long. It's a good size. Chunky, but not gigantic.
I designed a hex "tube" to capture the nut on one half of the handle set, but I realized after I printed them that the hex side could double as the screw side so really a single model can be used for each side of the handle.
I haven't ever seen these replacements for sale. I wonder if there's a market for them? They can be printed in just about any color.


Working on screening the interior window surrounds today. My replacement belly pan aluminum should arrive tomorrow. Once that is here, I can rebuild the tank valves, install the tank heaters, and get the waste tanks and pan reinstalled. Not looking forward to that job. The tank valves are attached to the tank pan, so I have to assemble the tanks to the valves in the pan and then lift the entire assembly up to the frame. I don't have a floor jack anymore, so I'll see if I can do it without.
Wood You Lend a Hand?
The interior construction begins…
Since my last update I've been able to accomplish a good bit of tasks, but it feels like I got more accomplished. Either I'm forgetting some things or the holiday time warp is messing with my head!
I'll spare you the gory details of up close photos, but I was able to successfully weld up the cracks in the tanks. Since they were on the outlet spout, I tightened a hose clamp around the spout while I did the repair to hold the cracks closed. I used the iron the melt in some stainless mesh on both sides of the spout and laid down a layer of HDPE from a plastic welding rod to fully encapuslate everything. Of course, this means the outer surface isn't perfect anymore - but dang close to it - so I'm going to either smooth it down some more or find somethinng to put between the rubber connector and the tank spout to make sure it 100% seals. I do NOT want any grey/black tank leaks.
I bought valve rebuild kits for the grey/black tank valves. I'm waiting on the new belly pan aluminum to arrive before I complete the installation with the tanks. Before I mess with them again, I want to be ready to put everything together and back in the Airstream in one shot. See, whoever had this thing for the last 20 years never emptied the tanks so there is still some "stuff" in there that is dry, flaky and generally looks like mulch. So... before I get to the point of reinstall, I want to try and clean out the black tank, hook everything up, test for leaks, and get it reattached as quickly as possible. Its just gross and needs a few flushes to be - uh - less gross!
Another item I checked off the list but didn't get a photo of is the new gaskets on the rear storage door and refrigerator access door.
Speaking ofthe refrigerator, I scored a deal on a small Hotpoint refrigerator from Lowes just before Christmas. $300 off the regular price, so I got it for $370-ish out the door with tax!
In my last post I mentioned that my 110v is all in. Well, that was wishful thinking. I had planned to protect all circuits with GFCI outlets or breakers. However, any time the split unit is running all the protected GFCI circuits but one will trip. It's not immediate, and I think its when the compressor is either just kicking on or when it's under a full load. All of the 110v lines, distribution box, and outlets are new. Everything is properly wired and grounded. I've toyed around with and without bonded grounds at the generator (just a tad far from the building for power right now), and with/without the bonded ground in the distribution panel with no changes. Since this is a giant metal box with electricity running through it, I'd really prefer to have GFCI operational. I have standard outlets swapped out while I continue on with other things and troubleshoot with Renogy support.
The day before yesterday I managed to finish the insulation in the center ceiling run and get that section installed. Sadly, I didn't know how the center section came out when I did the demo and mangled the J channel pretty bad getting it apart. I can't seem to find that channel anywhere so I just riveted the edges and I'll cover up the seams with some wood trim. It's not awful, but you can see the stress waves along the edges from where I removed it the wrong way. You can also see where I said "Screw it, I'm covering the seam with wood trim. I'm not fighting that wallpaper anymore!"
Along with the center section being complete, I also got all of the ceiling puck lights installed. They are click on-off, dimmable, and even have a dim blue mode for a night light. That makes two in the front dinette area, one directly over the door in the center, one over the kitchen sink area, one over the counter next to the fridge, one inn the bathroom, and two in the bedroom. They are quite bright and even on their lowest setting at night it is super bright inside. I'm going to get a few battery powered lights to strategically place around as well.
I also started laying out where the walls are going to be. There are two walls whose locations are dictated by the vent pipes - both bathroom walls. The original bathroom/bedroom wall was a thin sheet of woodgrain metal and the vent pipe was just tucked in the corner and hidden with a decorative cover. Since I won't be using any of the original bathroom equipment, I can rebuild this wall to be hollow and hide the vent pipe completely. It will also allow me to drop a CATV line to an outlet in the bedroom since I forgot to do so next to the power outlet in there for the TV.
You can also see the basic layout of the platform for the bed in this shot. I'm going to remove those slats along the walls and build it from the ground up instead of a laser level.
I also sanded all of the window trim and matched them up with where they go. The goal is to get them rescreened and reattached today. I was able to get the large window trim without a screen installed last night.


I've been temporarliy reassigned at work to a single customer working remotely, so I'll have more time to finish this thing instead of jumping a flight every week or so.
Now that the metal work is done, it's time to break out the Shopsmith and do some wood working!
An Eventful Road Trip
A road trip to Pensacola results in some unexpected damage!
My water heater arrived, and apparently new water heaters aren't as big as the dinosaurs they replaced. I could have spent $100 on a black painted steel adapter kit, or fab up a patch panel out of spare sheet I had laying around. I'm contemplating having the water heater door powder coated silver.
Time to finish up the rear frame rails and get the split unit installed now that the powder coater is done with it. After mocking everything up, I'm going to wind up using every inch of the 1' longer frame rails to mount the condenser. Here's the cut profile. I left the bottom of the rail uncut and bent that up and welded the seams to enclose the back of the "ramp". I welded in a tab at the "notch" about a third of the way up, and welded in nuts in the frame for all four bolt holes.
This is what the result looks like. I already tested the dropped frame rail, as when I hauled it out of my neighborhood the rails dragged on the intersection going up a steep hill.


The mounted split unit. It was supposed to look chrome, but they clear coated it and it removed the shine and yellowed it. Oh well. at least it isnt beige!
It was time to load this gal up and haul her to Pensacola. I wired up the brakes at the hubs, installed a breakaway switch, and double checked everything I thought to double check. Notice I said "thought to double check".
Keep in mind I haven't even done so much as give this thing a shake down run around town. It's a two mile run through city streets to the interstate where I head north for about an hour and then turn left and go for several more.
Trailer pulled smoothly at 5 under the limit. The steering felt a smidge light. I stopped at the first rest stop, re-torqued the wheels, checked the hub temps, and cranked down to the next mark on the Hensley hitch to put a few more pounds out front. Back on the road I noticed that the trailer liked to wiggle going down the road. Not really a sway or anything dramatic. Just looking through the empty trailer from my center rear view I could see the trailer wandering around back there. The Hensley hitch isn't supposed to allow that.
I stopped at the next rest stop to inspect things. First thing to check was the torsion bars. They were loose. Uh oh. Do you know what I forgot to do or double check? I forgot to weld the Hensley brackets in place! I don't care how hard you crank down on those U bolts, they are going to slide around with that hitch unless they are bolted through the frame or welded. I headed for the nearest Tractor Supply and grabbed some appropriately sized bolts, corresponding tap, and drill bit. I drilled and tapped one bolt for each frame rail in the parking lot and I was ready to hit the road.
It was then that I saw an omen of a bad time coming. When I ran the new 7 way harness, I had to open up the front of the belly pan to get access to the wiring. I hadn't buttoned up the leading edge yet and the belly pan at the very front edge was parting from the trailer with a slim smile. Never fear, with as much aluminum tape as I used inside with the insulation, I had plenty with me in the parts bin. I grabbed a roll and taped up that seam to keep the wind out.
It was a little bit prior to reaching Tallahassee when the storm hit. Ihad been getting storm warnings on my phone the past couple of days. Figured I'd just drive carefully through it. No big deal. I was following a car hauler semi when I noticed the trailer was now bobbing up and down. What the heck is it now? It was pouring so I waited until I found an overpass to park under and do a quick innspection.
I was HORRIFIED! My belly pan had ripped loose at the front and peeled back a good six feet or so and the pavement was mangling it. I'm on the side of the interstate. It's pouring. I don't have anything to reattach it with. I don't even have anything to keep me dry while I try and repair it! I grabbed a ratchet strap and secured it the best I could until I could get somewhere to fix it.
A few more minutes down the road and I could hear scraping. Now, the front edges of the belly pan were dog earing down and scraping against the pavement! I wound up on a long stretch between exits and came across another rest stop first, so I pulled in to see what I could do. I added another ratchet strap and bashed the remains of the belly pan up closer to frame to be out of the air flow. At least it's stopped raining at this point. I definitely lost some 2" sheets of insulation from under the floor when the belly pan came loose. I don't know how many yet.
I finally made it to Pensacola in one piece. Time to get back to work on this thing!
First up was the 48V Renogy Solar Charger/inverter and 4x 100Ah Lifepo4 batteries. I chose to go 48V, as it doesnt require heavy gauge wiring and (apparently) it's less lossy to invert from 48Vdc to 120Vac. I also bought a Victron DC-DC converter to run the 12V loads in the camper. This is a temporary install. Once I get to the dinette building phase, these will be rearranged.
While I was doing electrical work, I went ahead and installed a new plastic breaker box and outlets.


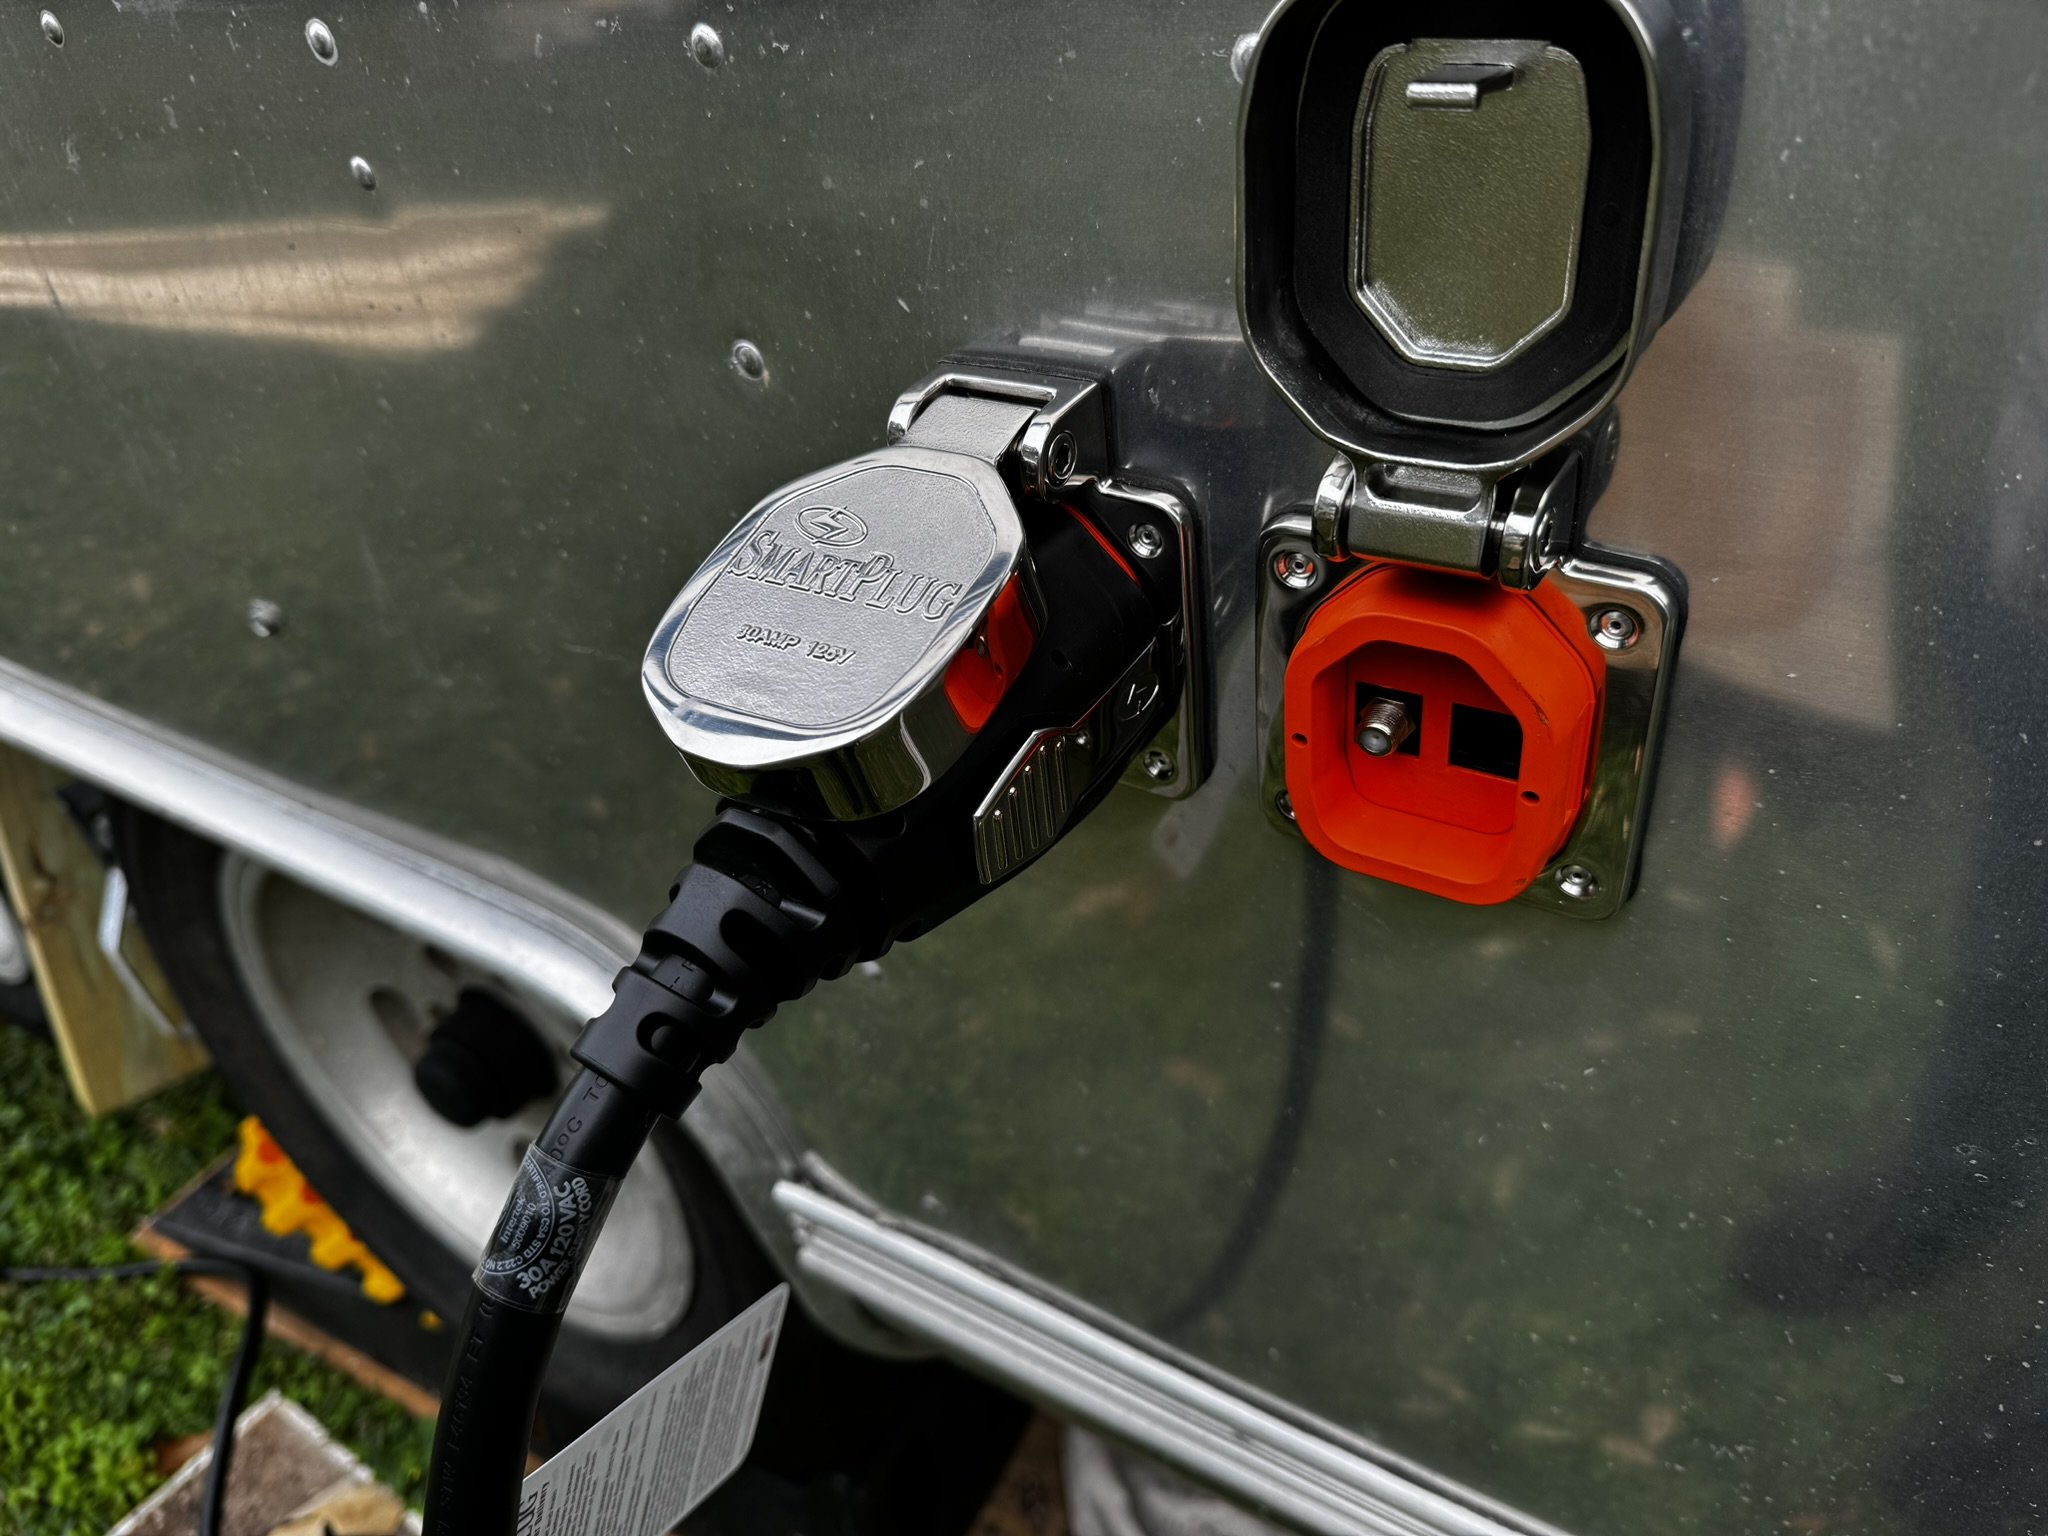
To wrap up the electrical side of things, I bought a Smart Plug power cable, power inlet and TV/Internet inlet and got them installed today.
The split unit was actually installed before I headed to Pensacola, but the lower interior panel wasn't installed yet, so here we are all wrapepd up. Also, if you decide to mount a split unit - go above and beyond and overkill the interior unit mounting. I used the bracket that came with it, snapped it in nice and tight, but a harsh bump sent it crashing into the floor. Fixing that problem is on my to-do list. It didn't harm the unit and there was plenty of flex in the lines. It heats and cools just fine. Don't fret about the lines. They will be covered and look nice.
The next task is the holding tanks. I got the black and grey out yesterday and found the outlet neck on the grey tank has two cracks running in line with the outlet. I bought a plastic welding kit to see if I can repair it. Inca doesn't make these tanks anymore. I had considered trying to find similar tanks to drop in, but the cut out area for the drains is pretty unique for this size tank. They are either the correct size, but pure rectangles, or they have a notch, but won't fit in the openings I have available. I had even considered making my own tanks out of fiberglass with a plywood or foam core. I'm going to try the welding repair first.
I'm going to head back "home" this weekend to load up some belongings to move with me to Pensacola.
My to-do list is getting shorter:
Repair and reinstall tanks
Run PEX plumbing and install water pump
Install plumbing drains and vents
Install shower pan
Build walls (bedroom/bathroom, bedroom/closet, bathroom/kitchen, bathroom/hall, closet/kitchen, refrigerator to dinette)
Build bed platform
Build cabinets for bath and kitchen
Build dinette
New axles, wheels, tires
Of course, there are hundreds of steps for each of those steps, but with HVAC now functioning and power outlets that work inside, it's going to be a breeze.
Also, I now have a flat - and I mean zero PSI - tire from the trip. Like everything else... if I'm gonna replace a tire, I might as well replace all four. If I'm replacing all four tires, I might as well replace the wheels too. If I'm replacing the wheels and tires, I might as well replace the axles, right? Lol, it never ends...
I’ve Been Everywhere, Man
The interior walls are complete!
No rest for the weary!
My flight home from LA was a red eye, so it took a solid day for me to recoup. I spent Saturday spending too much time between soaking with paint stripper and it wound up drying out by the time I could get back to it. This created a leopard print of vinyl still stuck to the panel after pressure washing the bulk of it off.
I was working on that panel when work called and asked if I could be in New Jersey at 9am Monday. WHEEE! A flight Sunday afternoon to NJ, at the customer's by 9AM, and on a plane home by 3PM. I got in late last night.
Today I finished the lower panel that goes under the front window by the door and got it installed. I'm working on removing the leopard pattern and bird poop from the rest of the lowest panel for that side. So, uh, birds really like pooping on shiny things.
I just got off the phone with work and I'm flying to Seattle in the morning. I have a side gig on Saturday, so that leaves me with what I can get done today and Sunday morning before I head to Orlando for a job.
My plan was to have the interior finished prior to hauling this thing to Pensacola before Thanksgiving. If work keeps it up, I may have to haul it incomplete and finish it there!
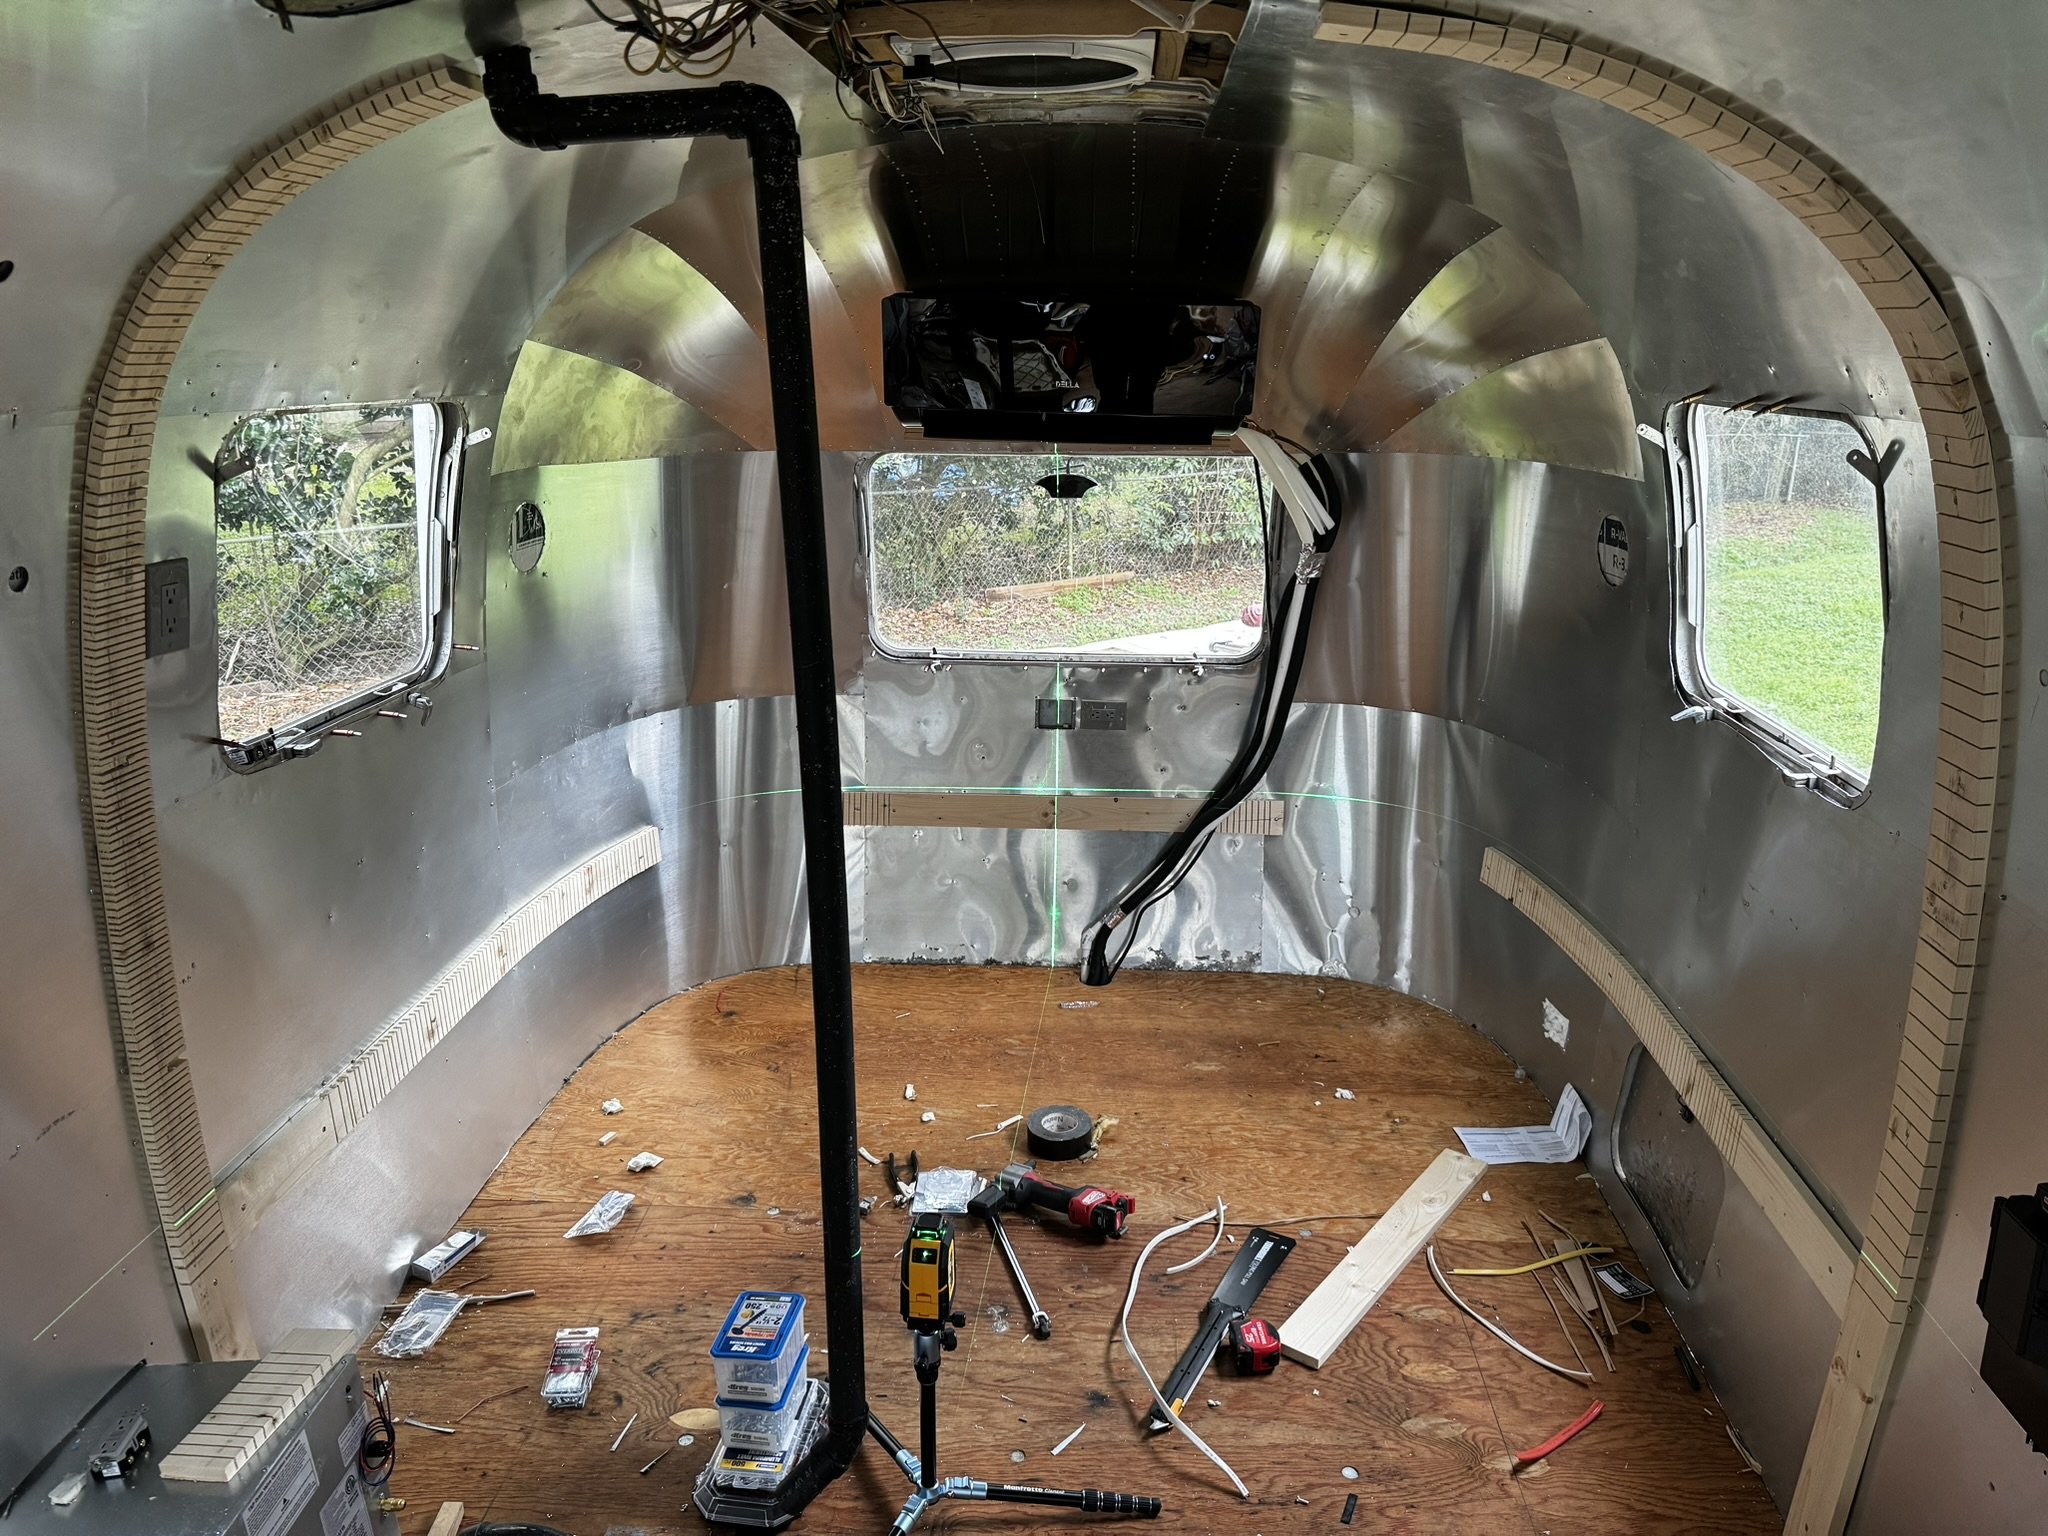
UPDATE: Huge milestone! All of the interior walls are attached! I'm leaving the run down the center of the roof and the front and rear center panels for last in case I need to run an unexpected wire or something.


Work has kept me hopping! The week after I went to New Jersey and Seattle, they had me go back to New Jersey. Different job, same customer. Then it was Orlando. This afternoon, I'm off to Bradenton, FL, which is close to Tampa. Monday I'm off to PA and return on Thursday. I'm going to try and get the Airstream to Pensacola in the next couple of weekends.
I also bought a 120v split unit for the Airstream and it's currently disassembled and the sheet metal parts are at the shop getting powder coated to match the polished aluminum. They said they would be done with the parts next week.
My water heater should be showing up today, but I don't think it will be here before I have to head south. I chose an on demand unit. Had one in a previous camper and was instantly spoiled. I'll just have to watch it when boondocking!
Next up: Road Trip!
The First Wall Skins Are In!
A super quick update about the wall skins
I was able to get the road side wall finished yesterday!
Trying to manhandle that 21’ length of aluminum was quite a chore. I did it though.
Sorry for the short update, but it’s time to go to the airport and go to work!


Until next time!
Oooh… Shiny!
Interior panel work. Installing the insulation and removing the wallpaper.
Well, since my last update I have been to Orange, CT and Miami, FL for work. Next week is D.C.!
I am one of those that prefer the bare metal walls. As soon as I found out stripping them was a thing, I knew that I was going to do that even before purchasing the Airstream.
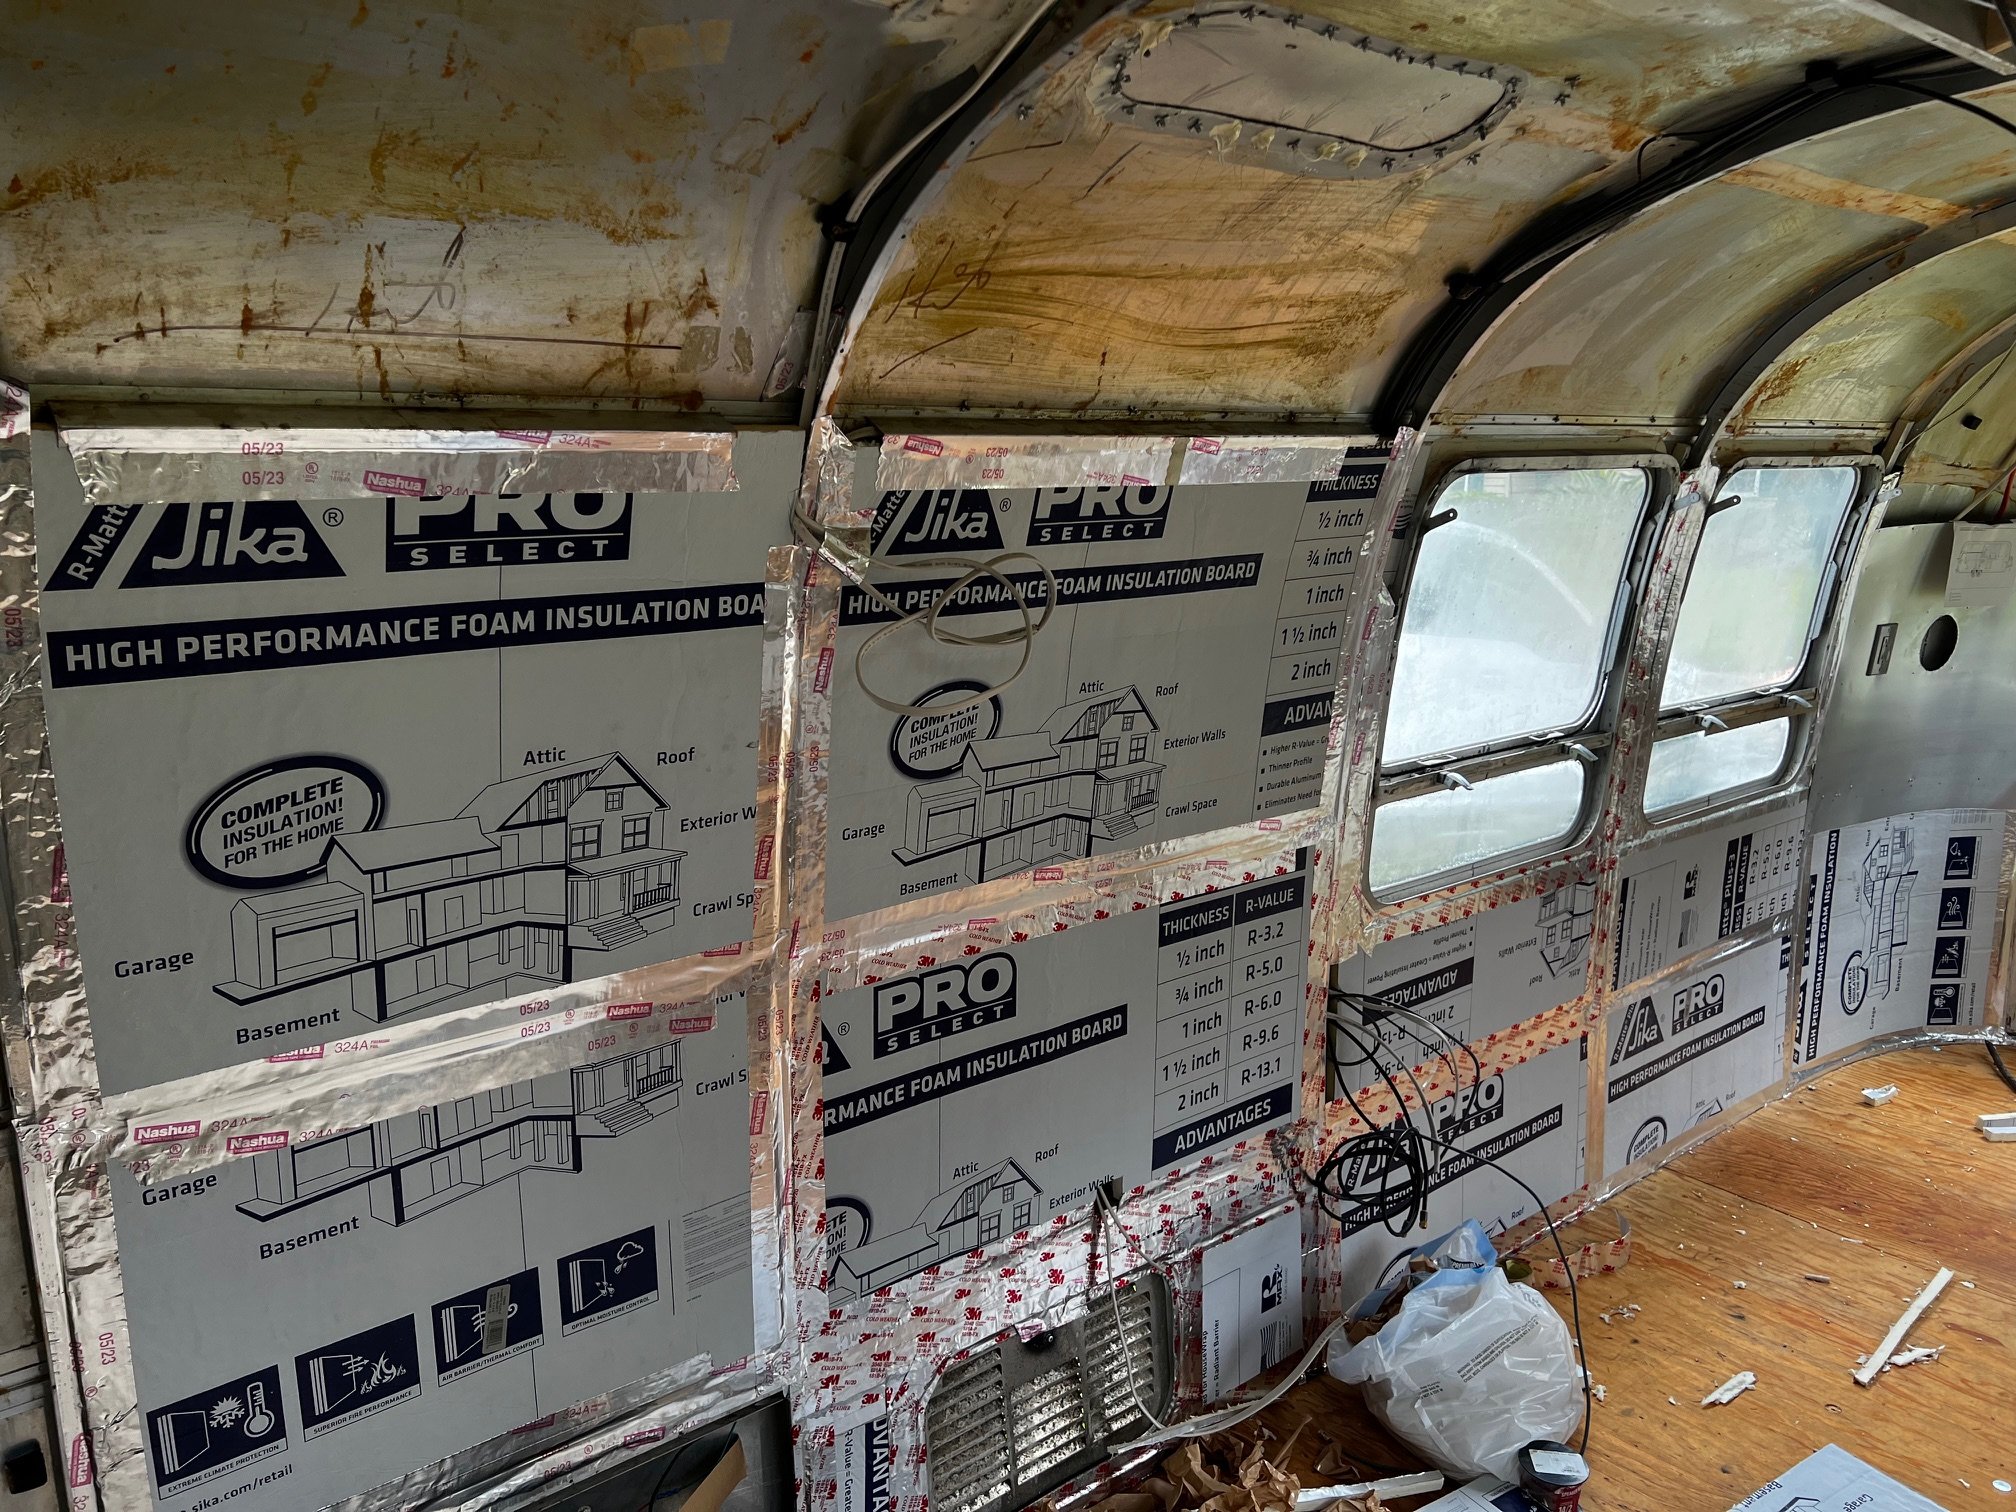
In between my travels, I've managed to get the walls insulated with 1.5" of Pro Select R-Matte Plus-3. I planned on three layers of 1/2" to conform easily to the body, but I mistakenly bought a mix of 3/4 and 1/2", so there ae two layers of 3/4" in the vertical surfaces.
Not shown is a Furrion 30A shore power inlet, Weatherproof RJ45 inlet, and Furrion Coax inlet on the street side just behind the rear wheels. Not sure how often I'll get cable TV access at campgrounds, but the RJ-45 is for plugging in Starlink or another standard wired internet access. The power is for... well, power!
I went ahead and ordered the segmented panels from Airparts and started to tackle the end caps.
I grabbed what I read as Rockwool at the big box store, but I must have grabbed the wrong package, because I wound up with fiberglass blow in insulation. It worked OK, but it didn't like to stay put. It will be fine. I put a panel in, and then stuffed it in behind it.
Airparts recommended 12" panels for the job. I wound up overlapping them at 1" for the first two seams, then increased it to 2" for the rest. The center piece would have been too crowded had I just stayed with the 1" overlaps.
The worst part about the end caps is getting the first ones right. The rest are cake. With the compound curves if you cut the first piece where you think it needs to be cut, you will find out real quick that you are wrong! Give yourself a solid 1/2" or more margin on that first cut line to match the top of the window. When you cut it, the panel will lay differently and more into the curve. Sneak up on that final cut with cut, test, cut, test, cut, fit!
Before you know it you will have a nicely done end cap!
The front was the same story. This time I used cellulose insulation instead of fiberglass. I was hoping it would stuff between the foam blocks better. As you can see by the amount on the floor, it did not stuff very well. I added a couple of 12v puck lights that are dimmable and have a blue "night light" mode. Whoever thought blue LEDs were a good idea to put in things to be used in a bedroom are monsters. I've had phone chargers, TV indicators, random recahargable doodads, etc that have all had the burning blue eye of Sauron burning into your eyes as you try and sleep. These don't look like that though. It's kinda frosted and subdued. We'll see when I go check them out this evening.
Also, to get the first panels level with the windows I used a 360* laser level. It worked GREAT. I didn't have to eyeball anything or rely on artistic impression of where the cut line should be. This is the one I used: https://www.amazon.com/Leveling-Hori...s%2C112&sr=8-7
The first big panel is devoid of wallpaper! I was pumped, as once these big pieces start going in, things go quickly. Of course, these take a fair amount of time to complete.
Next time: WALLS!
It won’t make a good boat. It leaks.
In this post, I patch holes and seal the roof.
Another big fat update!
I've been pretty busy lately. Work is about 50/50 right now. This past week I was at home with nothing on my schedule, but the week prior I was in DC and Chicago. Next week I'll be in Orange, CT and Tampa, FL.
The things I've completed may seem a little ADHD. Oh well.
First thing was to remove the existing clear coat. It will eventually get polished, but I have some patches to make and I'd rather not have the clear coat sandwiched in between a couple of panels, so I may as well remove it all.


I patched the holes where the original two batteries and vent were in the front, as well as the refrigerator vent. I'm going with a 12v fridge, as the last 3 way fridge I had tried to burn down my last camper.
While I was up there I put on a couple of coats of Bus Kote. This stuff works great. IR thermometer shows a solid 10*F difference in temperature on the back side of the metal between coated and uncoated. Yesterday I resealed all of the roof vents and put the MaxxAir vent covers on.
On the inside of things I've been slowly removing the vinyl from the interior wall panels. I've found that smothering the panel with paint stripper and covering it with a garbage bag yields the quickest and best results. Make sure when you apply the bag to smooth it out so there are no air pockets. Once the vinyl is loosened, peel it off. Then pour *and let soak for a few seconds* Goo Gone Professional. I learned the hard way that just using a wet rag and Goo Gone does not work well. The glue and wallpaper remnants need to soak in Goo Gone for a few seconds, then it will easily wipe away clean. Wipe a coat of mineral spirits to get the Goo Gone off, then spray and wipe with WD-40 to protect it and keep fingerprints at bay. I have all of the end cap sections done. Time to start laying out the big 20' long sections now.


3 layers (sometimes only 2 depending on the curve and space) of 1/2" insulating panel. Each panel is R 3.2, so this technically should provide an R 9.6 when completed.


Back on the outside I replaced all lights with LEDs, and added a Furrion S camera system with two side marker cameras and one rear mounted camera. Still working out where/how to mount the rear camera so that it can see the edge of the rear bumper and not be blocked by the rear awning.


Let’s Bring It Home
I finally get to bring the Airstream home!
I finished the center section of the floor with the proper dimensions based off of the wheel wells.
I decided to go with two layers of 2" polystyrene for insulation under the floor. Once the insulation was installed, it was time to reinstall the belly wrap and the belly pan.


Next thing I knew, it was time to bring her home to continue with the inside work! I cannot tell you how happy I was at this moment!
When it promptly down poured as I urgently needed to unhook and get to the airport for work!
So that's where it stands. Next up is to start documenting what remains of the wiring, planning out the wiring for future solar, and begin with the insulation and re-installation of the interior walls.
The Eagle Has Landed
Reattaching the body and bulletproofing the rear sag weakness.
Eagle has landed. While not attached, I had to set the body down before sundown. 63 days from top popped to reattachment ready. My job regularly has me travel out of state for work, so if I worked from home or in town - as well as didn't have to drive 30 minutes one way to work on this thing, I could have completed it sooner. Still, I'm happy with the current timeline.
Reattaching the body was pretty uneventful. When I was replacing the outriggers, I made a tool to help me keep them in place. Essentially I took a 3 foot section of 1" aluminum angle and drilled a 1/4 hole in one end. I dropped a bolt through that hole, then used a couple of clams to clamp the angle to the frame so that the location of that hole wouldn't change. I'd cut the old outrigger out, then line up the hole of the new one with the bolt sticking through the angle, then weld it in. By doing this, all of the original outrigger holes in the channel lined up perfectly, which means my body skins should line up perfectly to the channel. Should. Should line up.
And now for the weak link of this build. I tried to find a source for a replacement rear curved channel but the only one I could find would be nearly $1k to get it here - AND I'd have to cut it in half to make it fit the narrow body. I looked at what others have used, and for some reason thought those setups were worse than that I came up with. My thought was a couple of sticks of 3/4" angle with a shrinker and stretcher to make my own that would get riveted and welded together.
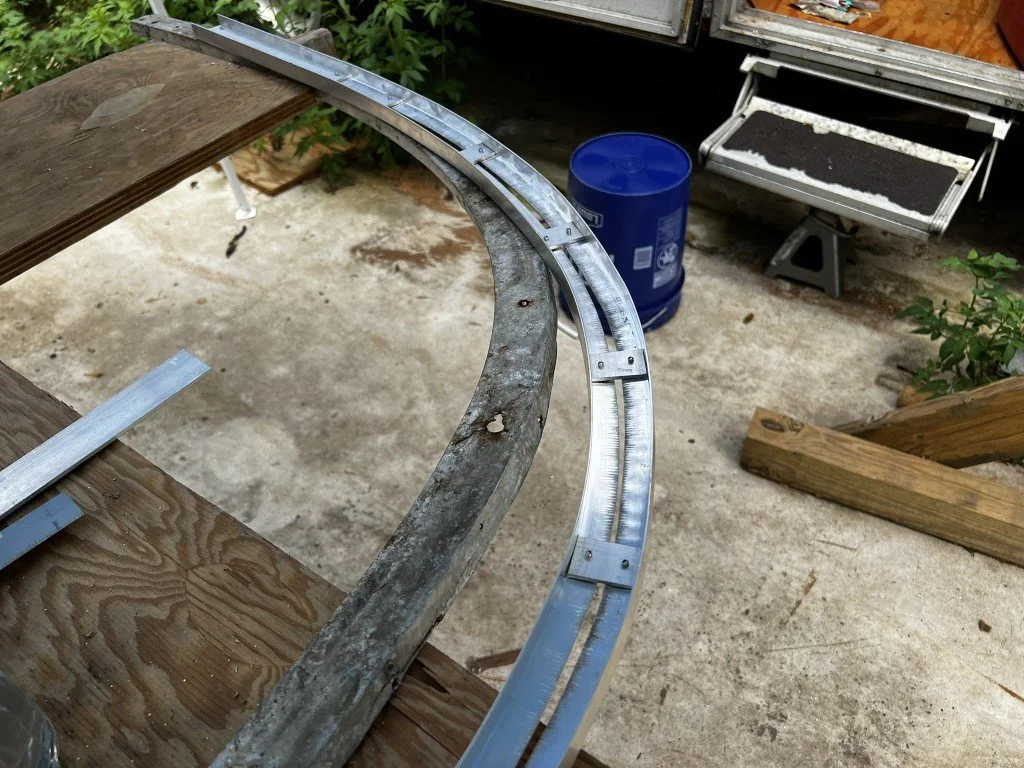
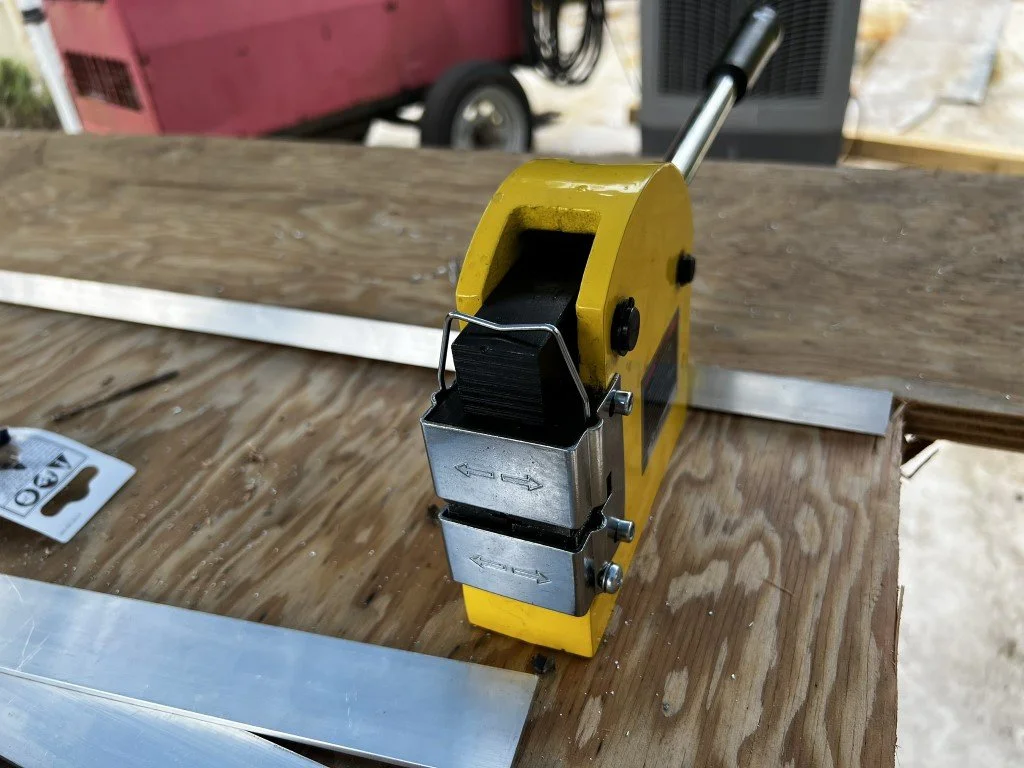
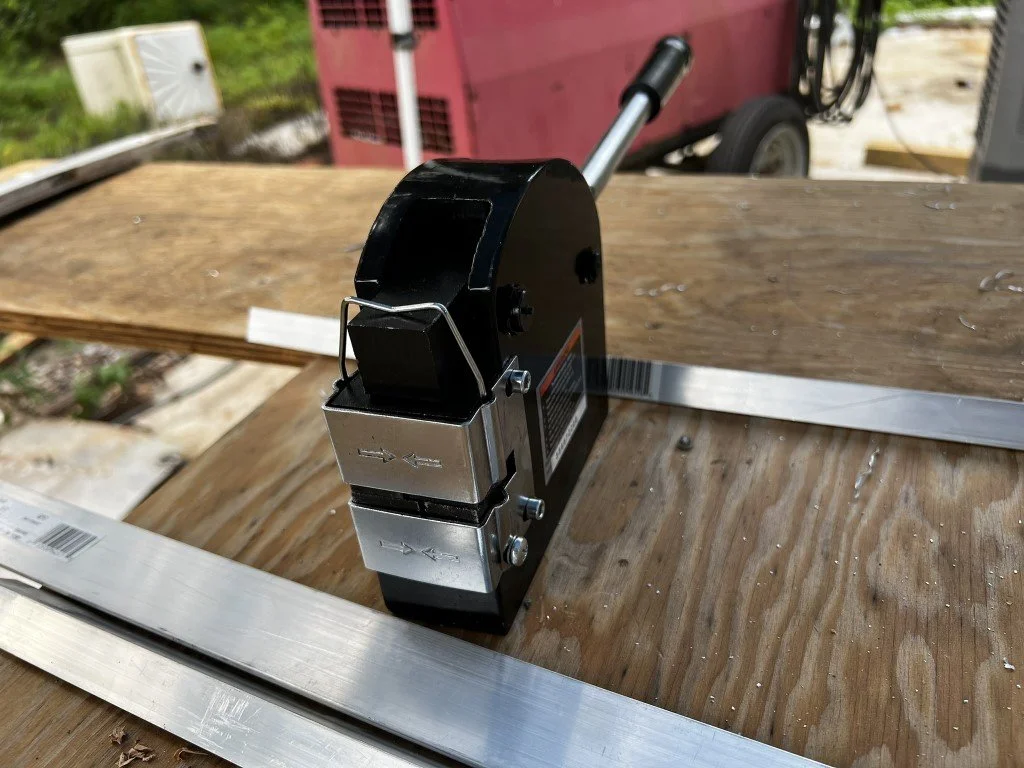
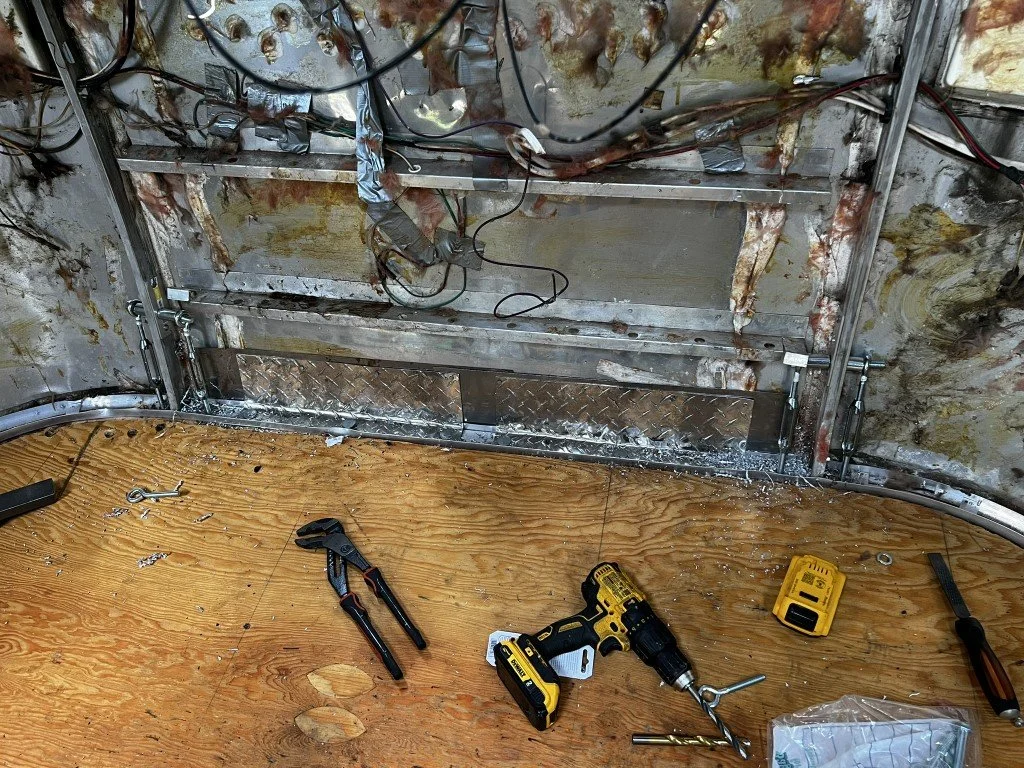
The result wasn't bad, but it's not great. One solid piece is preferred for strength. I tried to beef it up with a piece of 1/8' aluminum on the inside rear of the wall, bending to an angle that sits nicely in the groove of the channel. Then, between it and the outer skin, I used a section of 16 gauge sheet metal to wrap under the floor and trailer frame. Then I bolted through all of it. Even with all of this, there was too much movement in the rear. I then had the bright idea to bypass the c-channel and securely attach the inner rib of the body directly to the frame, eliminating any weak links in the floor to frame attachment.
I sandwiched the upright ribs between two pieces of 1/8" aluminum plate that I buck riveted together with hardened rivets. I drilled a 1/2" hole through that sandwich. a 1/2" bolt goes through the eyelet of a turnbuckle, then a spacer, the upright, another spacer, and then another turnbuckle. The other end of the turnbuckle is just a piece of all-thread that goes through the floor and through the new rear crossmember of the trailer. There are four of them going through the frame, and jumping up and down on the frame shows no separation at all. I'm going to secure the turnbuckles with safety wire to make sure they don't loosen over time.

Coming up: Finishing the floor and taking it home!
Miami! It’s a wet heat!
I go to Miami. I think I’m smart. I make a mistake.
I had a job in Miami for work to go do, and figured while I was down there I would get some Marine Plywood for the decking. While I was there, my buddy who is letting me use his place found a sweet deal on a Ditch Witch down there, so I picked it up for him and brought it back too. Also, new wheels and tires for the truck!
Here's where things begin to go a bit off the rails and I have to "wing it". I forgot to measure the channel the plywood sits in to see what plywood I needed. After several Google and forum searches, I came to the conclusion that 5/8" was the size used. I could not find 5/8 Marine Ply locally in Miami, but 3/4 was everywhere. No big deal, I'll just route the perimeter down so it will fit the 5/8. Well, I get home and began getting setup to route and find the flooring was actually 1/2! Yikes. That's more than I wanted to route, but it will be fine. If nothing else, I'll have the most solid floor in an airstream I guess.

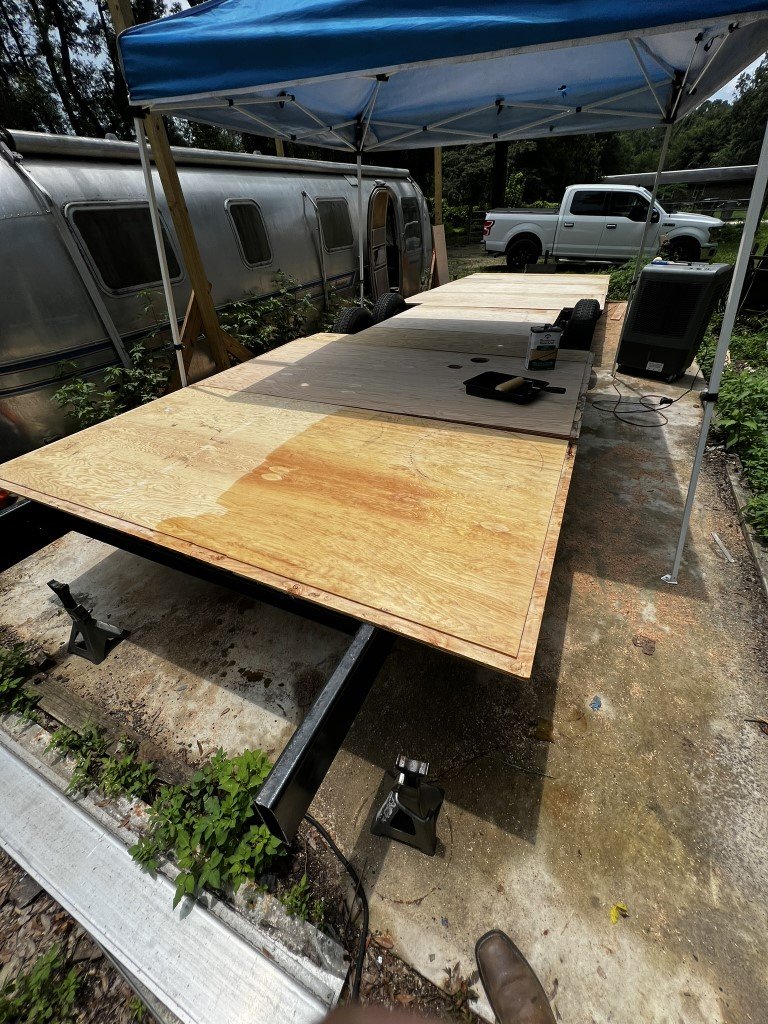
It was at this point, dumb move #2 was encountered. For some reason, I though the floors followed the frame rails, so I cut the decking to follow the frame rails. No bueno. The decking actually comes out past the frame rails and the opening is determined by the wheel wells. I removed these sections and just left the front and rear floors attached.
Coming up: The body gets reattached!
Rust, Rust, and More Rust
The frame repair process on the 1979 Airstream Sovereign
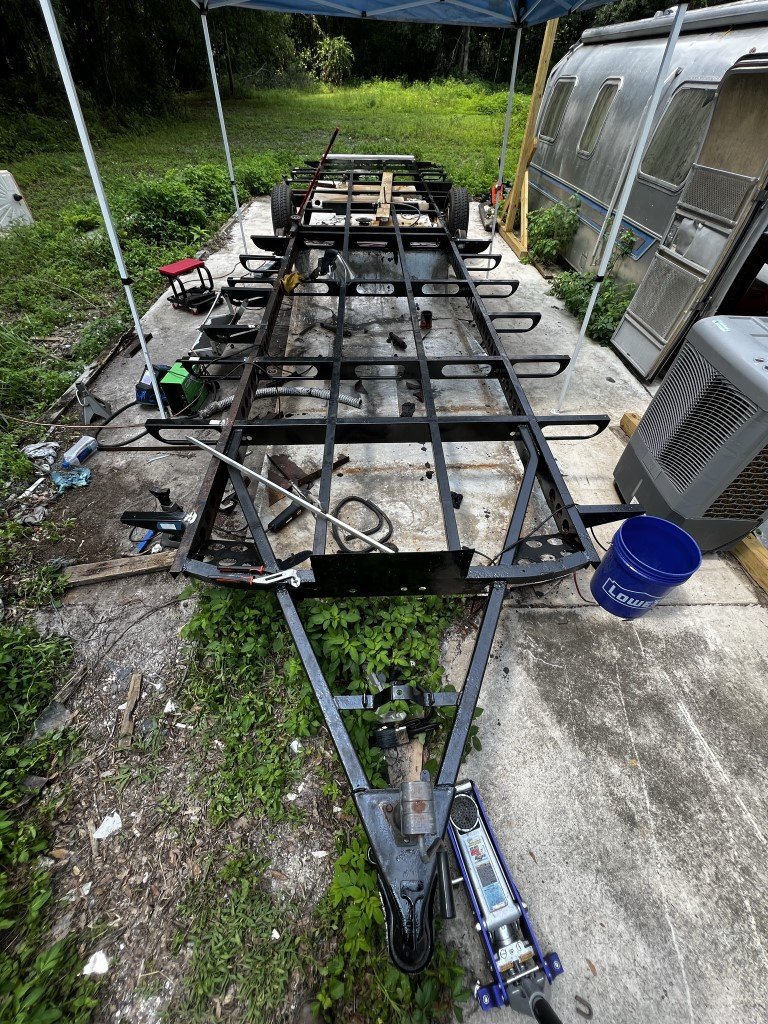
When you are grafting in a new steel structure, you want as much surface area as you can to weld to. My friend who's letting me use his slab is also a metal fabricator and jumped in to help knock out the big problems with this trailer. This is his method for cutting and welding in a new frame rail. We went with this much taller frame rail, as the height of it overall was the same as the original frame plus the 2" drag section at the bottom. I also left it long, as I plan on placing the condenser for a split unit on the back.


What started out as a "fix the rear rot and only replace outriggers that have turned to dust" turned into "replace the entire rear 6' section of the frame, ALL BUT THREE outriggers, and weld every joint that wasn't welded by the factory."


I began wire-wheeling the entire frame and preparation for POR-15, and began to notice some areas I had overlooked. A couple of spots on the frame on the door side were rusted through and the frame was kinked just behind the door. I hit the bulk of the frame with POR-15.


Now it's time to tackle the other frame rail in the rear. Those of you with a keen eye will notice I upgraded trucks. The sections of frame that were cut out and replaced were where the outriggers for the steps were - the kinked area from the earlier photos.


DING! Frame is done!

I go to Miami next!
Time to gut this thing
The gutting phase begins
I stood up the gantries in preparation for the lift. These were awfully easy to build. I only needed help to stand them up.
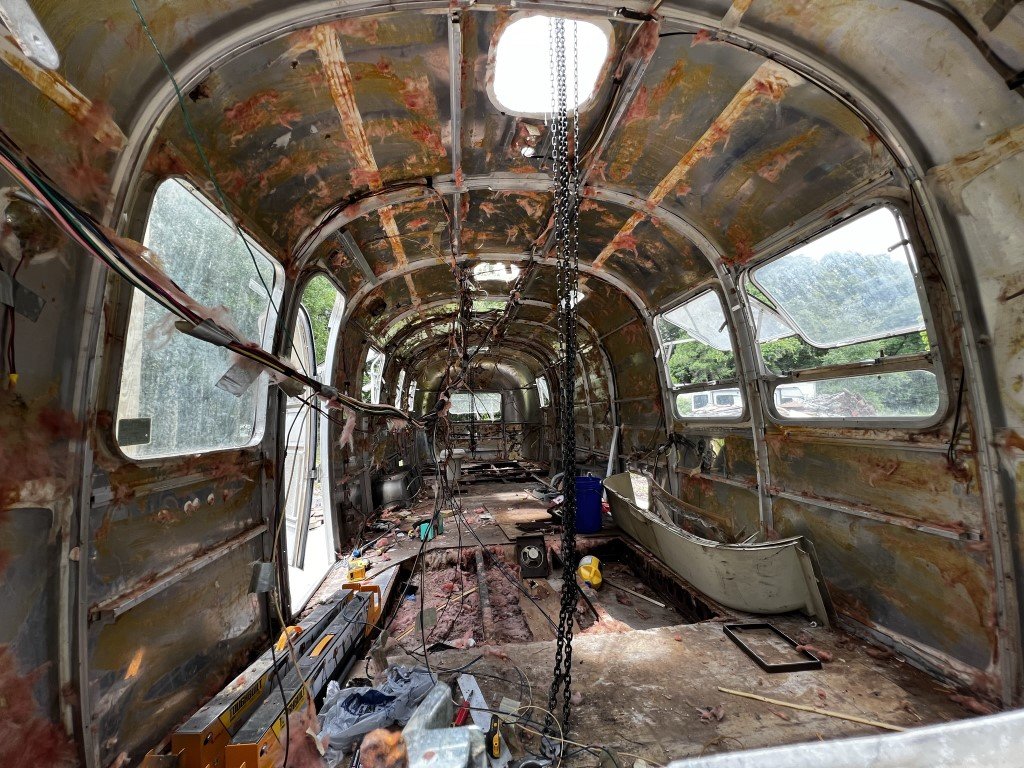
I removed all of the roof appendages because they were either damaged by something falling on them, or just beyond the capabilities of industrial degreaser to get them clean. Once i had the gantries and chain falls placed, I pulled the inner skins and insulation out. It's at this point when I realized in real time how much insulation affects the comfort of being inside this tin can in FL. I could feel the heat radiating from the skin as soon as I pulled the first piece out. It was somewhat tolerable prior to me doing that.
Remember that rear end separation I was telling you about? Gross.



It's hard to tell from the photo, but I took two 2x4s and attached them horizontally across the upper part of the frame - one in front of the opening and one in the rear of the opening of the front and rear most vent openings. I then braced vertically to the ribs on each side of the openings. In the middle of the body, I attached a 2x4 to each side rib to eliminate any bowing or warping from the flex and then tensioned it all with ratchet straps tying the braces around the vent openings on each end to the brace in the middle. Don't know if it was needed, but it made me feel better.


With the body off, I could finally get a good look at the frame. It was pretty bad. As a matter of fact, when I cut the left frame rail off, the right one just fell to the ground with it. I think the belly pan, bumper and spray foam were holding that side up.
You can see the sag to one side at the rear of the frame here.


Next time, let’s start making repairs…
It all begins here.
It all begins with an idea.
After searching high and low for an Airstream in my budget, back in April I stumbled across an Airstream that was way under what I had budgeted for a shell. It was an hour and a half away, so I took a ride one Sunday to go see it. This is what greeted me:
I had been reading about body-off frame repair jobs and knew going in that it's likely what this thing would need. When I did the bumper test at the rear, the separation was only stopped by the wooden 2x4 and spray foam holding the back end together!
At any rate, I called a buddy of mine with a nice big slab on his property to see if I could do the work at his place, and I made the trip home with it a couple of weeks later. I'm out of town a lot for work, so finding the right time for myself and the seller was like playing ping pong.
It made the trip with no issues. The Ranger pulled it extremely well, but my only complaint was not being able to see with the stock mirrors.
The iPhone’s fisheye lens effect when you zoom to .5x makes the trailer look smaller than it really is.
I have taken on many projects in the past of auto restorations that included separating the body from the frame, RV repairs that included removing the slide out to rebuild the floor around the opening, and several other projects that would have your average Joe running for the hills.
So, I decided to jump in with both feet immediately by gutting the interior and sending it all to the dump. During the gutting process, I was able to put together that this thing had likely been used up until 2000 or so, and at that point it was setup somewhere as a hunting camp. Tons of hunting related items were all throughout the camper. Gun cleaning kits, hand warmers, etc. Sadly, there were no treasures to be found during the cleanout phase. Dang it.
I opened the rear floor to see just how bad the frame was. It was when I saw the spray foam that I knew it was screwed!
Join me next time when I gut the interior and prepare to pop the top off this thing!


